LIVE OVERLAYS
Creating UX to configure faults and metric values as image overlays for core object templates in the Honeywell Forge Onboarding Portal.

TL;DR
Overview
The Honeywell Forge Onboarding Portal is a configuration software that supports the ability for customers or setup configurators to build the 'digital twin' of core objects like sites, spaces, and assets. A digital twin's details and real-time data run in the Honeywell Forge front-end applications so customers can best monitor their physical objects and overall operations.
In the front-end applications, there currently isn't a way to visualize faults or metrics on assets or objects in a site. When a technician or engineer is monitoring a piece of equipment, they need to be able to see real-time data for specific parts of the equipment or know exactly where an active fault is occurring.
The live overlays feature allows system configurators to easily map faults and metric values to images of core objects in the Onboarding Portal. The image and its corresponding overlays will run in the front-end applications, and technicians can find metric and fault details quickly.
Goals
Design user flows for adding, managing, and deleting overlays in a template
Consider scalability of the overlay pattern as new overlay types are introduced in the future
Revisit the template design of the default image to support editing overlays
Ensure Section 508 compliance of designs and interactions
Role
UX UI Designer Lead
Duration
Summer 2024
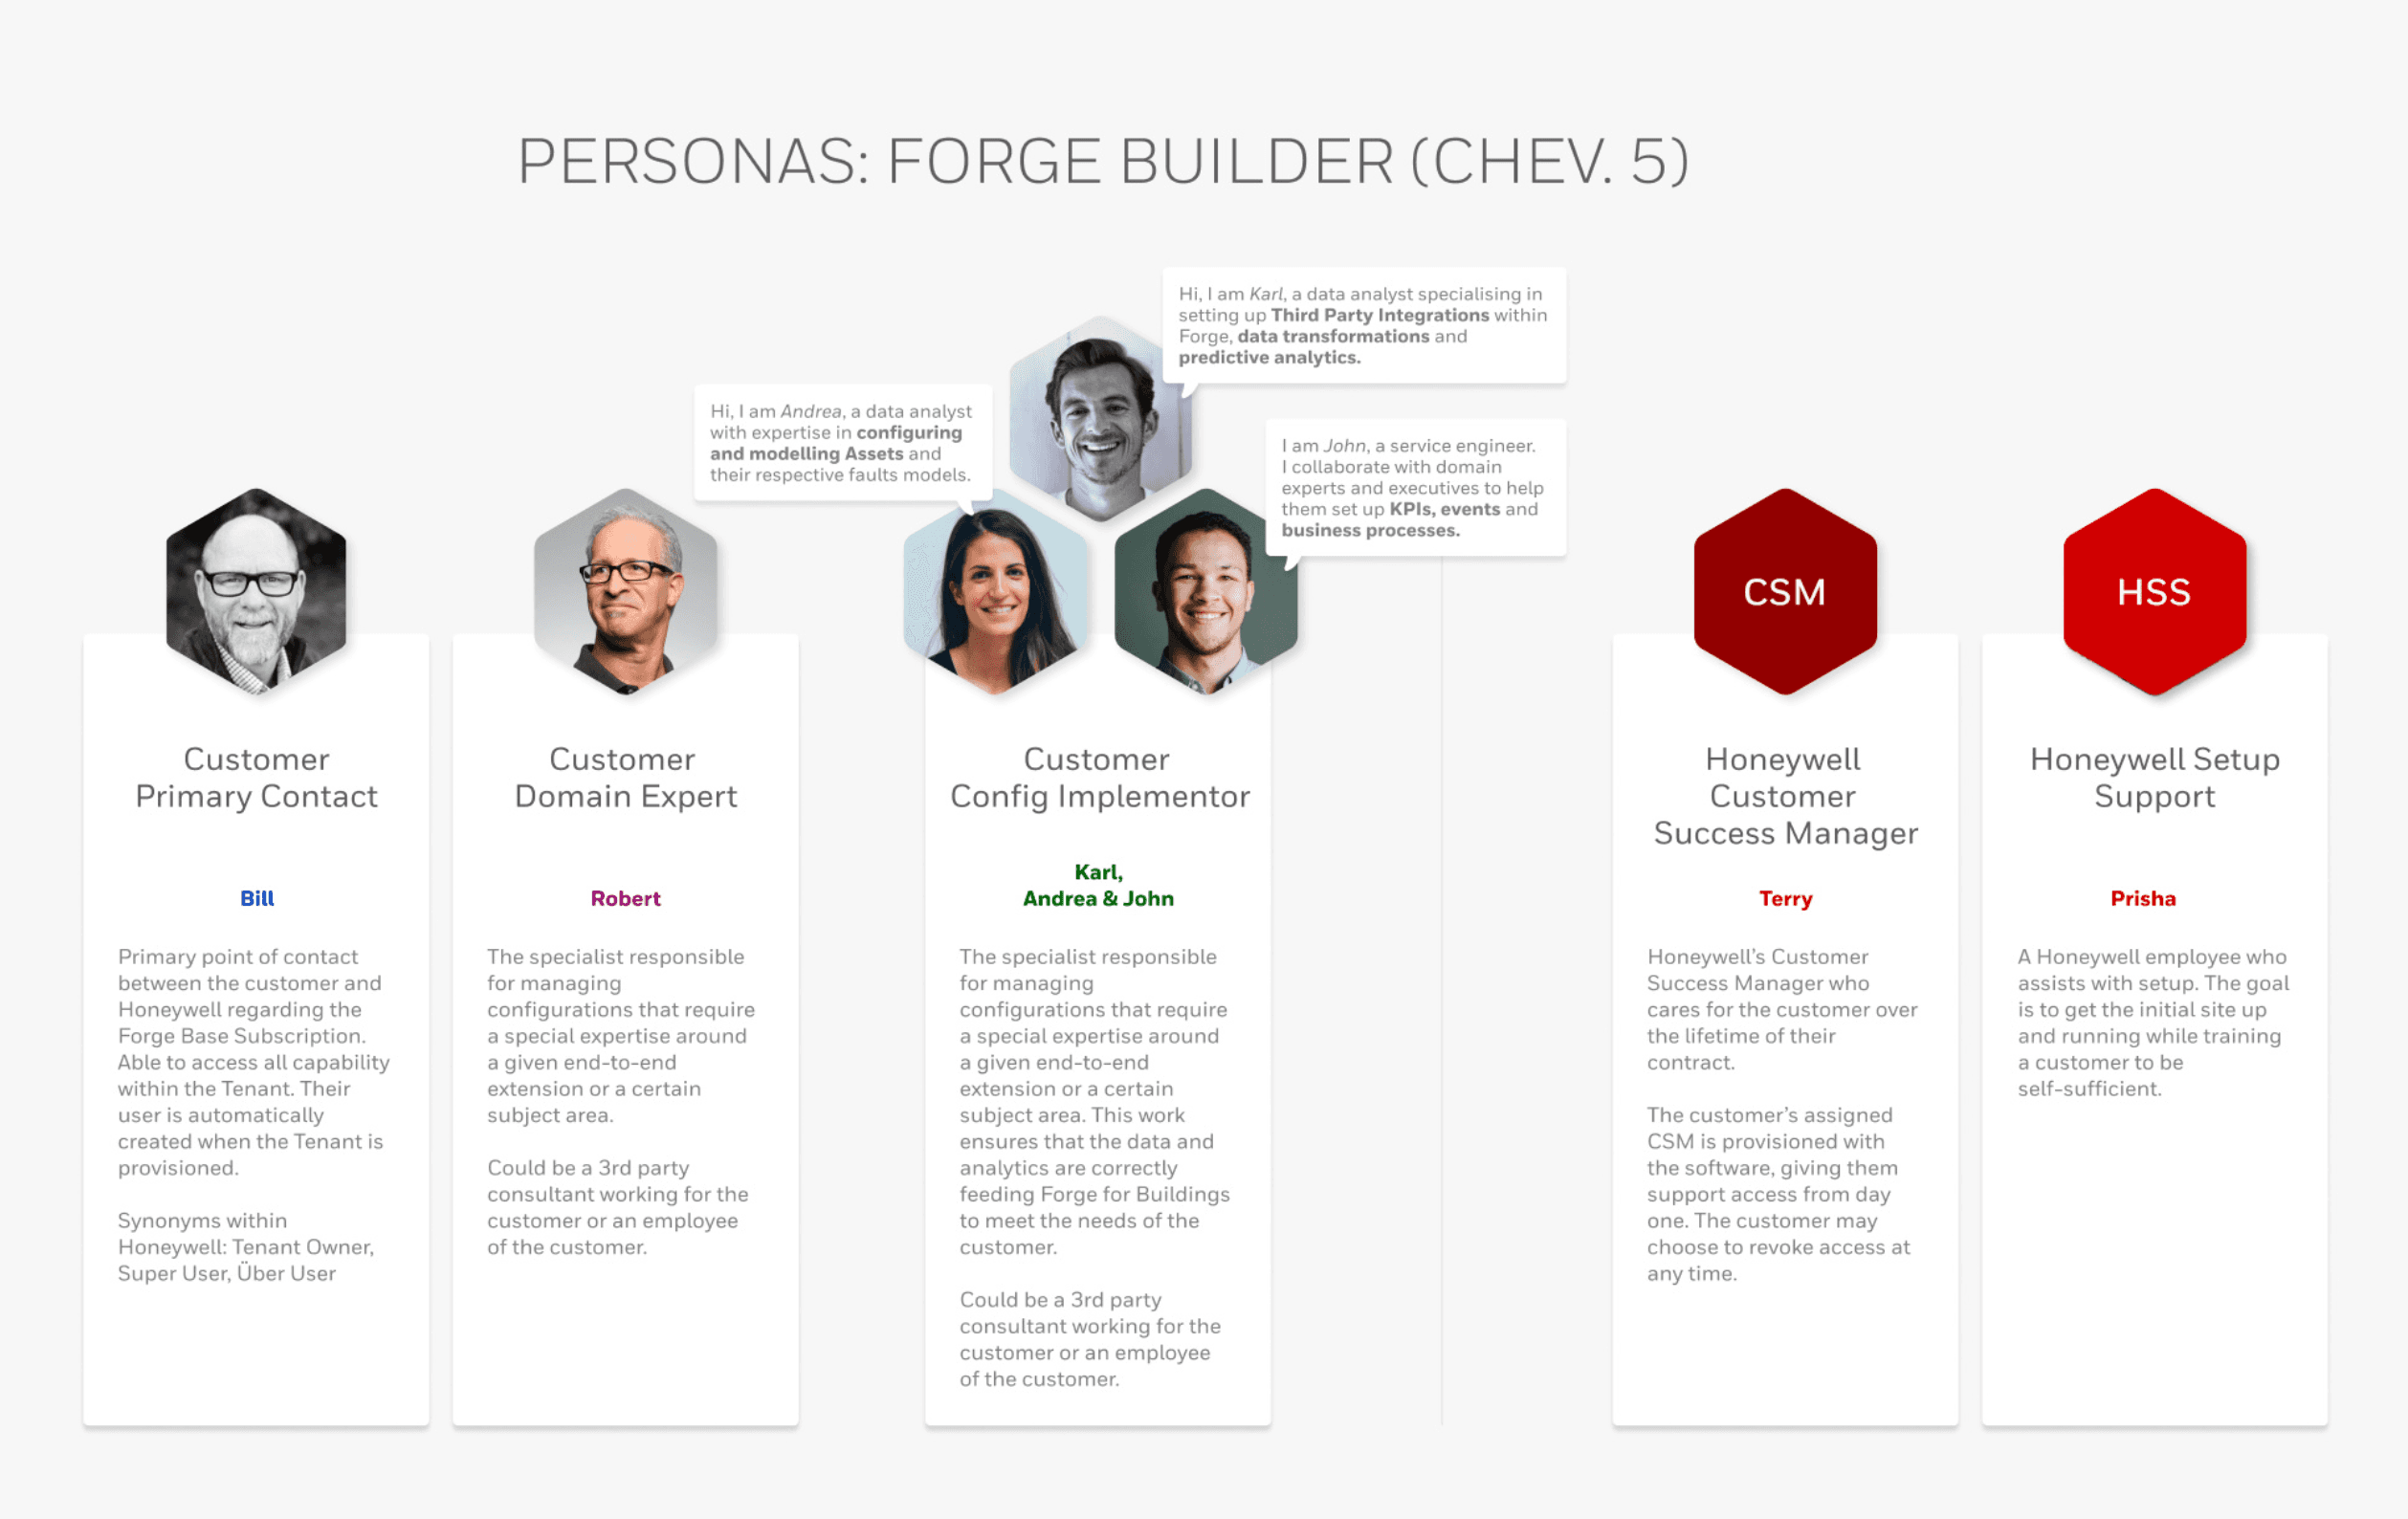
PERSONAS
The Onboarding Portal is built for two main users: Honeywell Setup Support and Customer Configurators. Both persona's end-goal is to configure the customer's 'digital twin' of core objects efficiently and accurately, and undergo the same user tasks to accomplish this.
Honeywell Setup Support:
"As Setup Support at Honeywell, I need to efficiently configure the customer and create digital twins of their physical core objects so they are set up to use the Honeywell Forge front-end applications."
Customer Configurator:
"As a customer configurator, I need to configure the core object modeling for the physical assets, sites, and spaces so the digital twin hierarchy is correct and data is flowing to the front-end applications."
TASK FLOWS
The live overlays feature would include two primary task flows: Add a fault or metric overlay to a template image and manage the overlays of a template image. These task flows are to support customer configurators when they set up images in the Onboarding Portal so the overlays can appear properly in the front-end applications.
Add a fault or metric overlay to a template image
Primary task flow:
Navigate to Asset Object Model —> View templates —> Select (1) template
Select 'Edit' —> Select 'Edit image properties' on the default image
Select 'Add fault' or 'Add metric' —> Fill out form details
Position the overlay on the image —> Select 'Create'
Select 'Back to template'

Manage overlays in a template image
Primary task flow:
Navigate to Asset Object Model —> View templates —> Select (1) template
Select 'Edit' —> Select 'Edit image properties' on the default image
Review the existing overlays —> Select 'Edit' on an incorrect fault or metric
Make updates on the overlay —> Select 'Save'
Select 'Back to template'

WIREFRAMES
Feature requirements
Add fault overlay to the 'default' image of a template
Complete a form to assign the fault(s)
Select a display type and position the overlay on the image
Resize a display to include the full affected area of the fault
Add metric overlay to the 'default' image of a template
Complete a form to assign the metric value(s)
Position the overlay on the image
Handle the image container
Zoom in and out of the default image
Filter through created faults and metrics on the image
Edit and delete image overlays
Re-open the form for faults or metric to update
Delete faults and metrics from an image
Default image placement in template
Default image should be distinguished from other attached images in the template
Allow editing, deleting, and configuring the image overlays
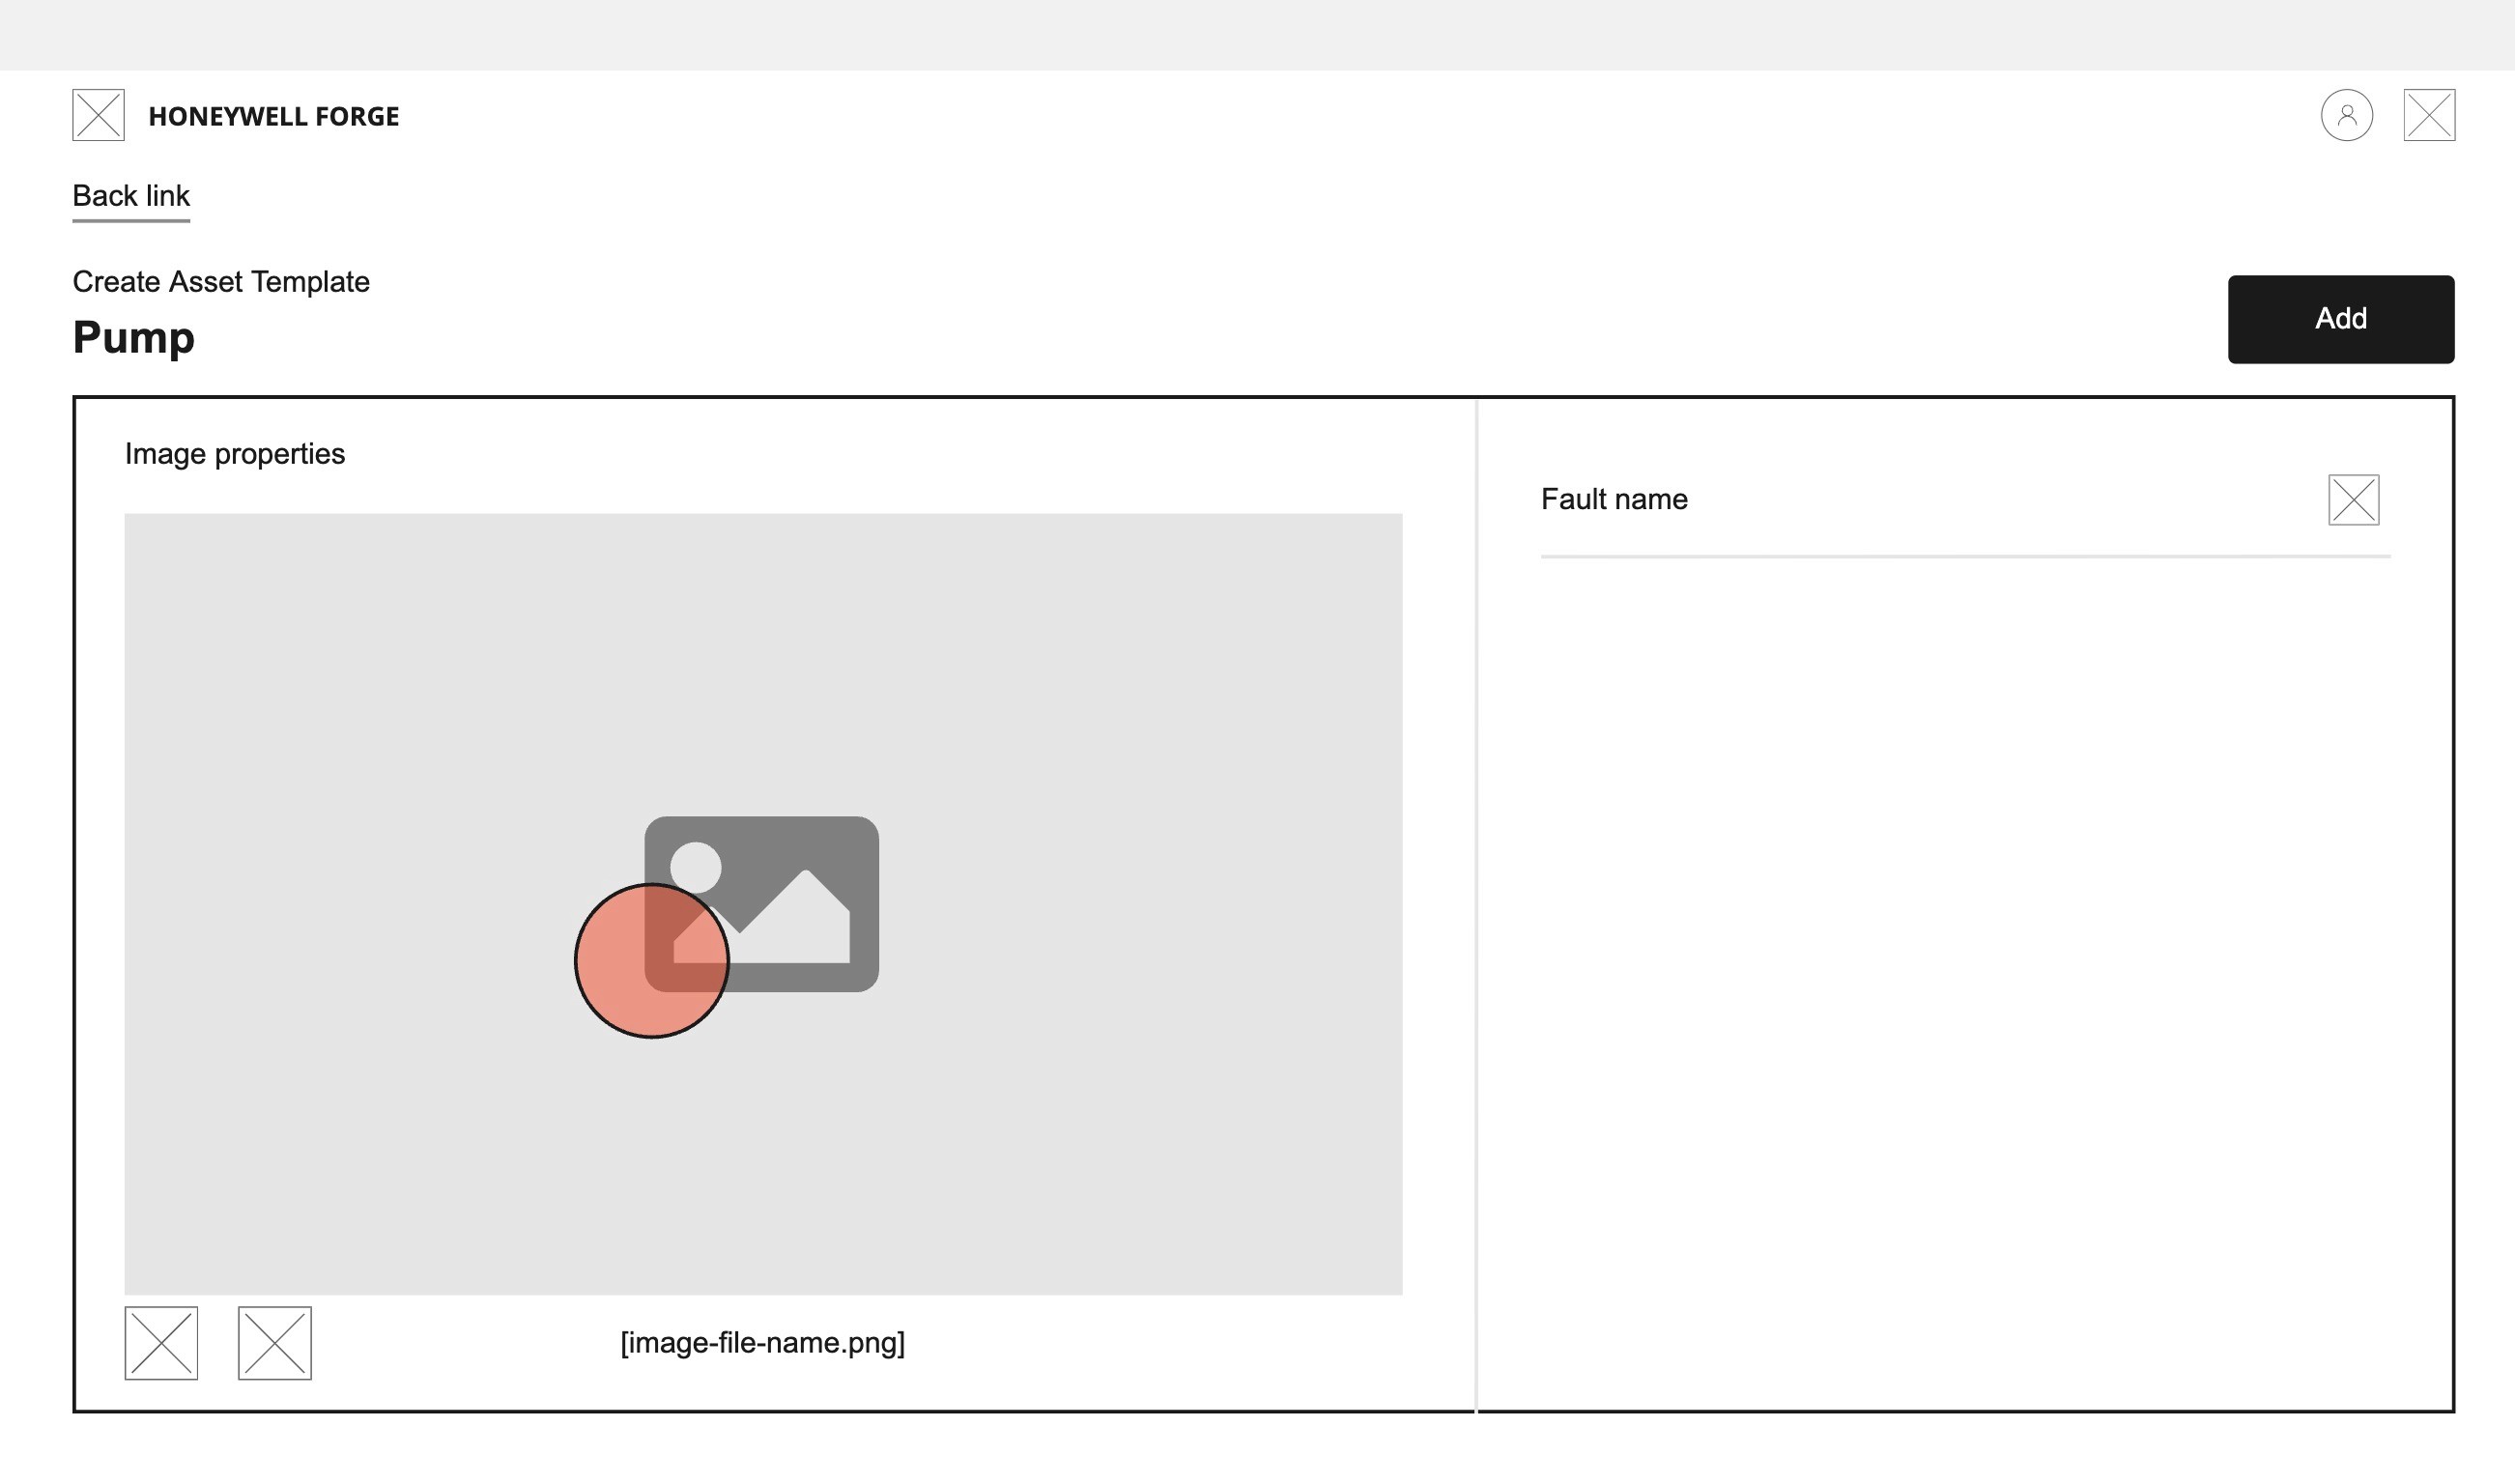
Wireframe v1 - Modal
A modal to support the overlays would keep the user within the same experience as the template. The user could configure the overlays in the modal to simply close the modal and save the template once they are finished with the remainder of the form.
The user would select 'More' to see the option to edit image properties on the template image
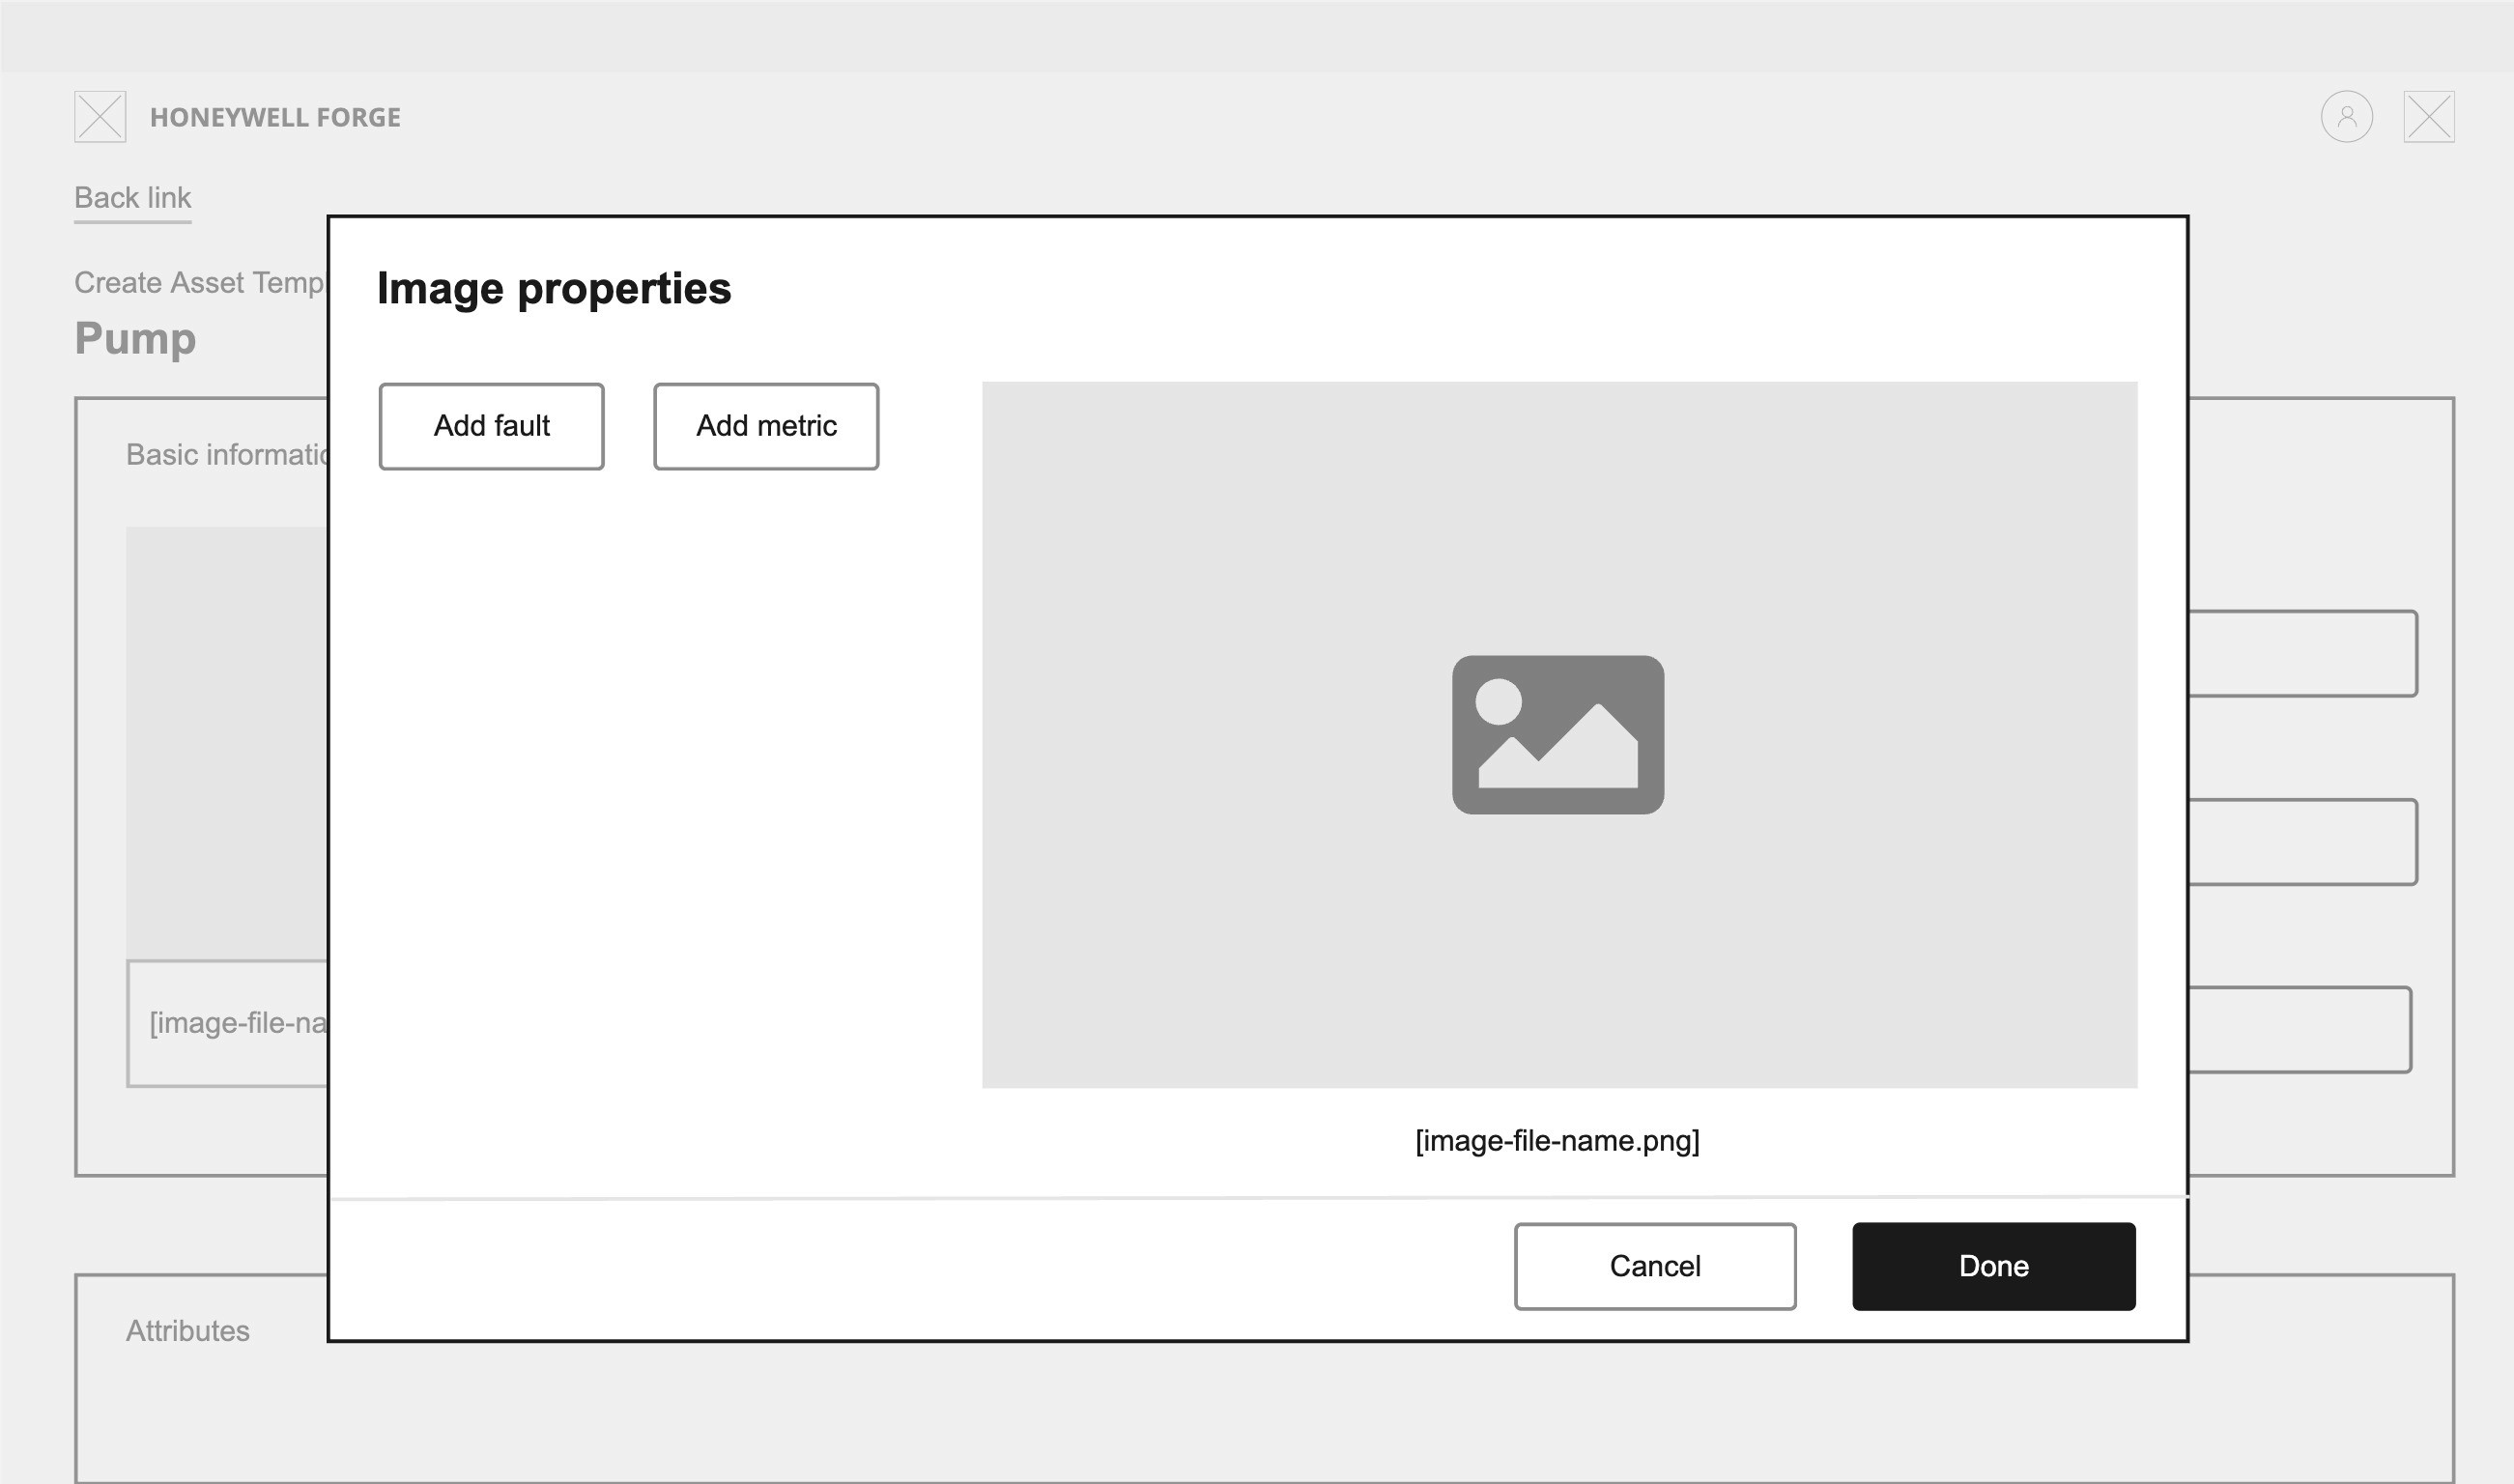
The image properties modal would appear; the user would select 'Add fault' or 'Add metric'
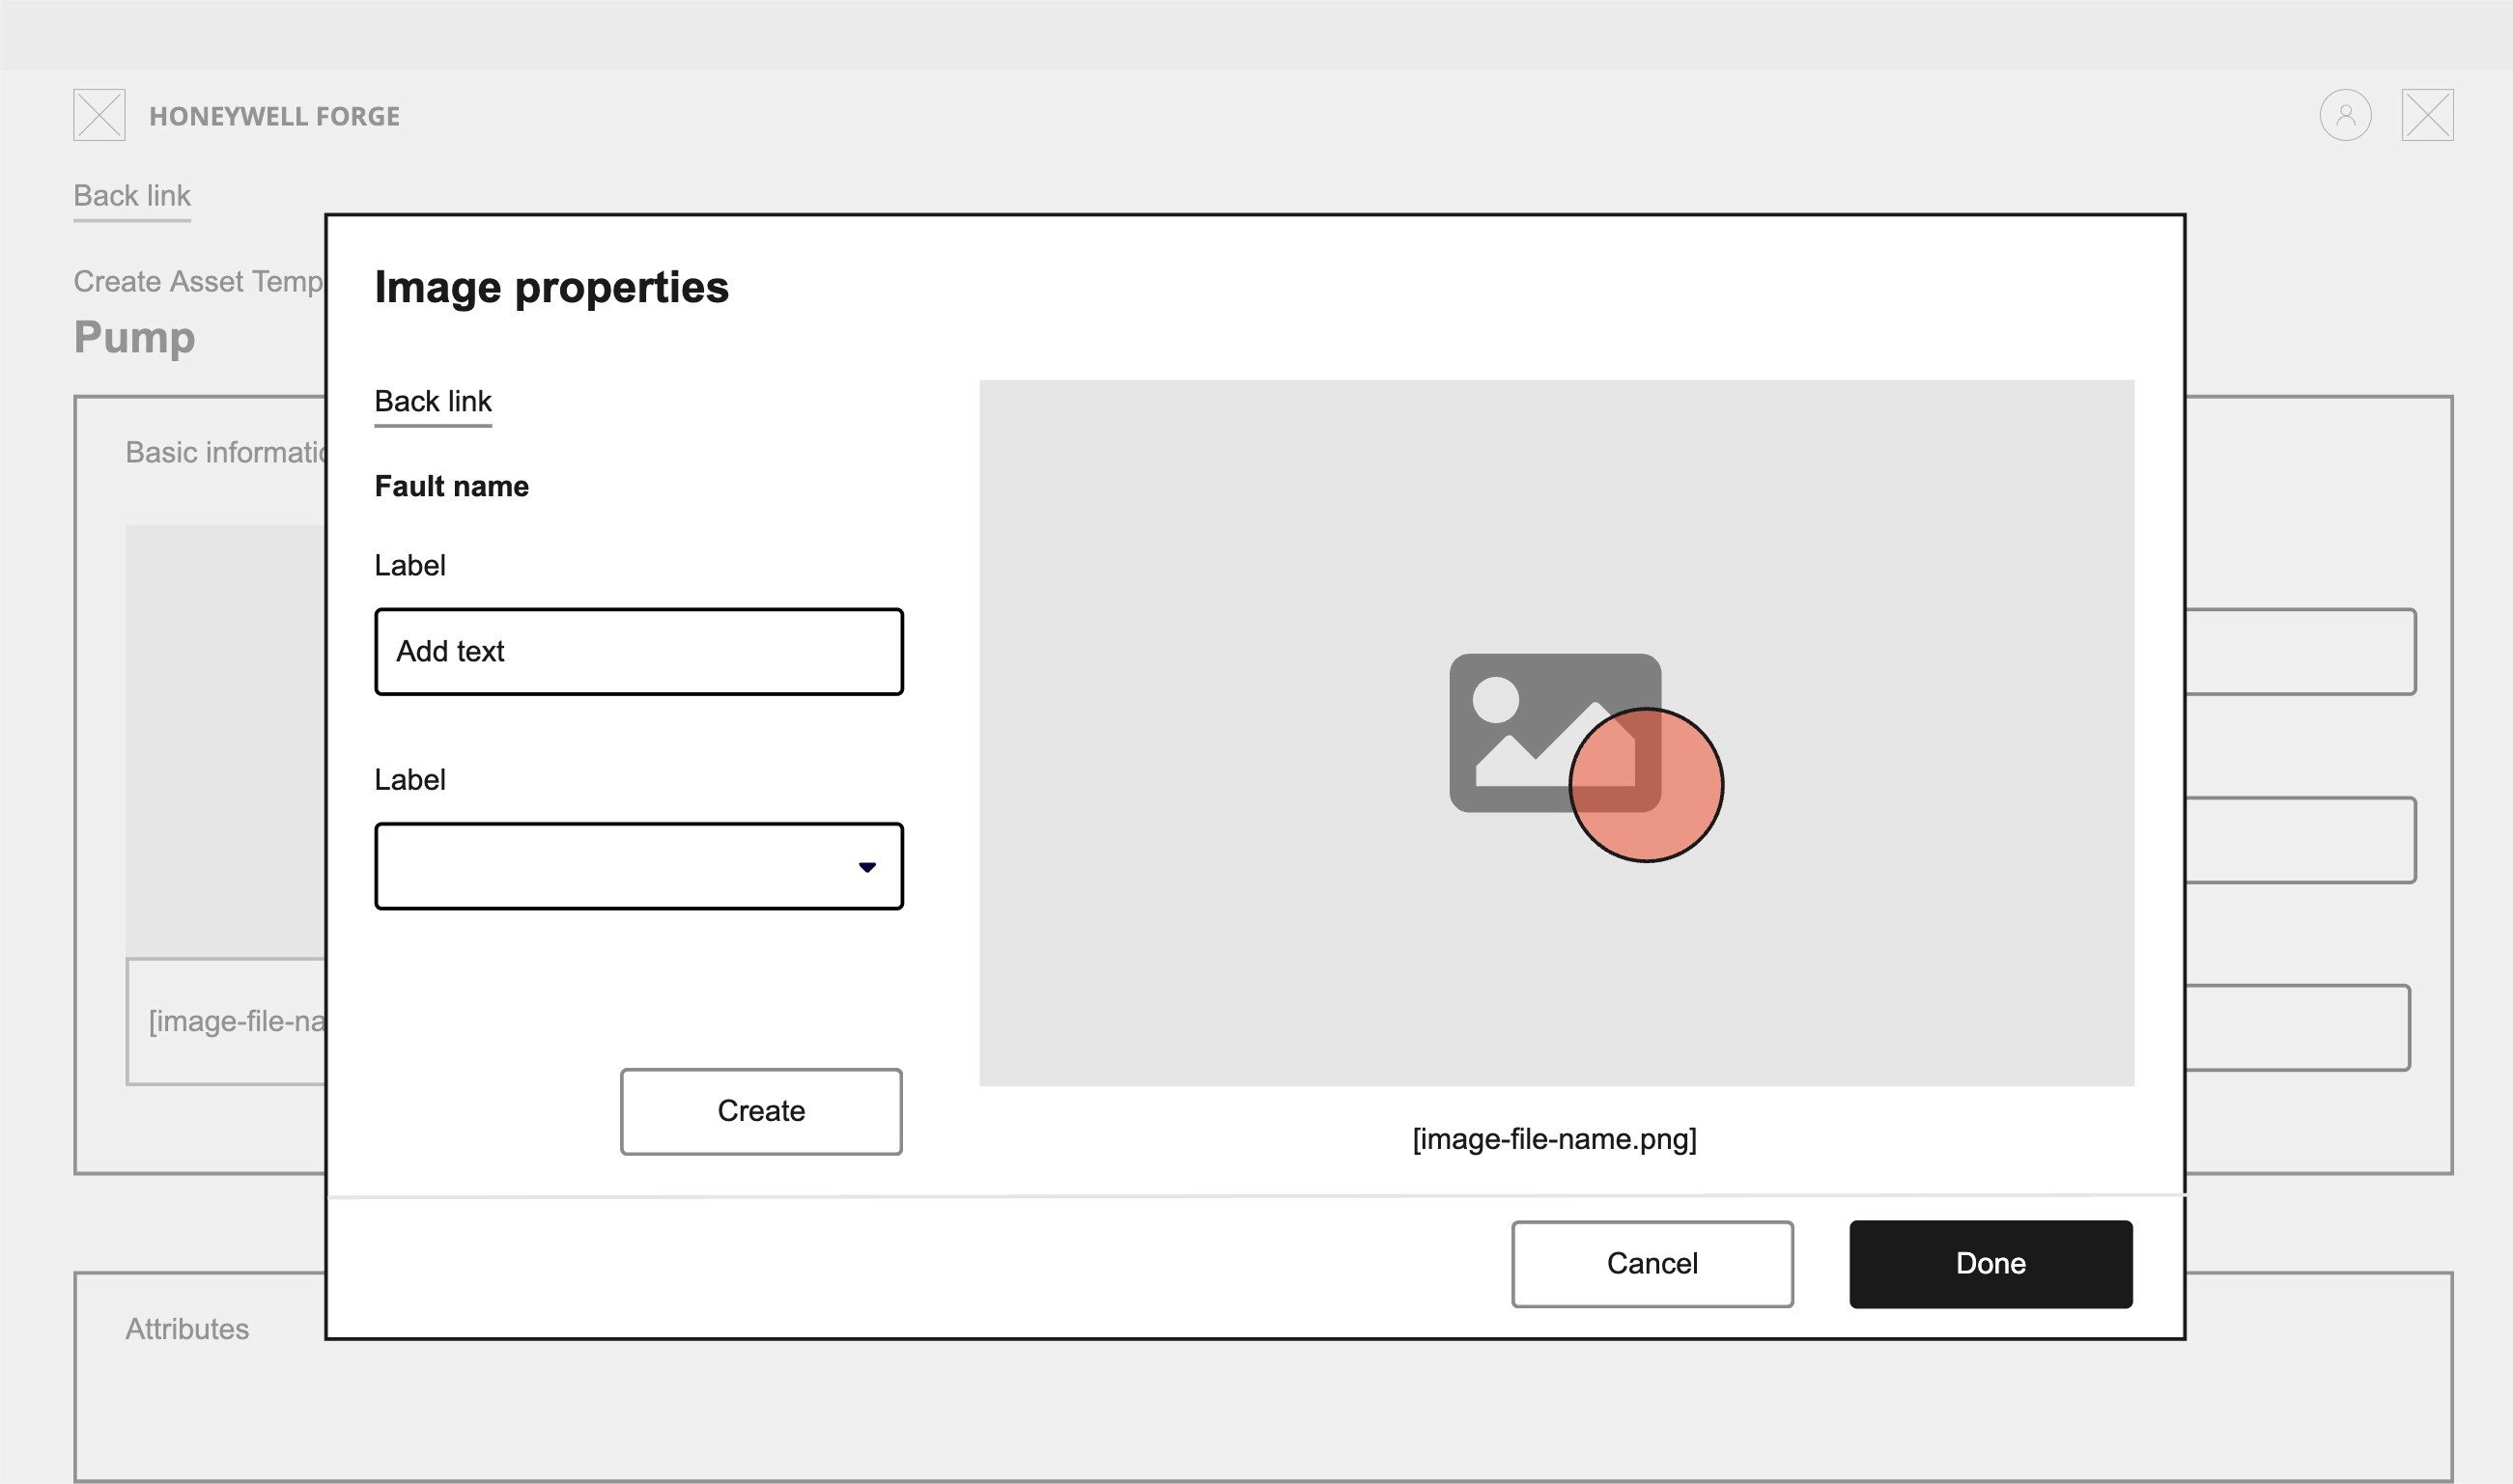
A form would populate the left side of the modal for the user to fill out and save
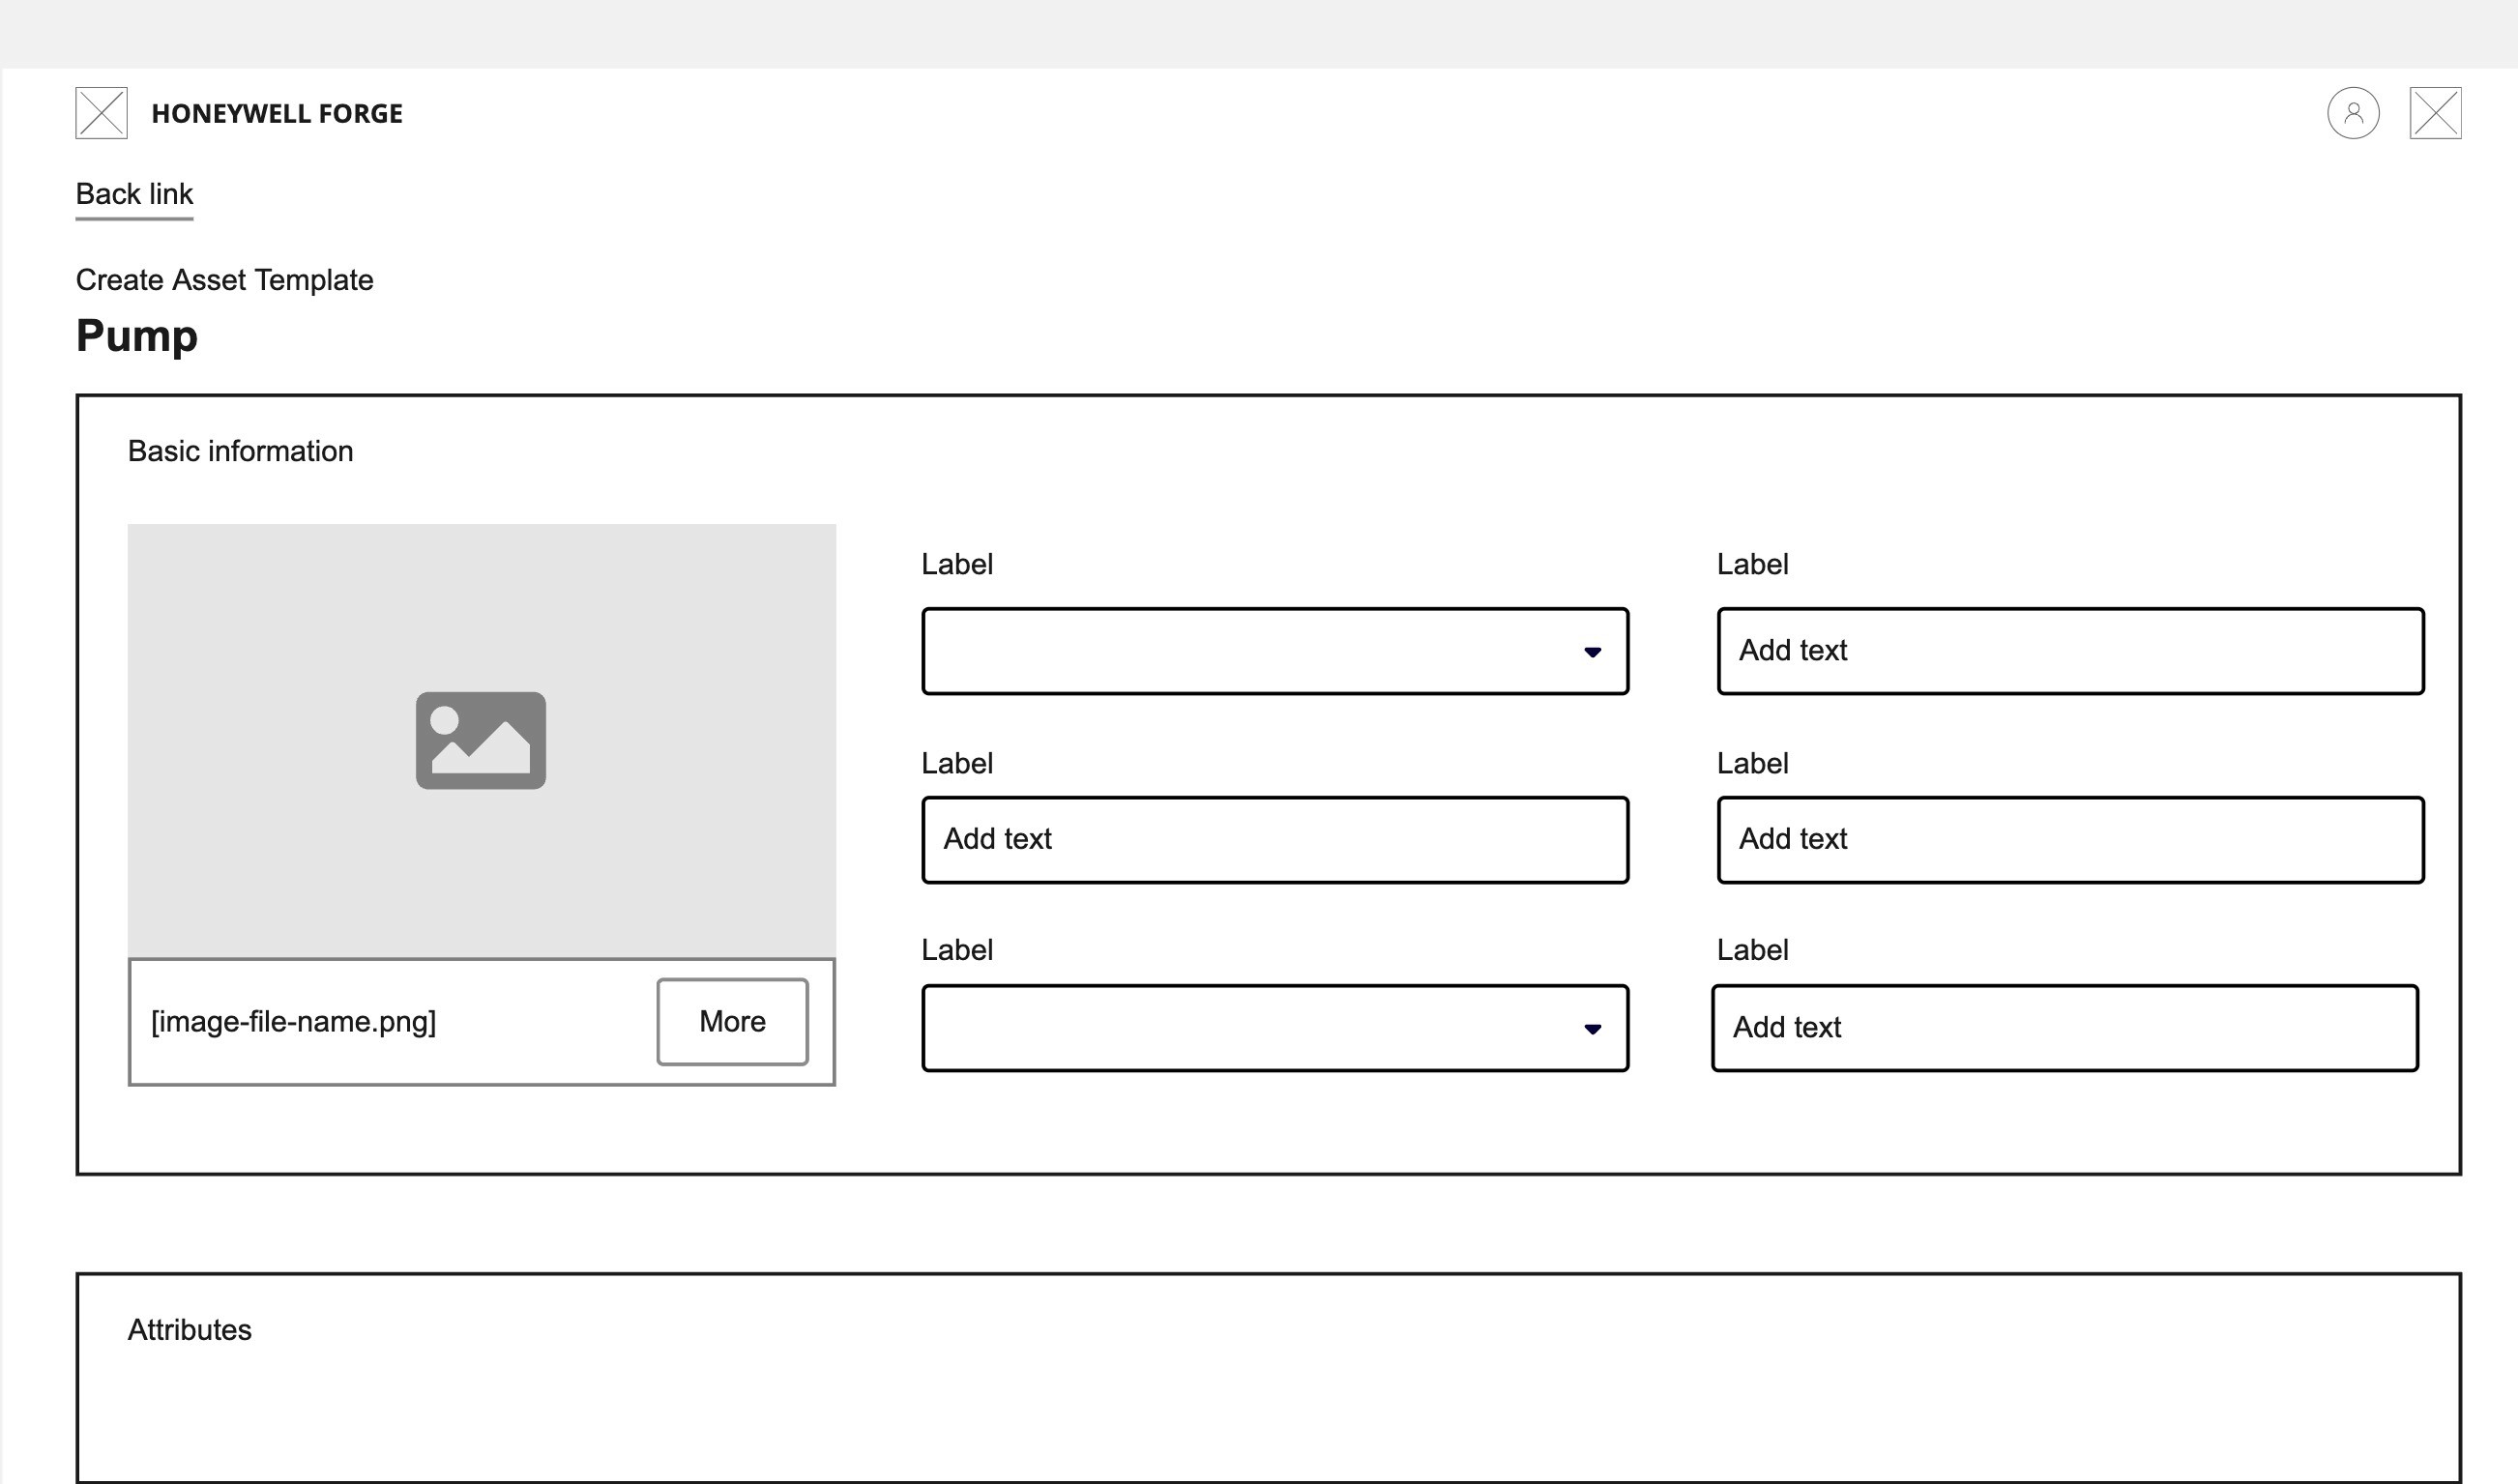
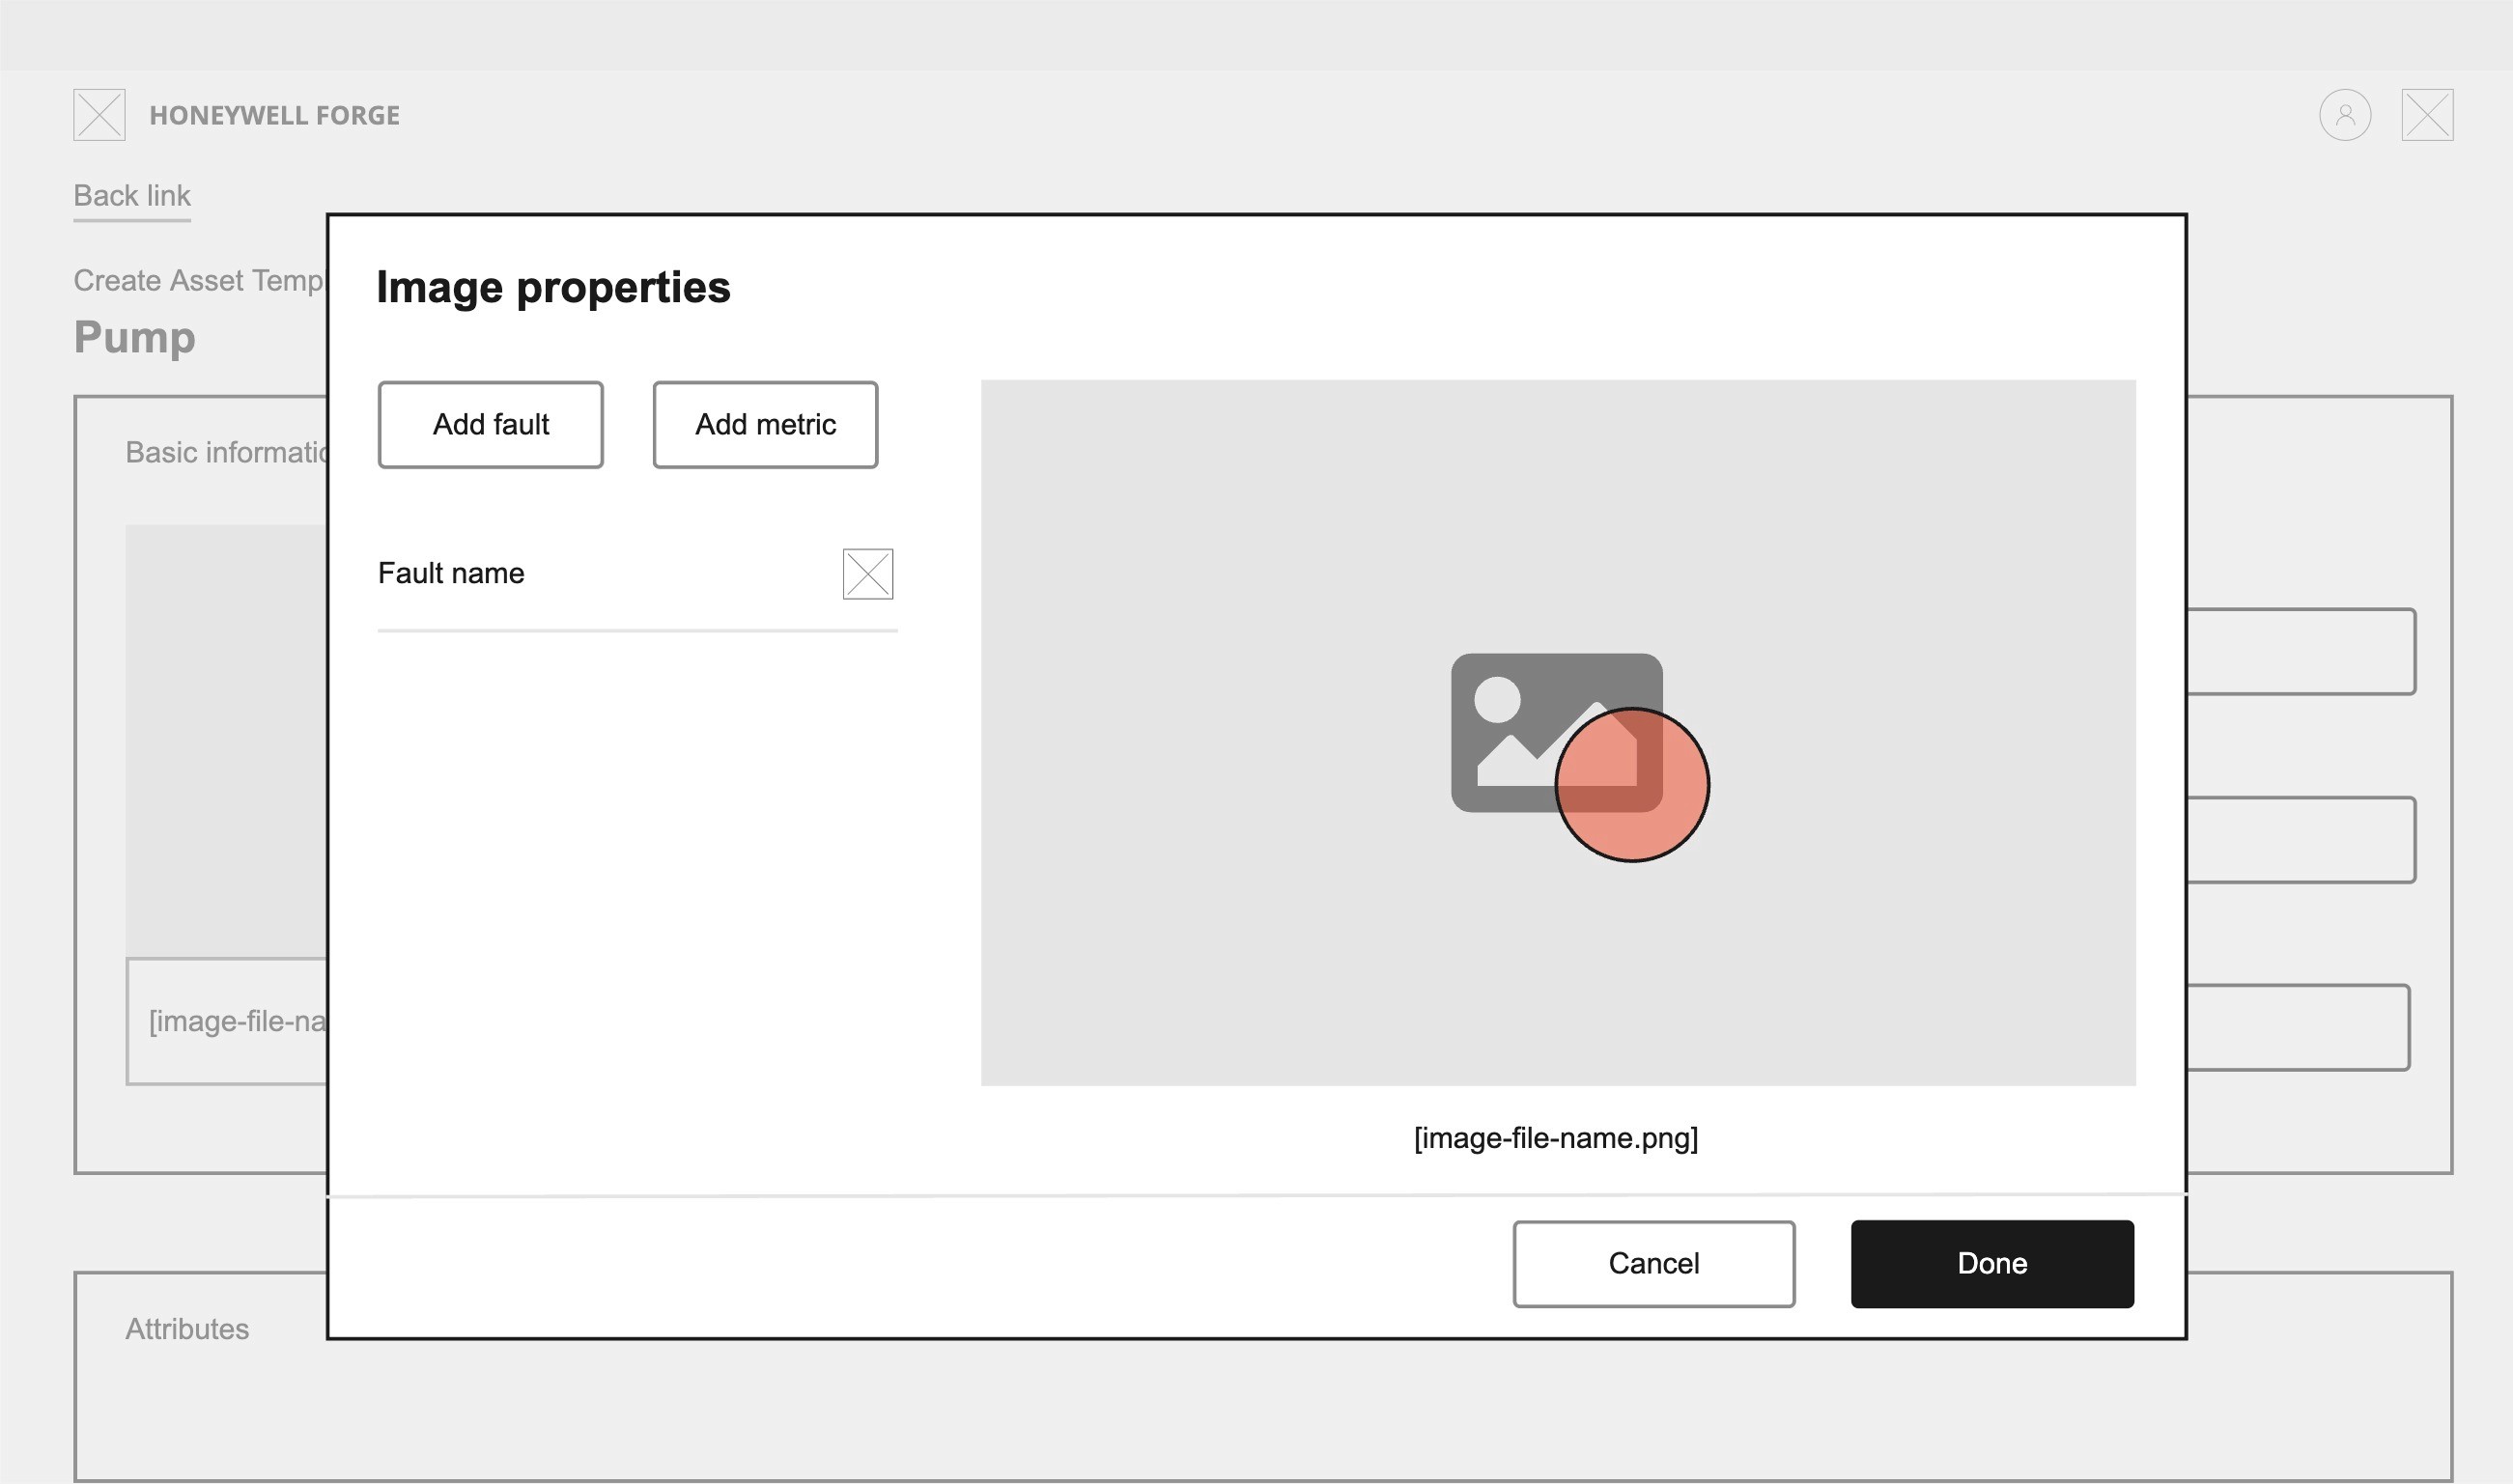
Mid-fidelity designs:
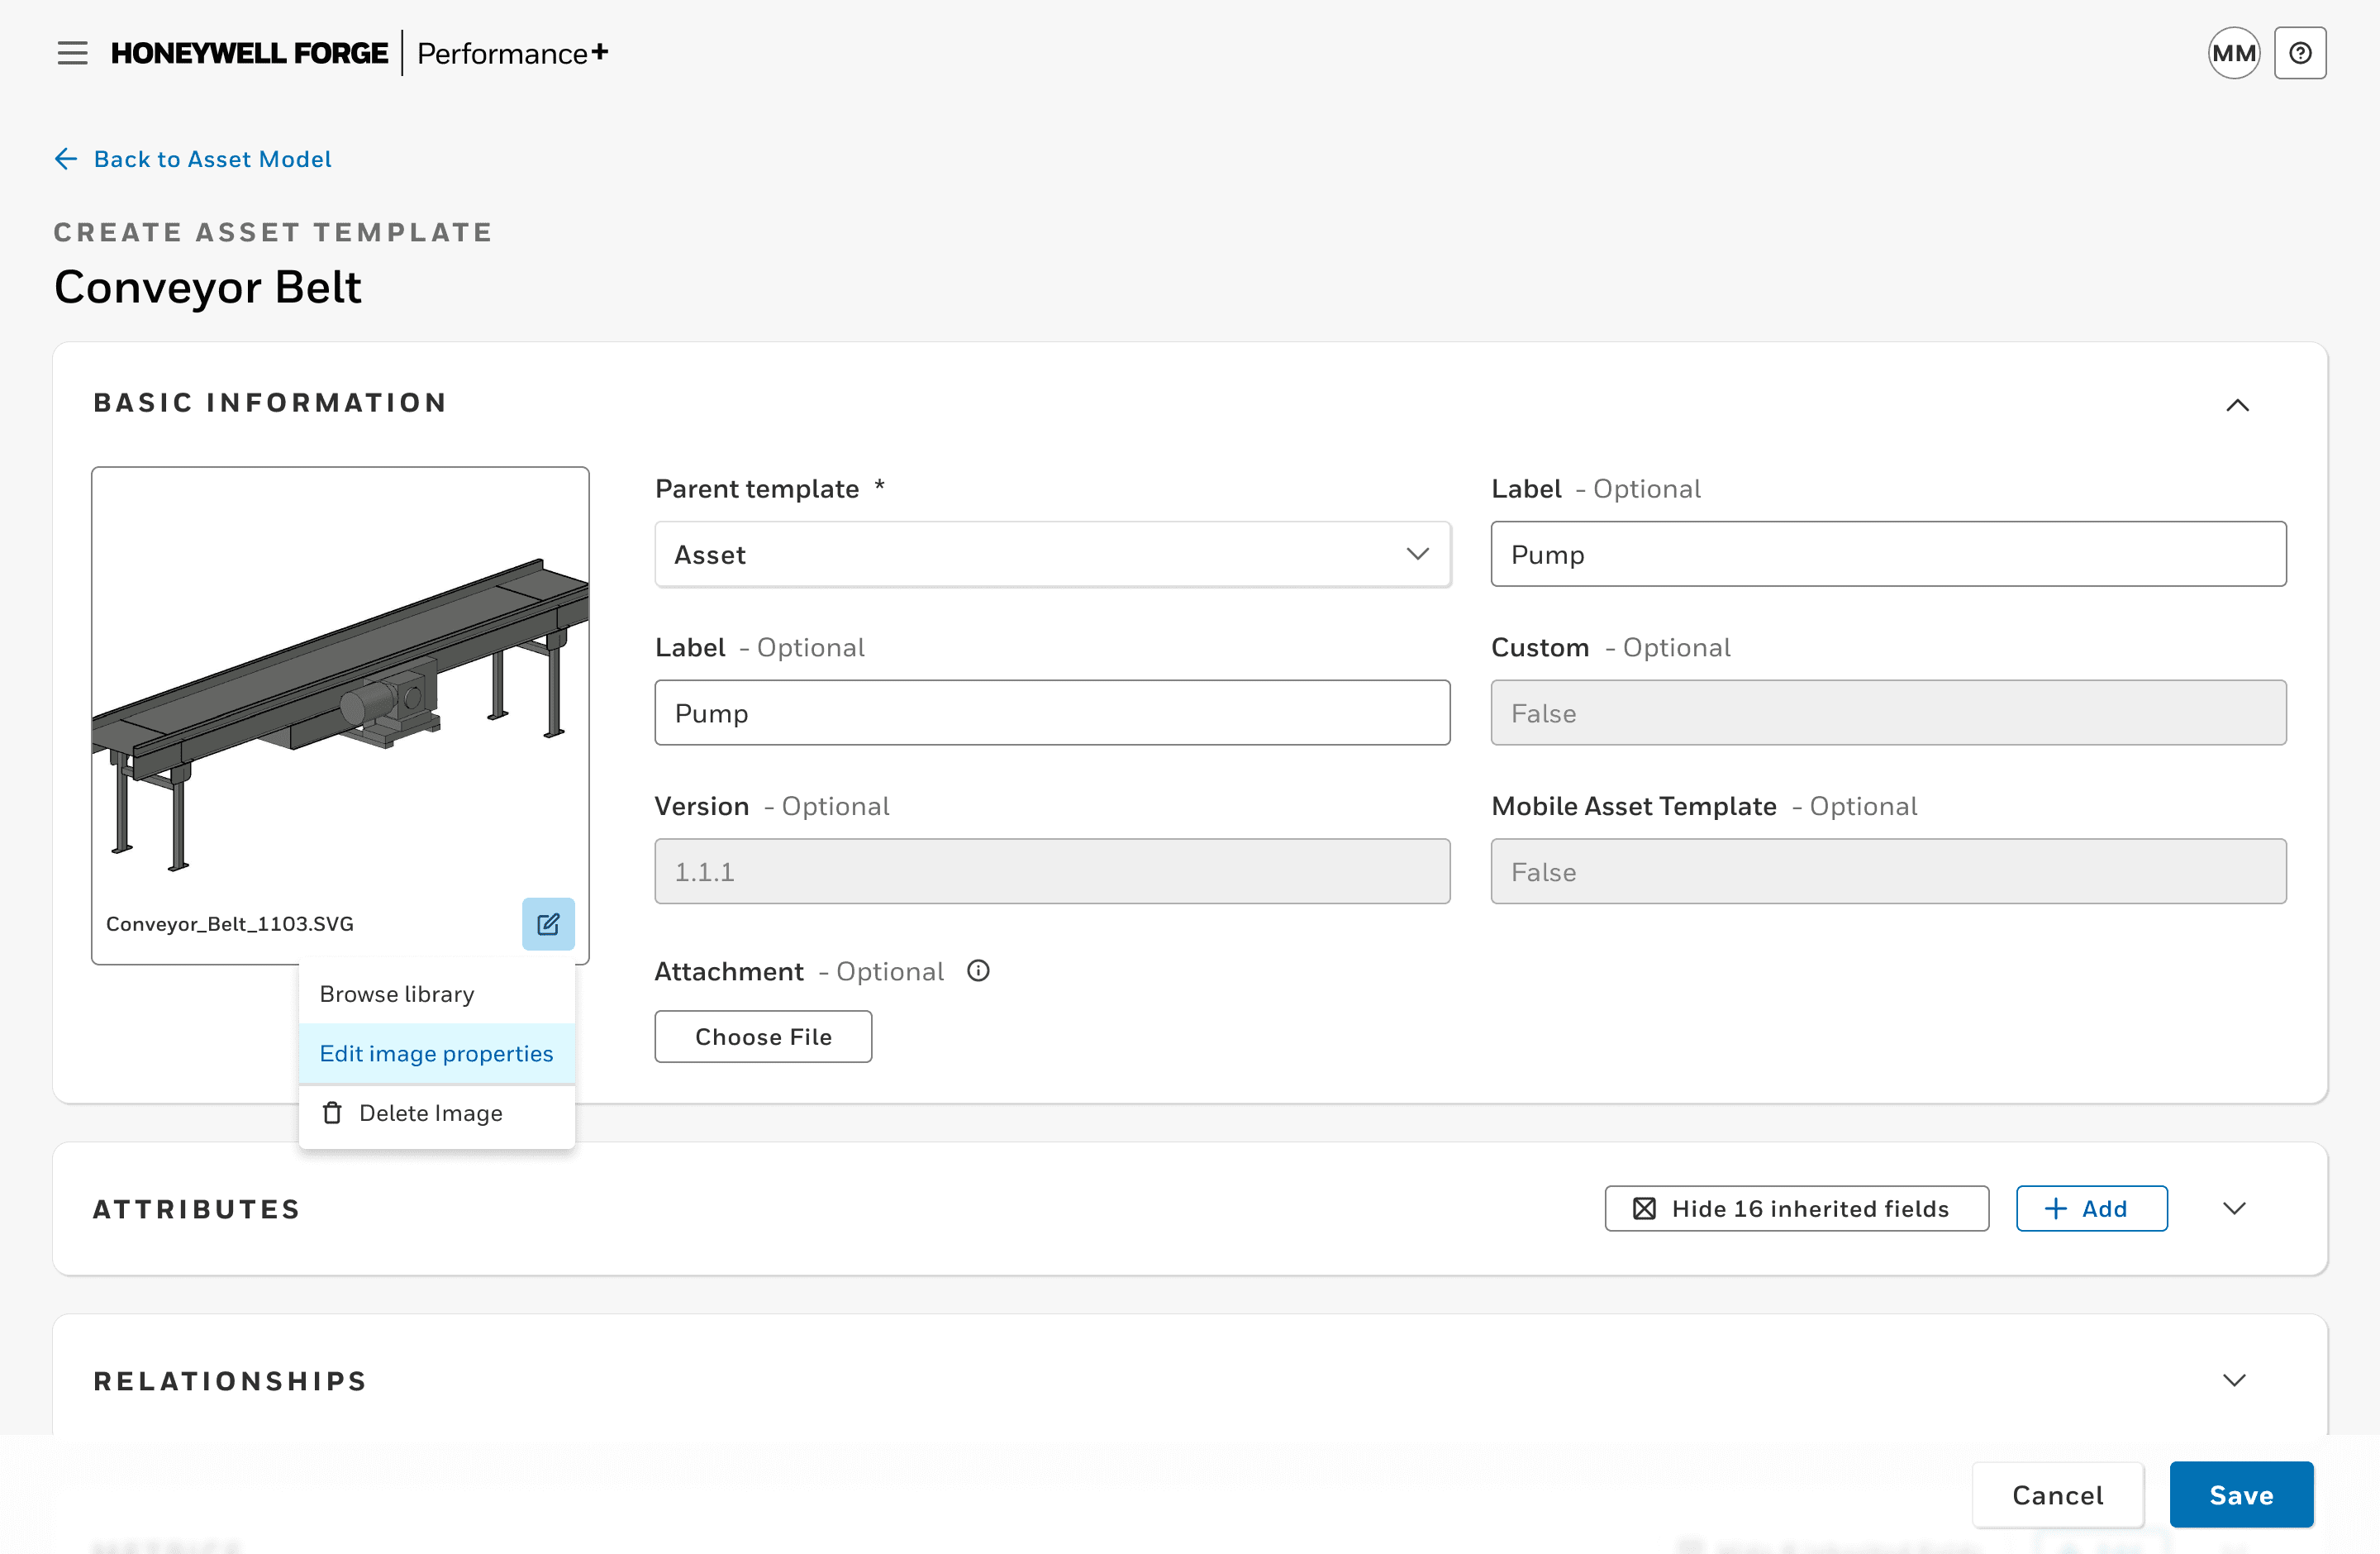
'Edit image properties' option when editing the asset template image
Modal shows image on the right side and the property details on the left side
User can position and scale the overlay directly on the image
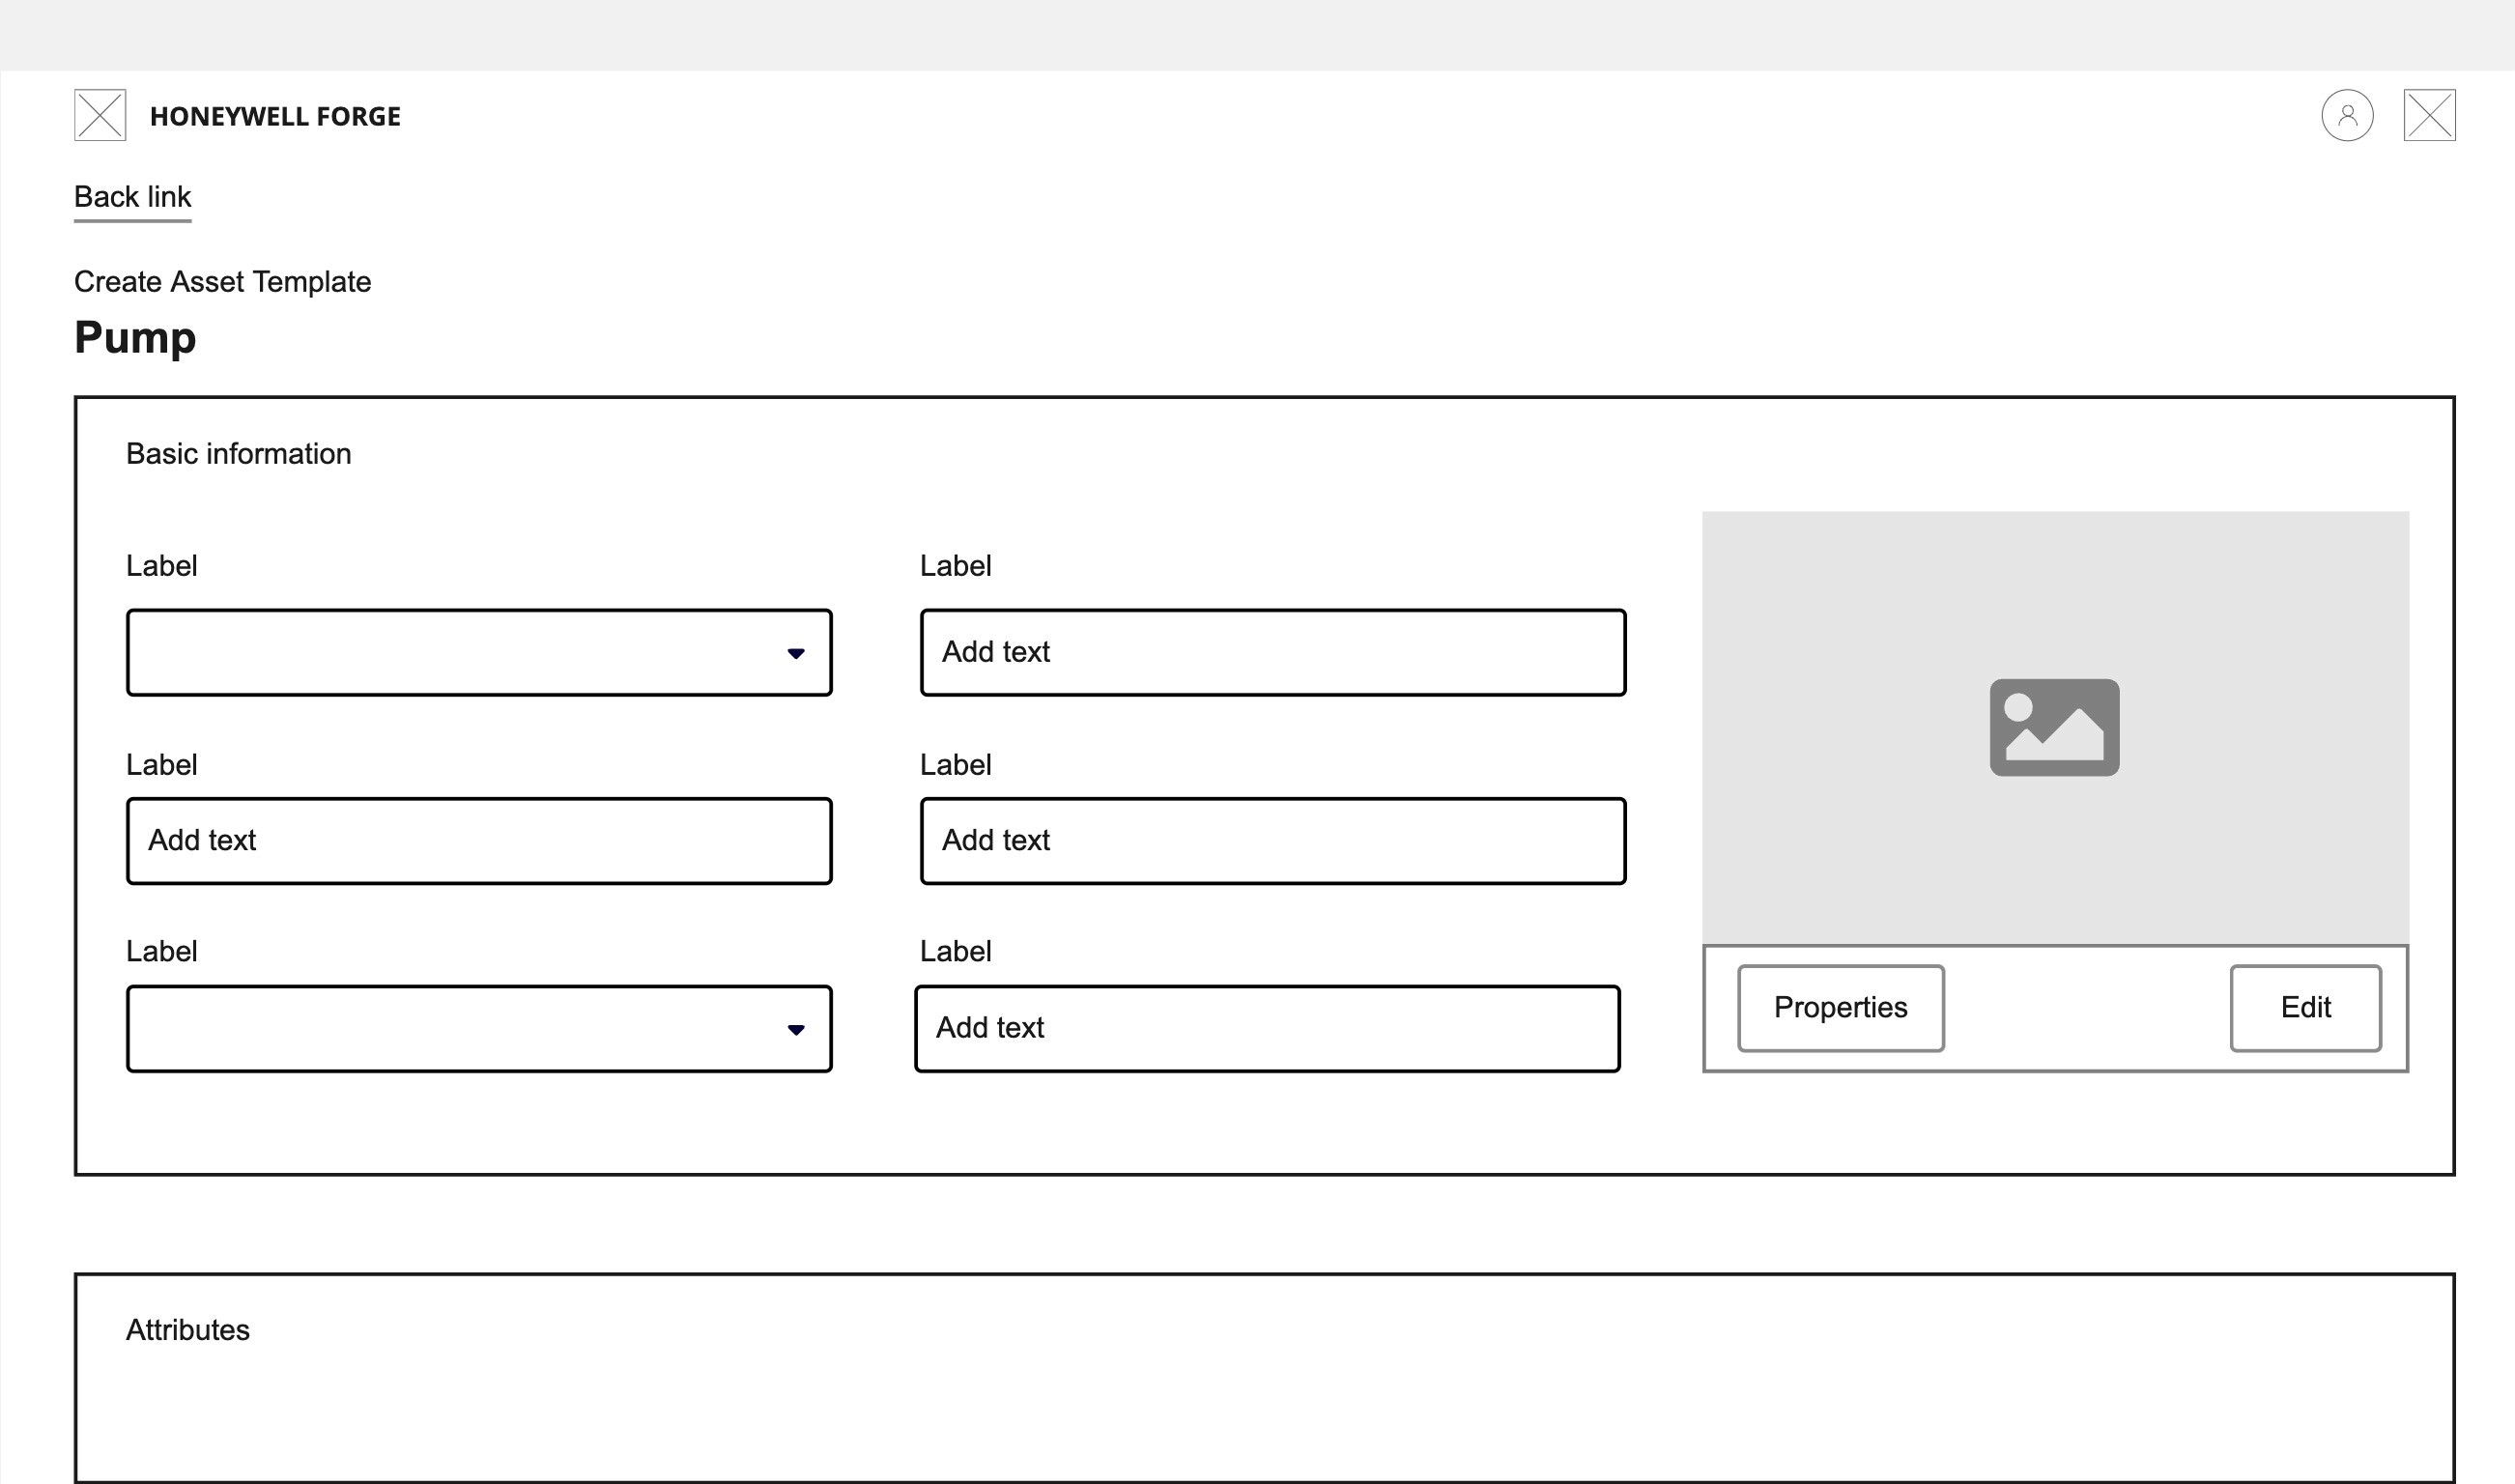
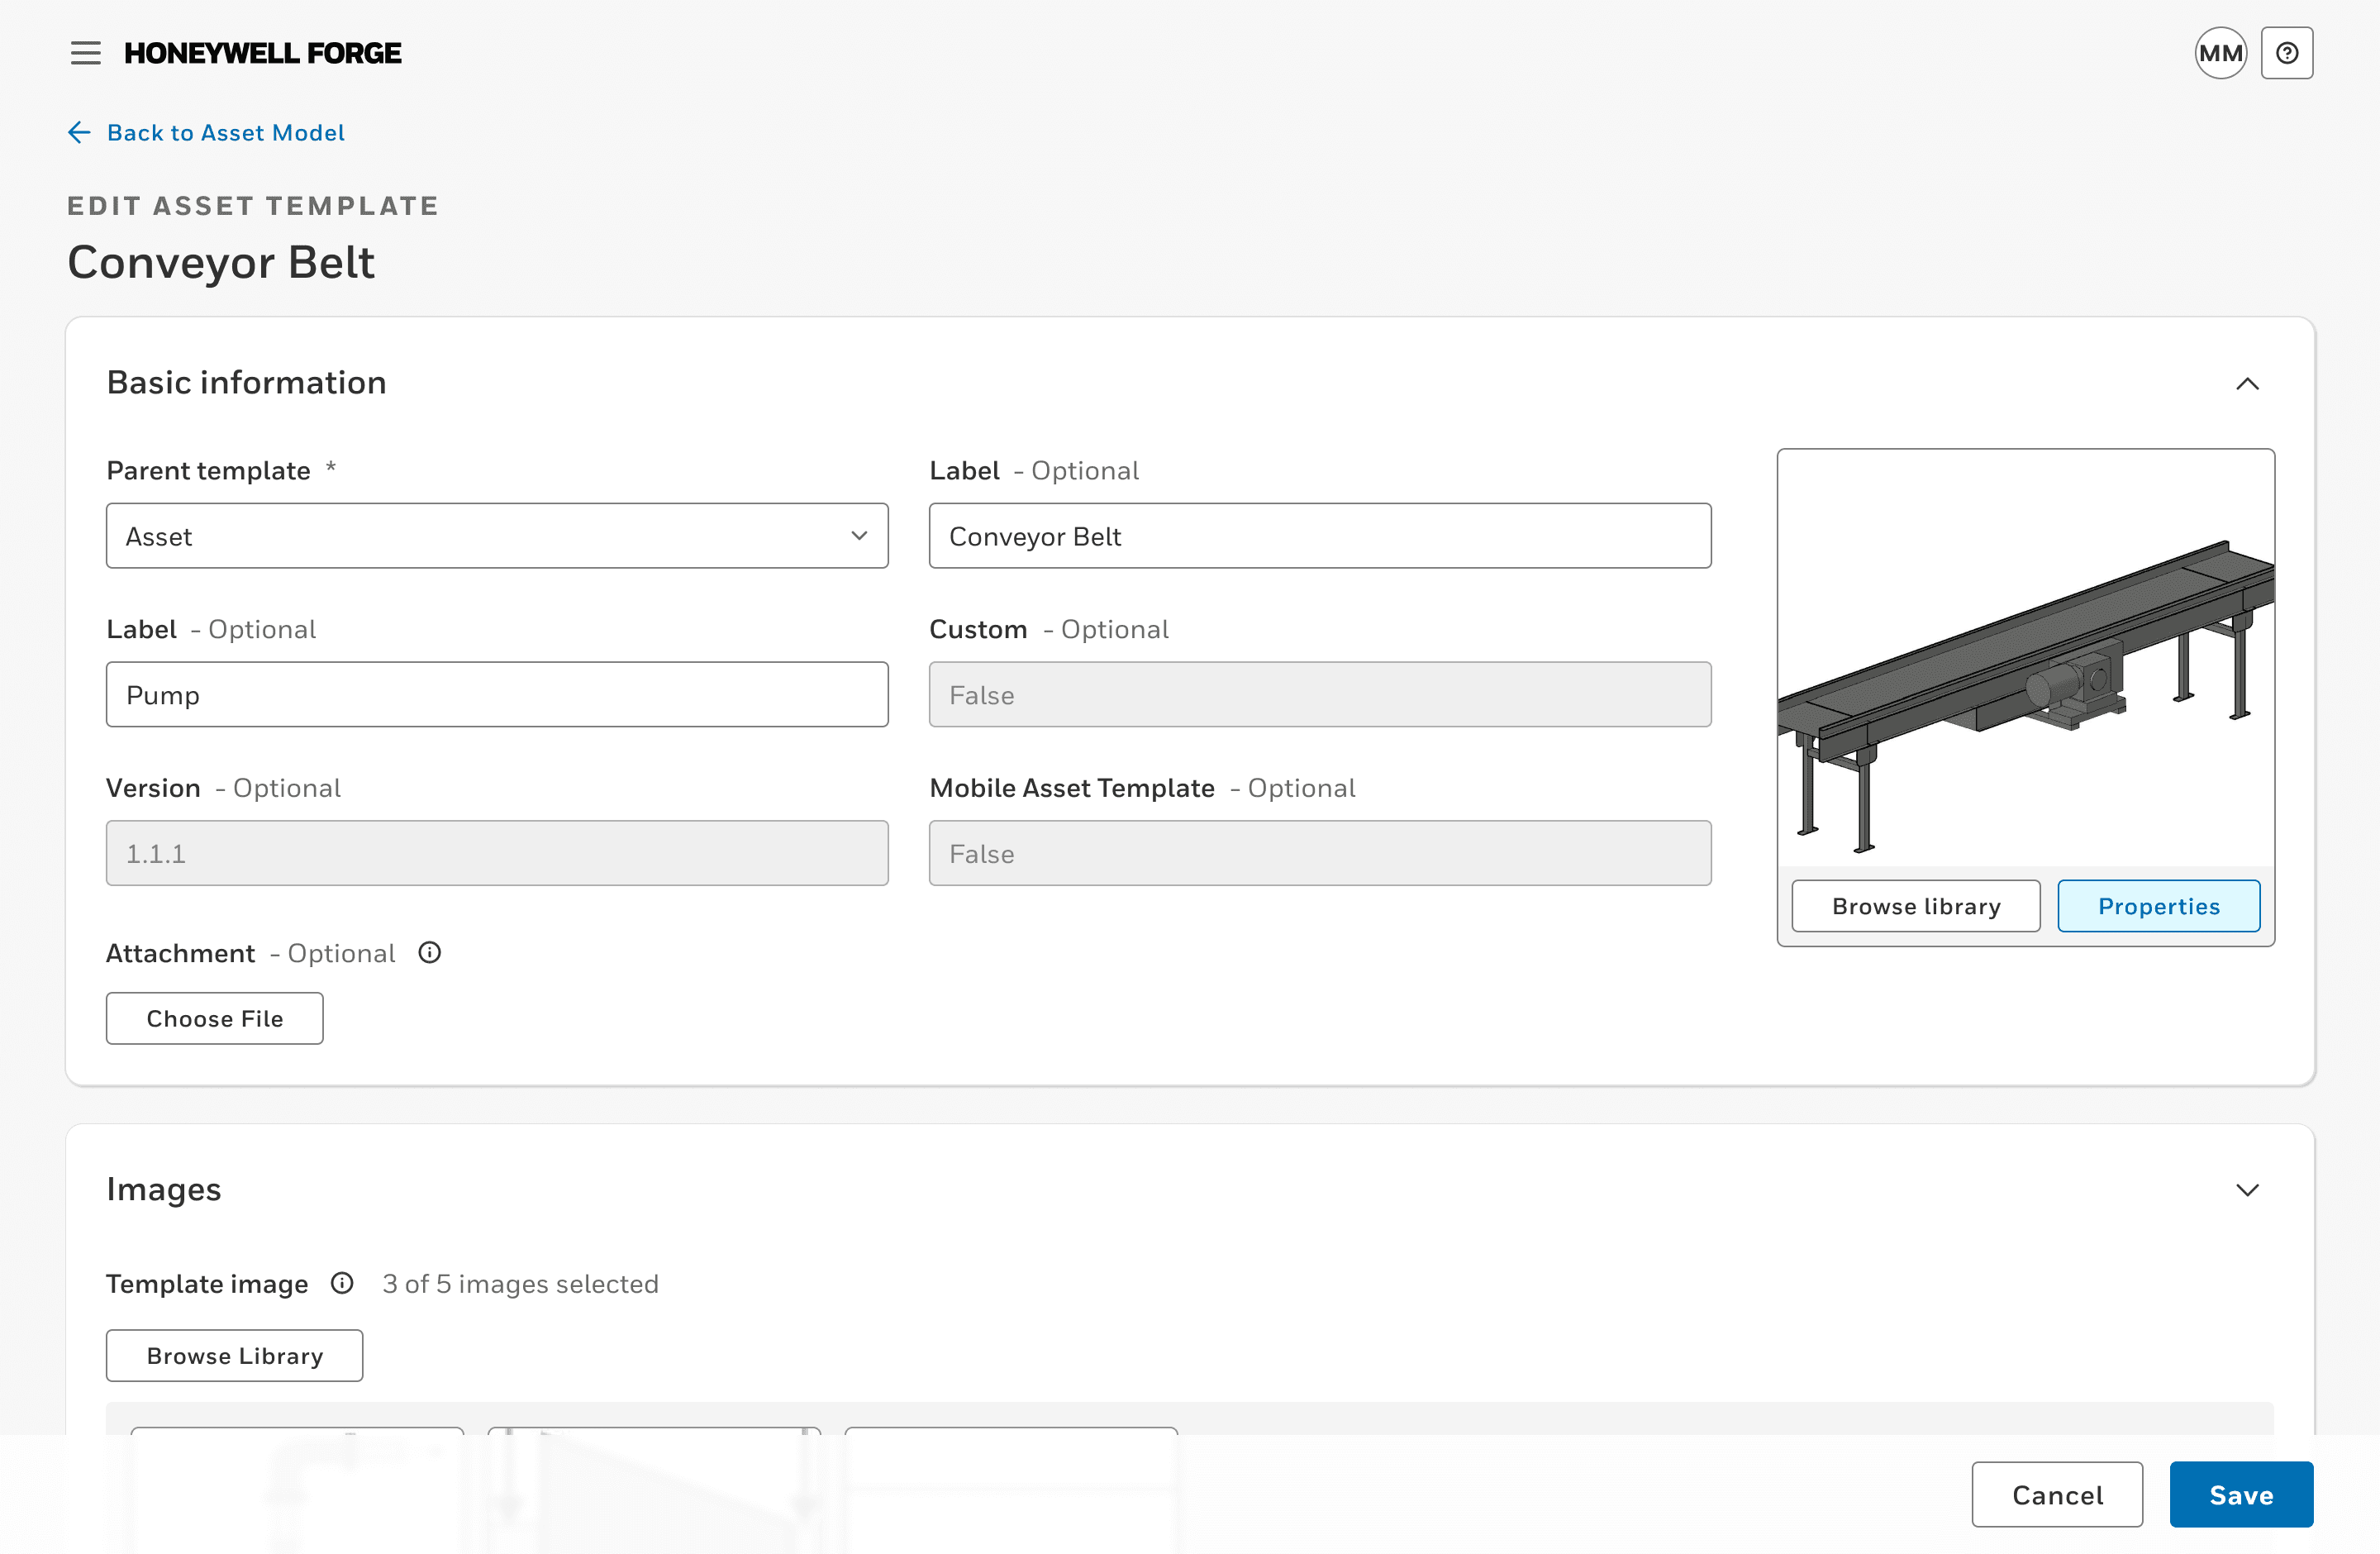
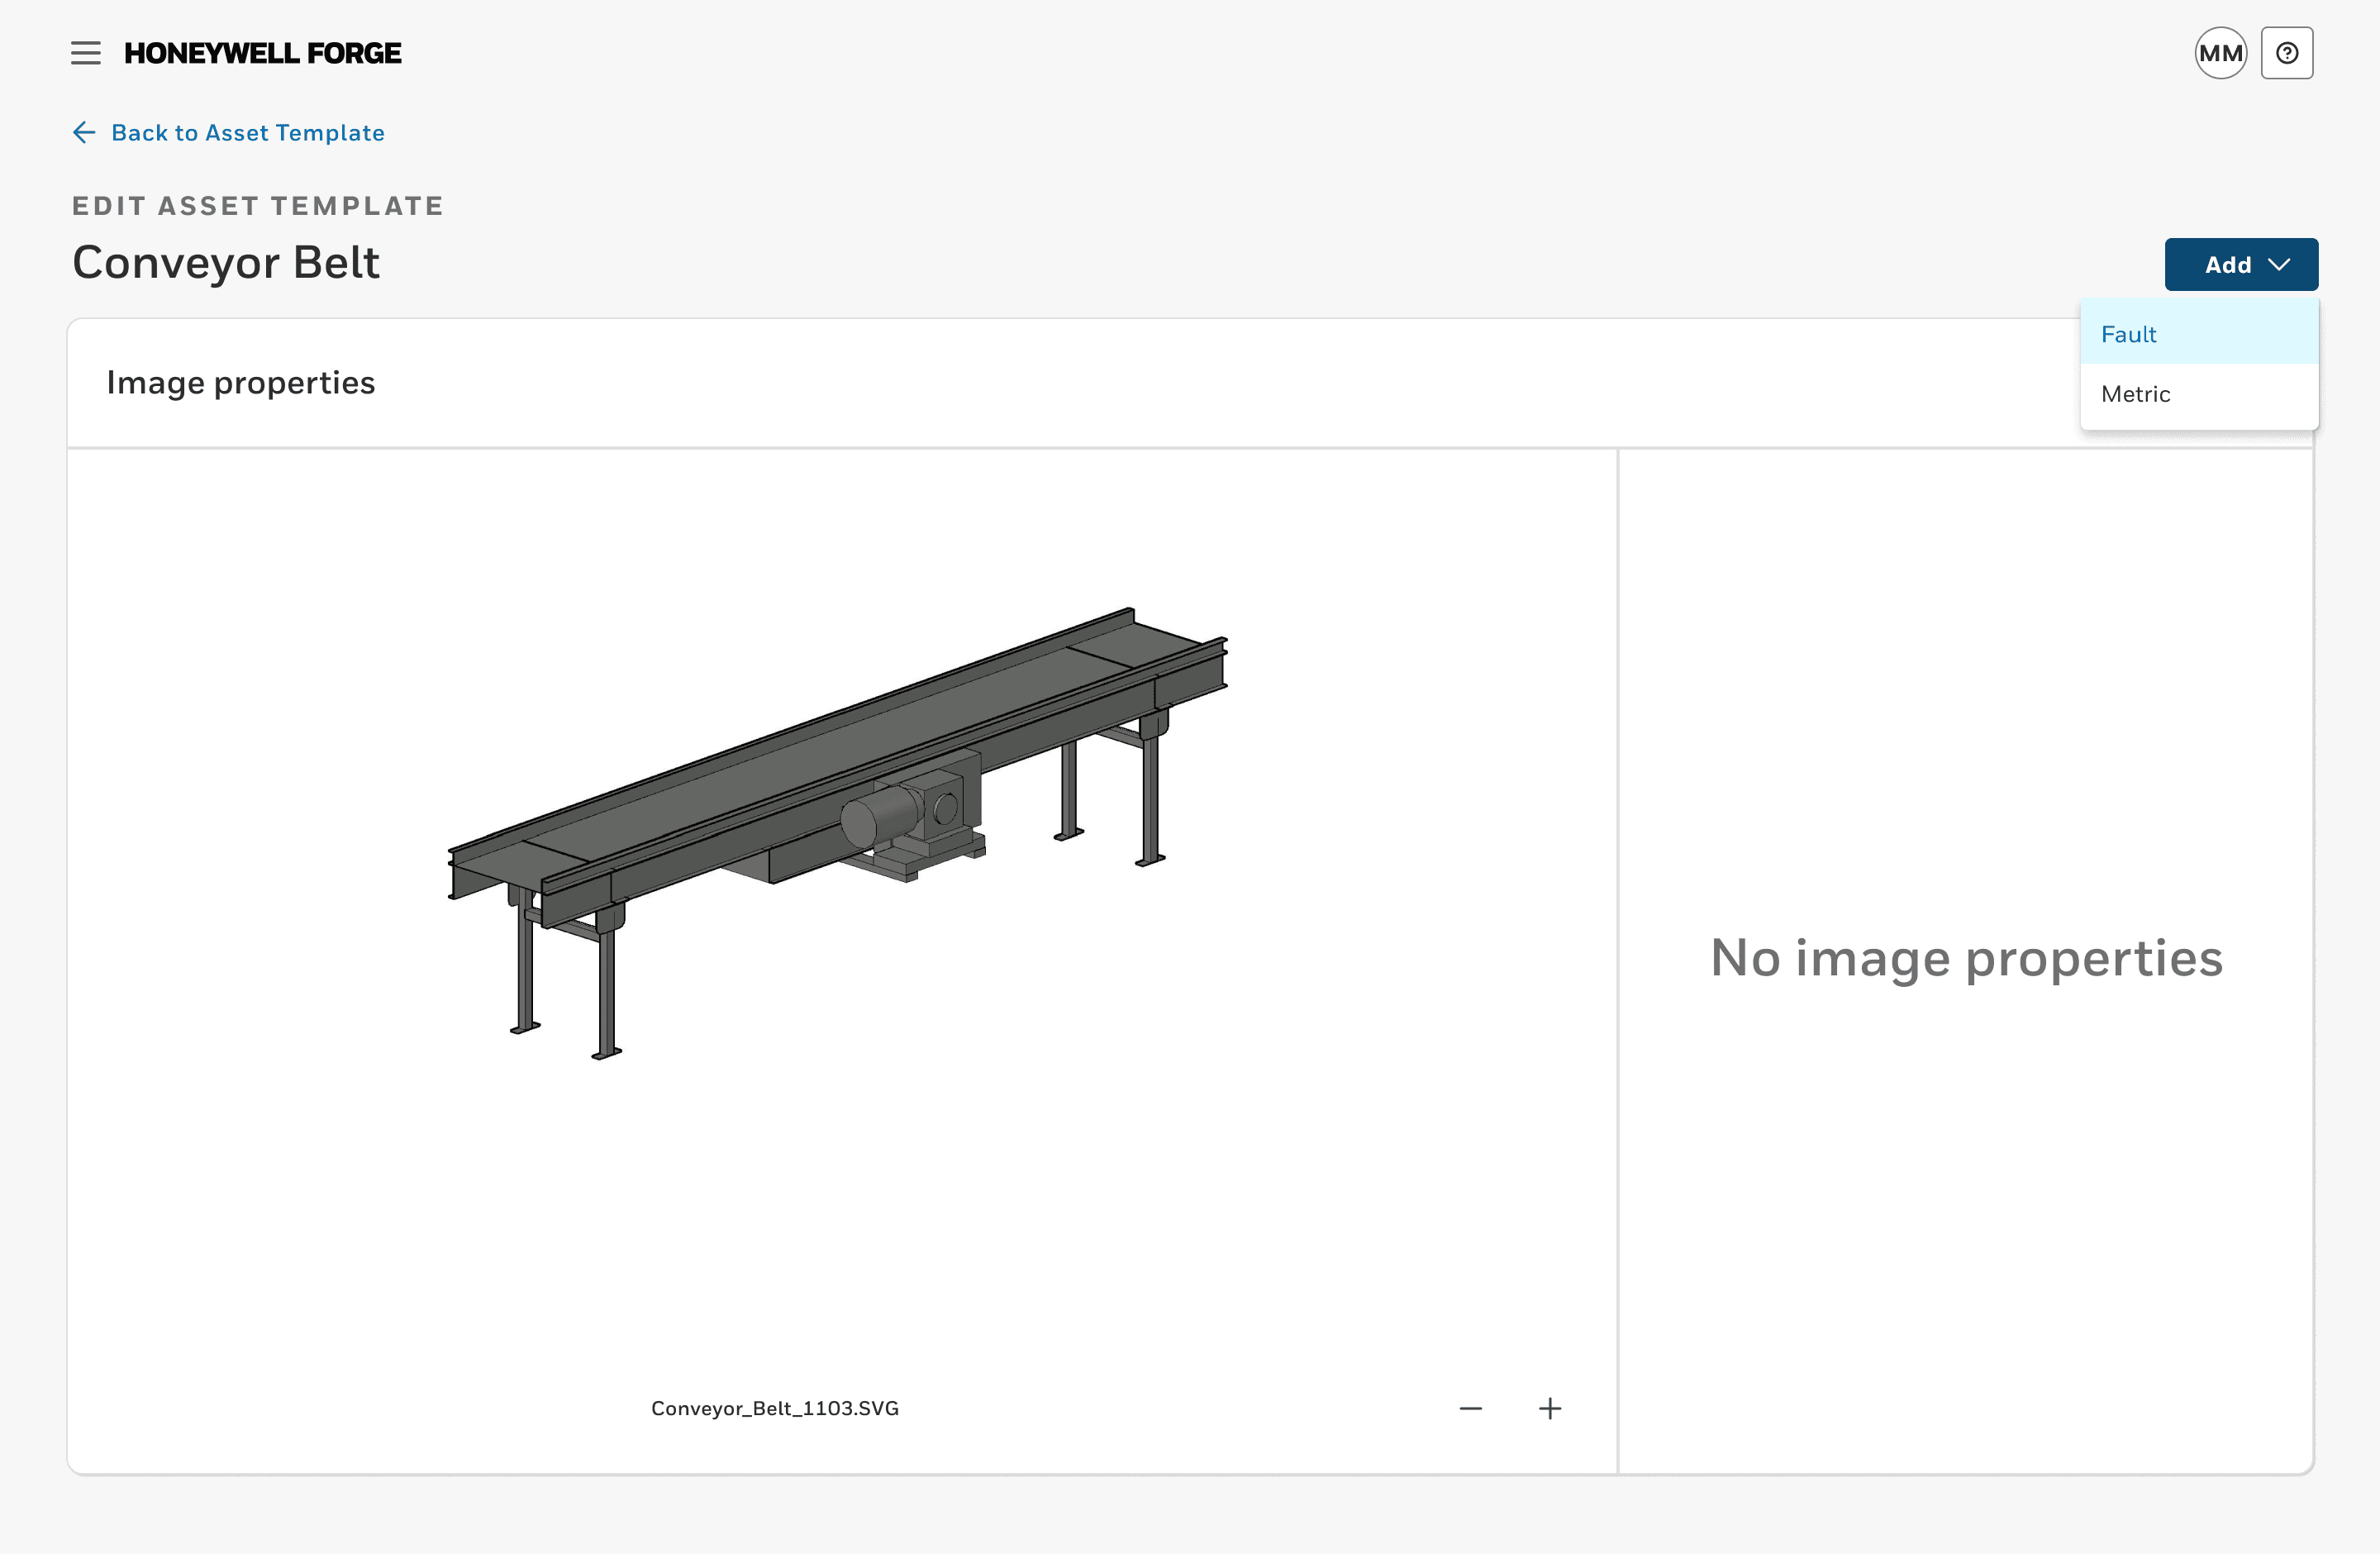
Wireframe v2 - Full page
A full-page would take the user to a new experience, but could easily navigate back to the template once finished. The full-page would allow the user to focus on the image properties as its own task flow, and they could save overlays one at a time versus all at once, compared to the modal.
The user would select 'Properties' on the template to be taken to the full-page
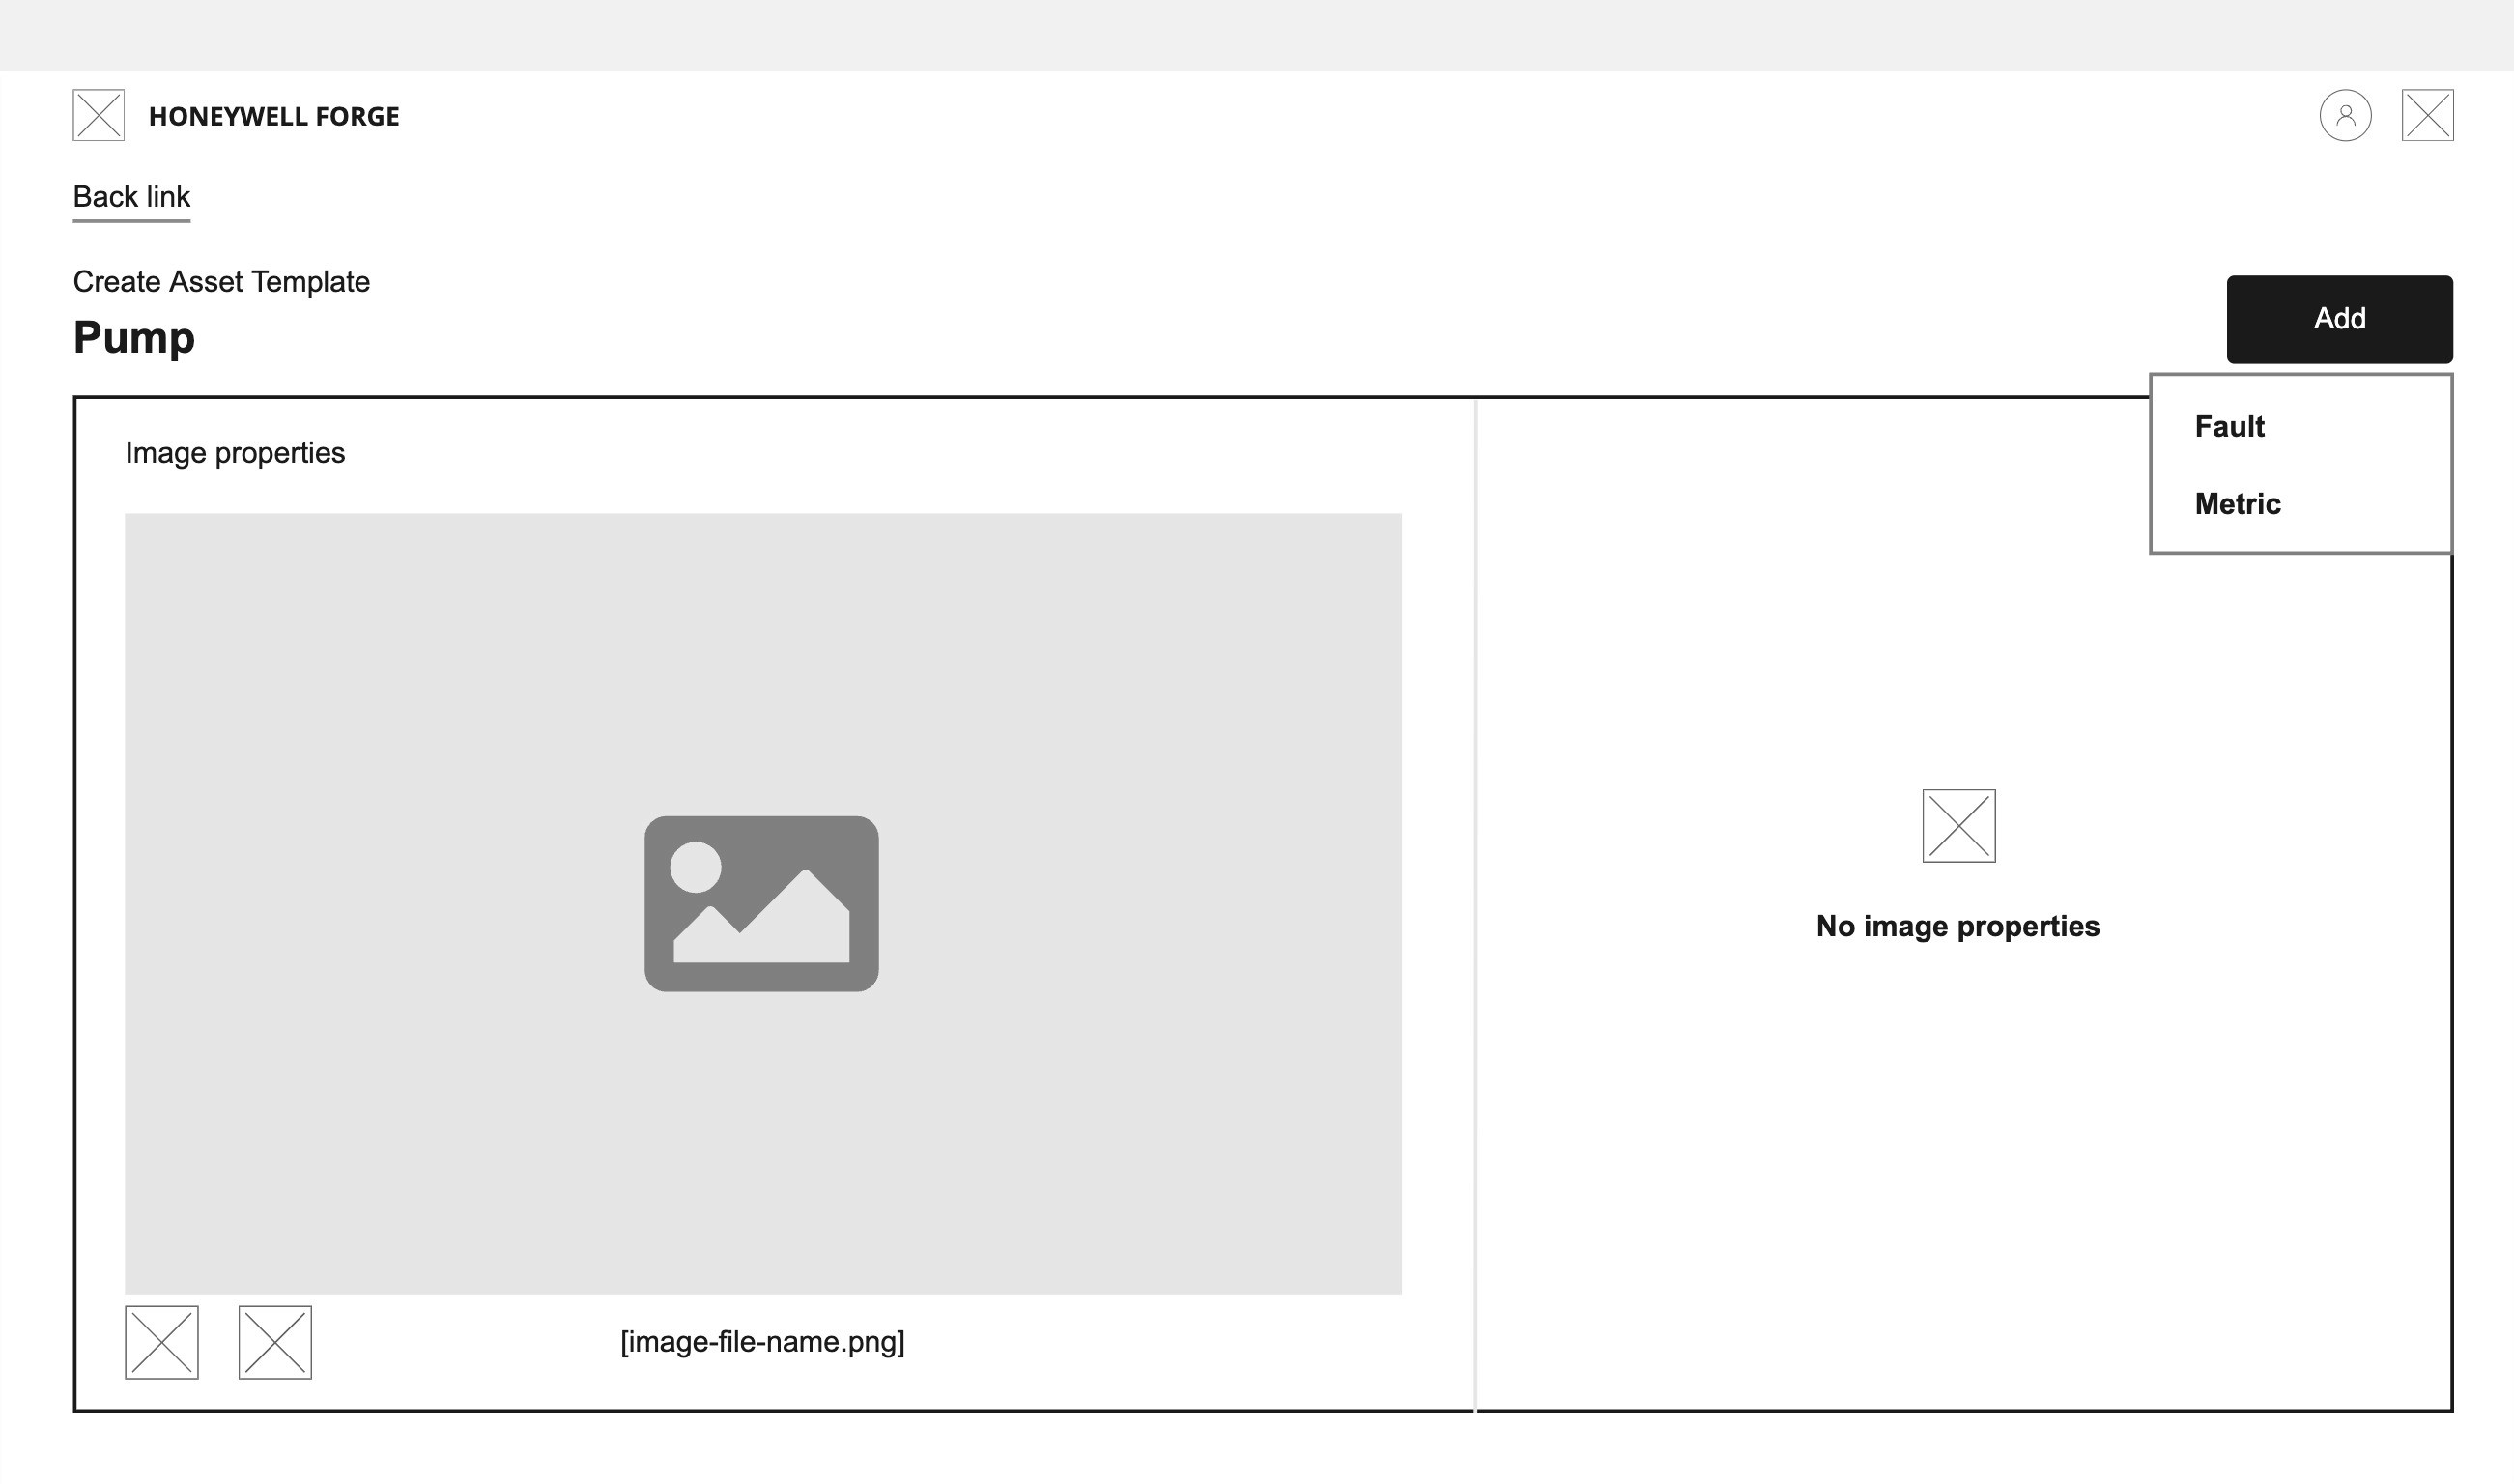
The user would select 'Add' to then choose to add a fault or metric
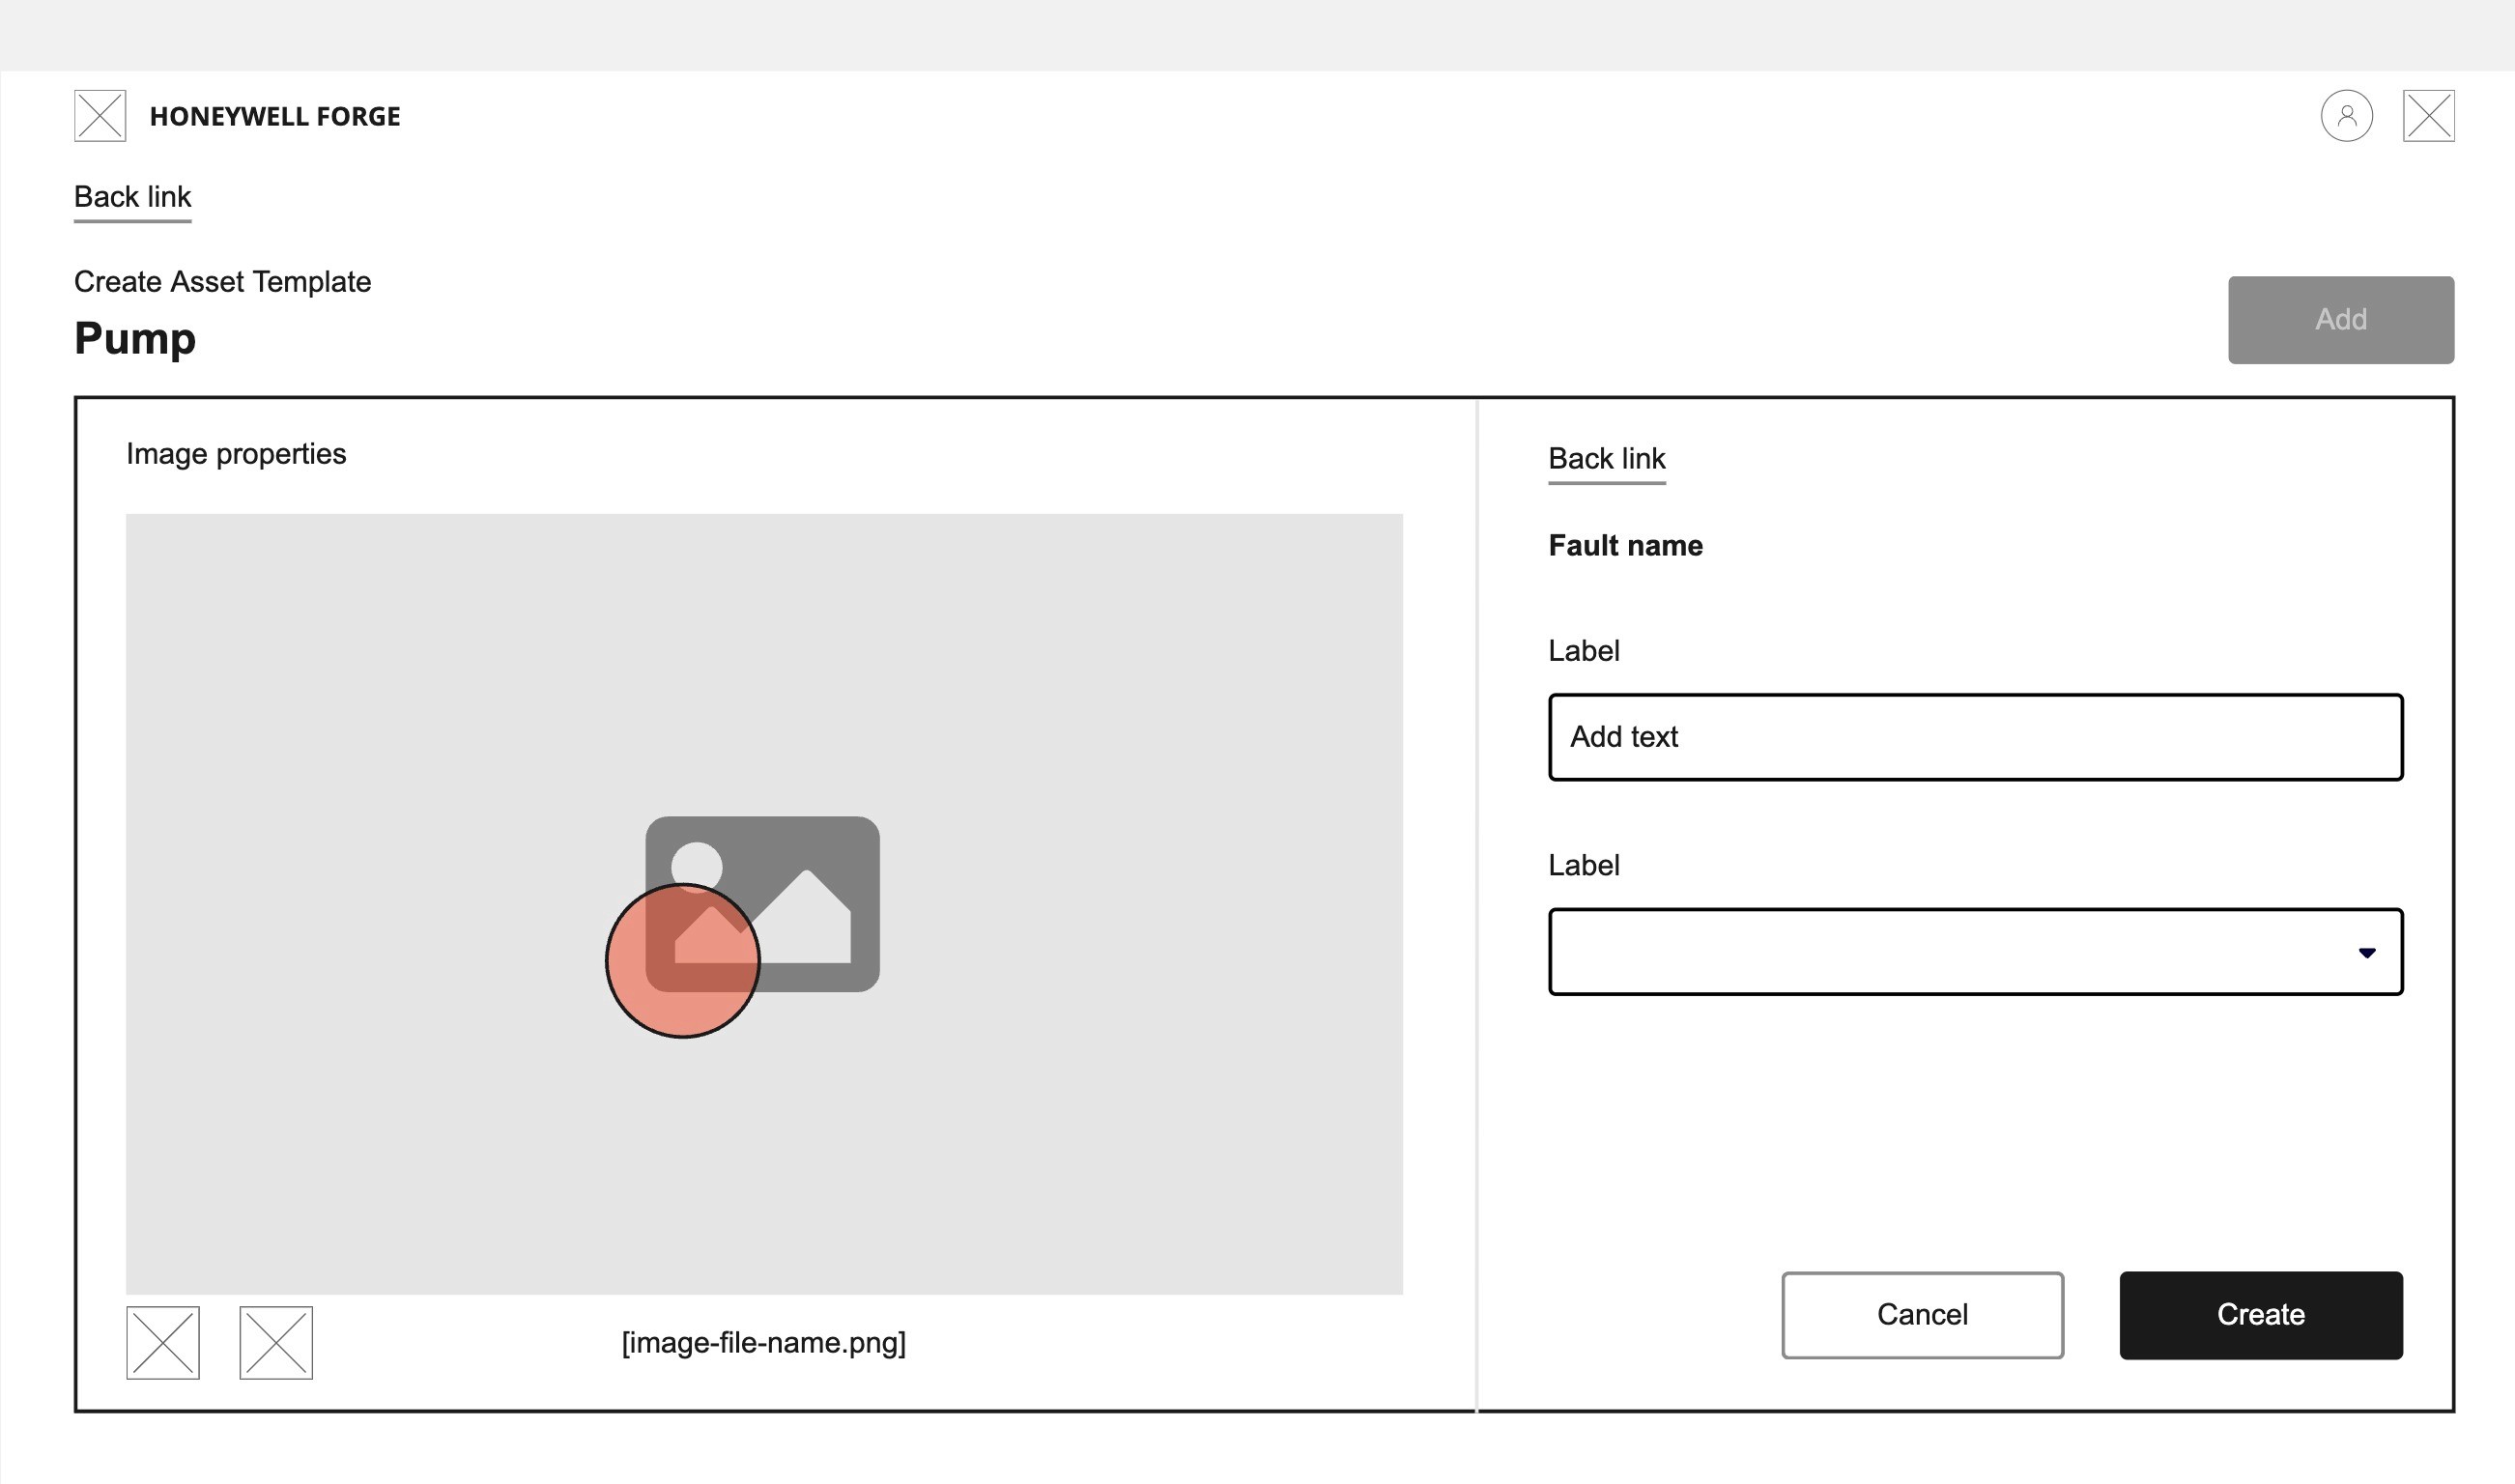
The user would fill out the form for the overlay, then select 'Create' to save the overlay
Mid-fidelity designs:
User can select 'Properties' on the template image to open the full-page
User can select 'Add' to then select fault or metric to fill out the details on the right panel
Once the form is complete, the user can select 'Create fault'
Decision
After the feature requirements expanded, I realized the user would need to select a metric to attach to the overlay through a modal. Our design system has a guideline that asks to avoid modals on top of modals due to usability issues. Because of this, I decided to move forward with the full-page experience.
New requirements created to create final designs:
Allow ability to search the faults and metrics
Include explicit 'Add fault' and 'Add metric' buttons to reduce engineering time
Allow ability to add multiple fault overlays to the same fault
Allow ability to add metric values to the same metric display
Use input stepper UI component for zooming in/out of the default image
Allow ability to filter between faults and metrics to view image properties
FINAL DESIGNS
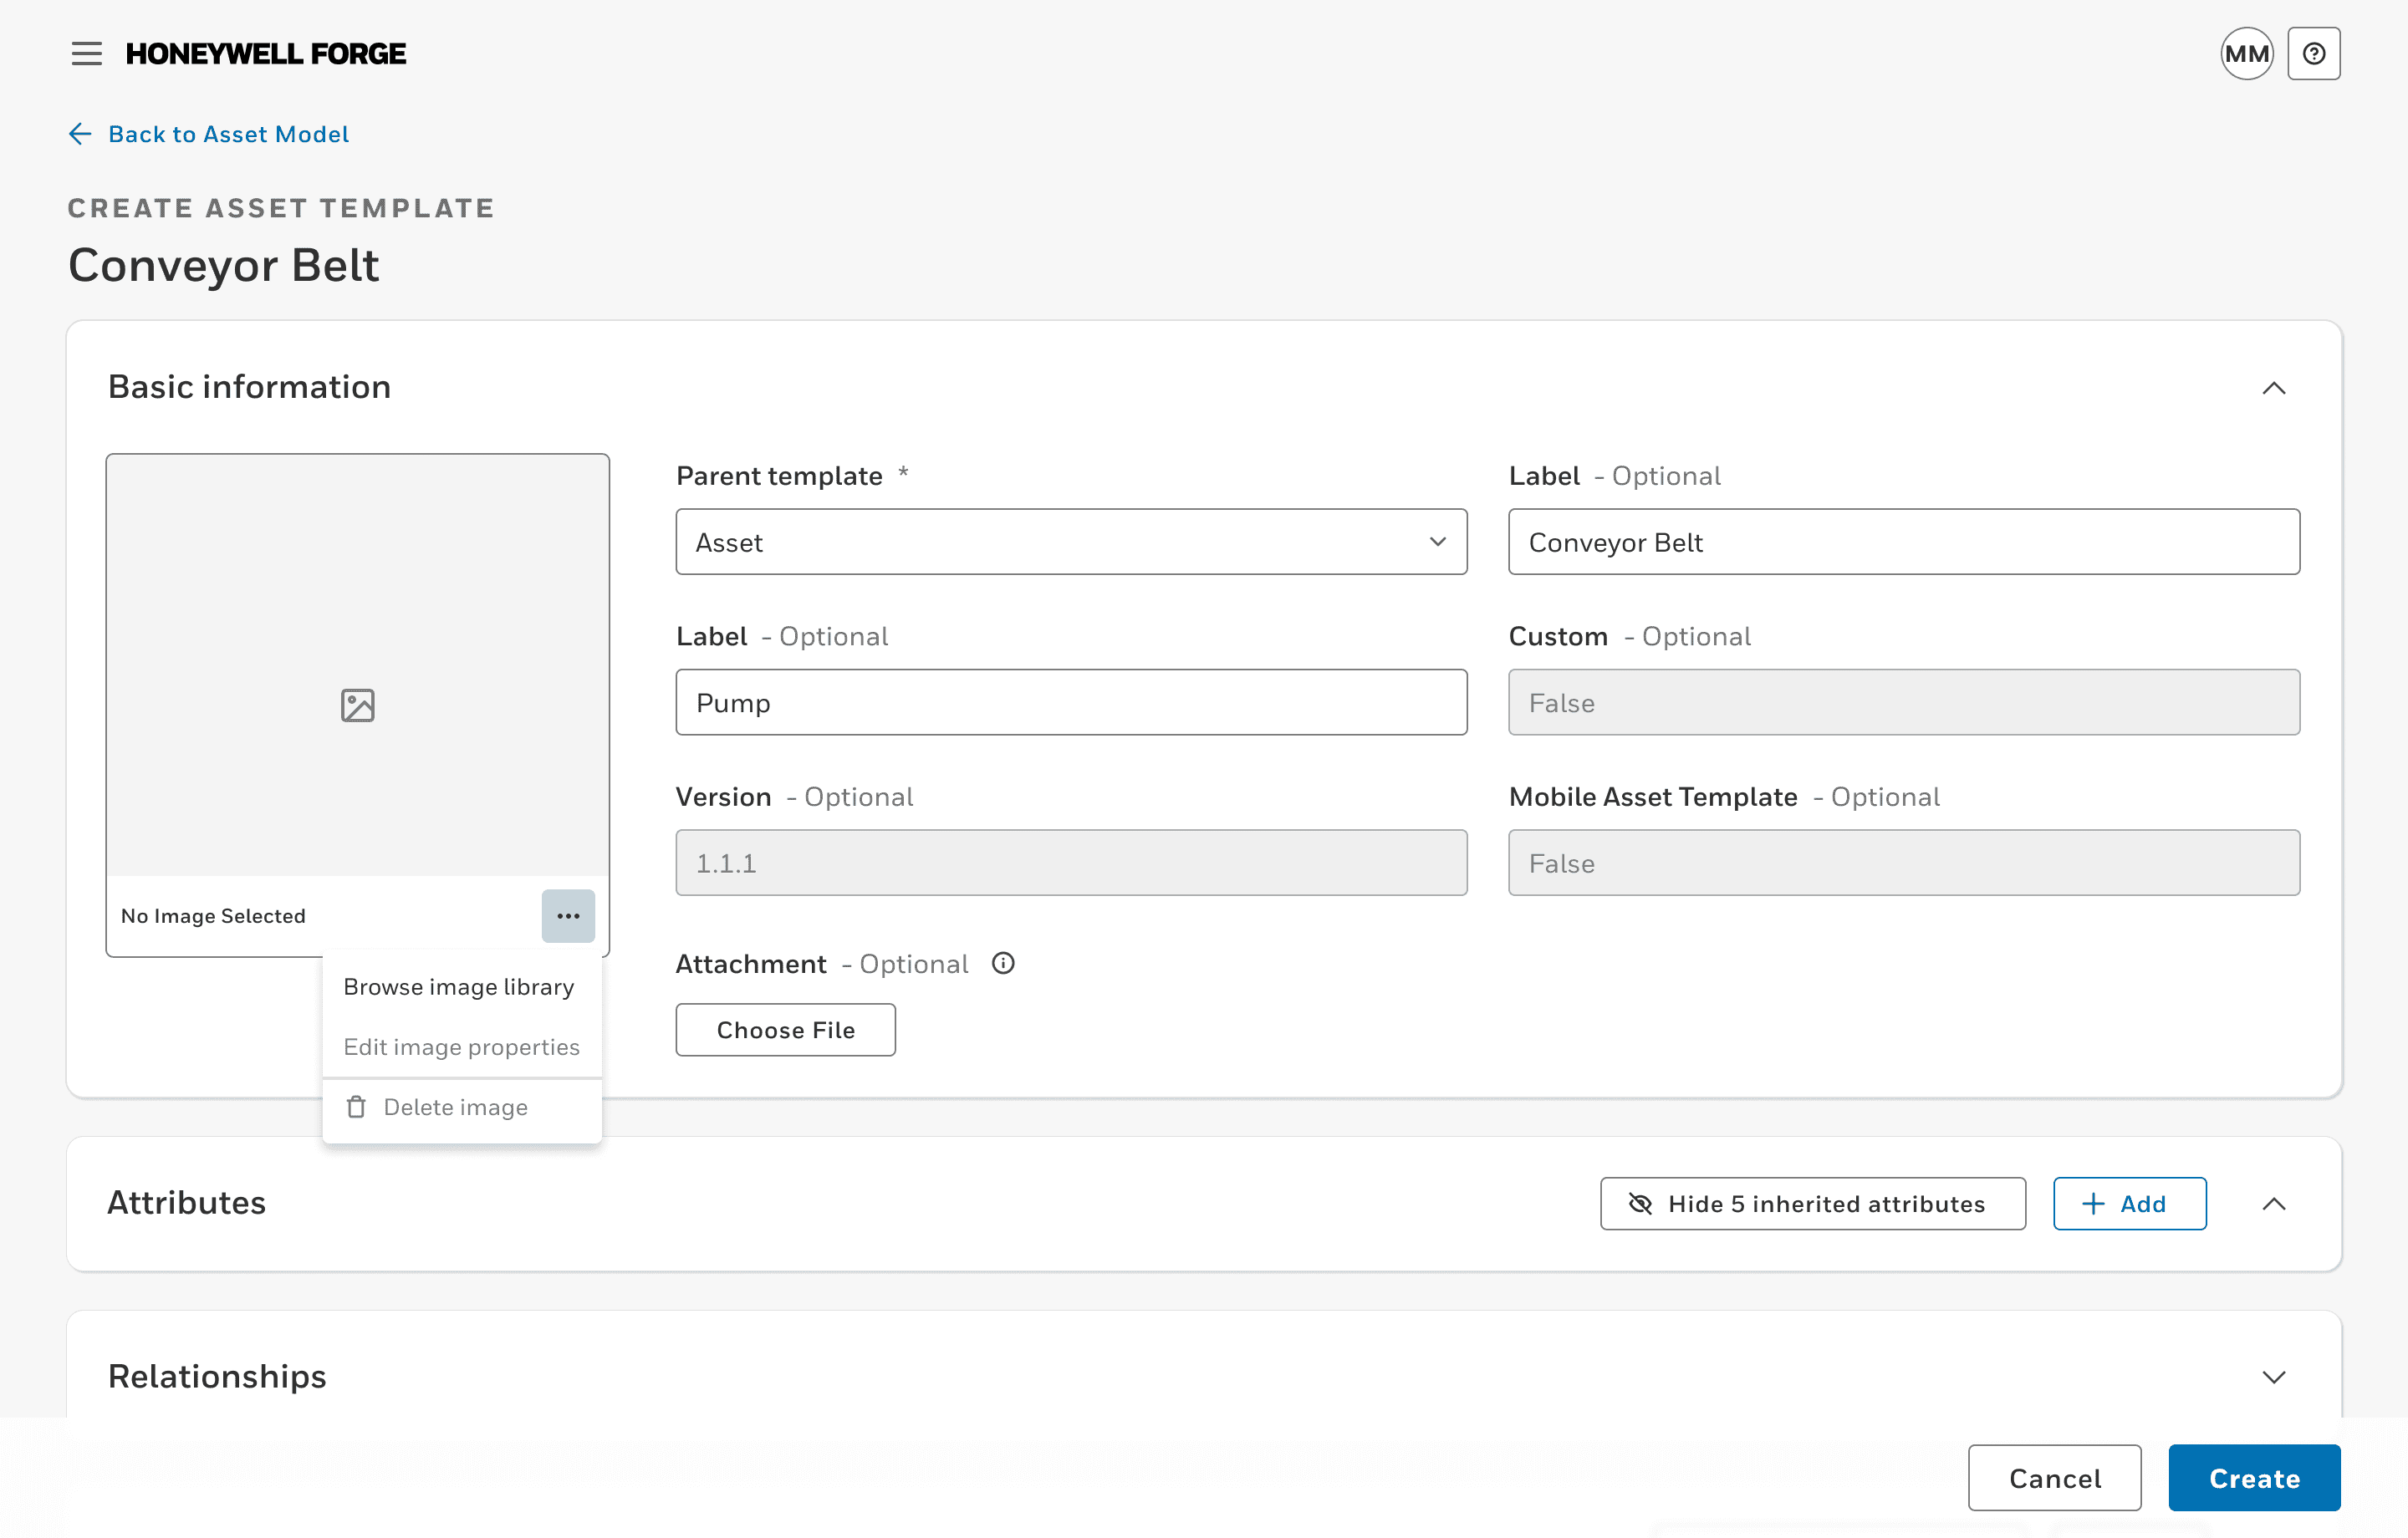
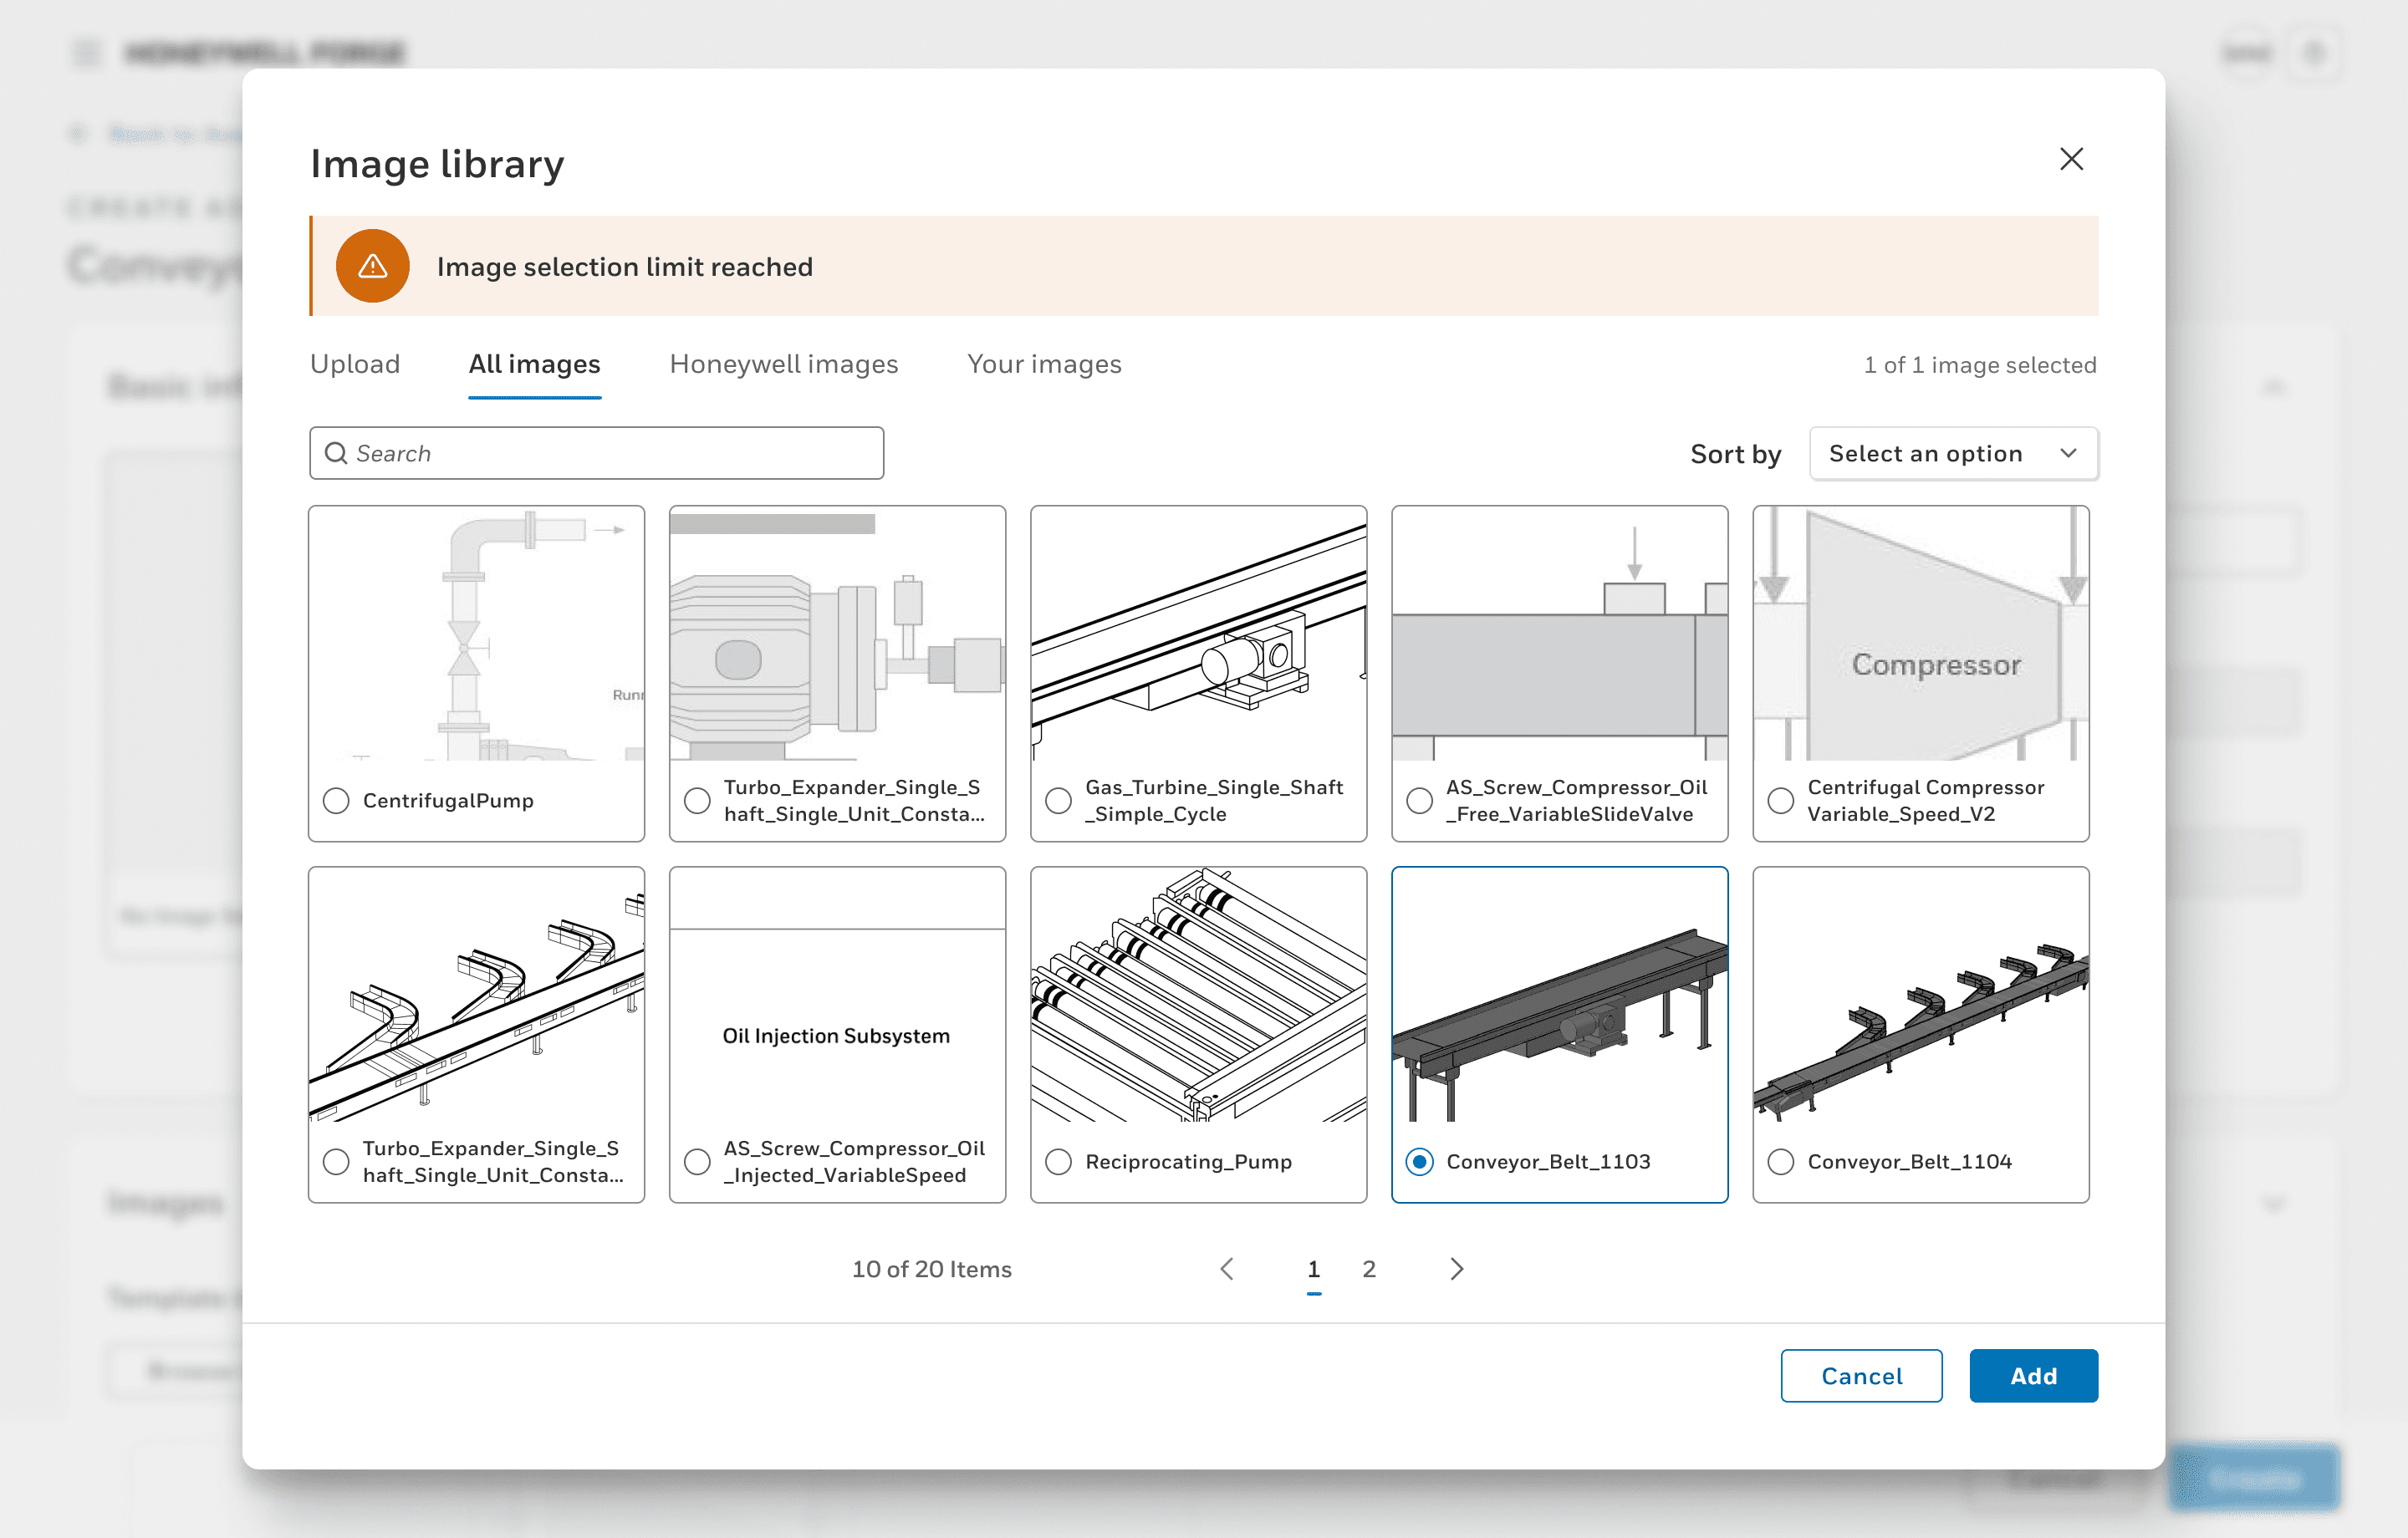
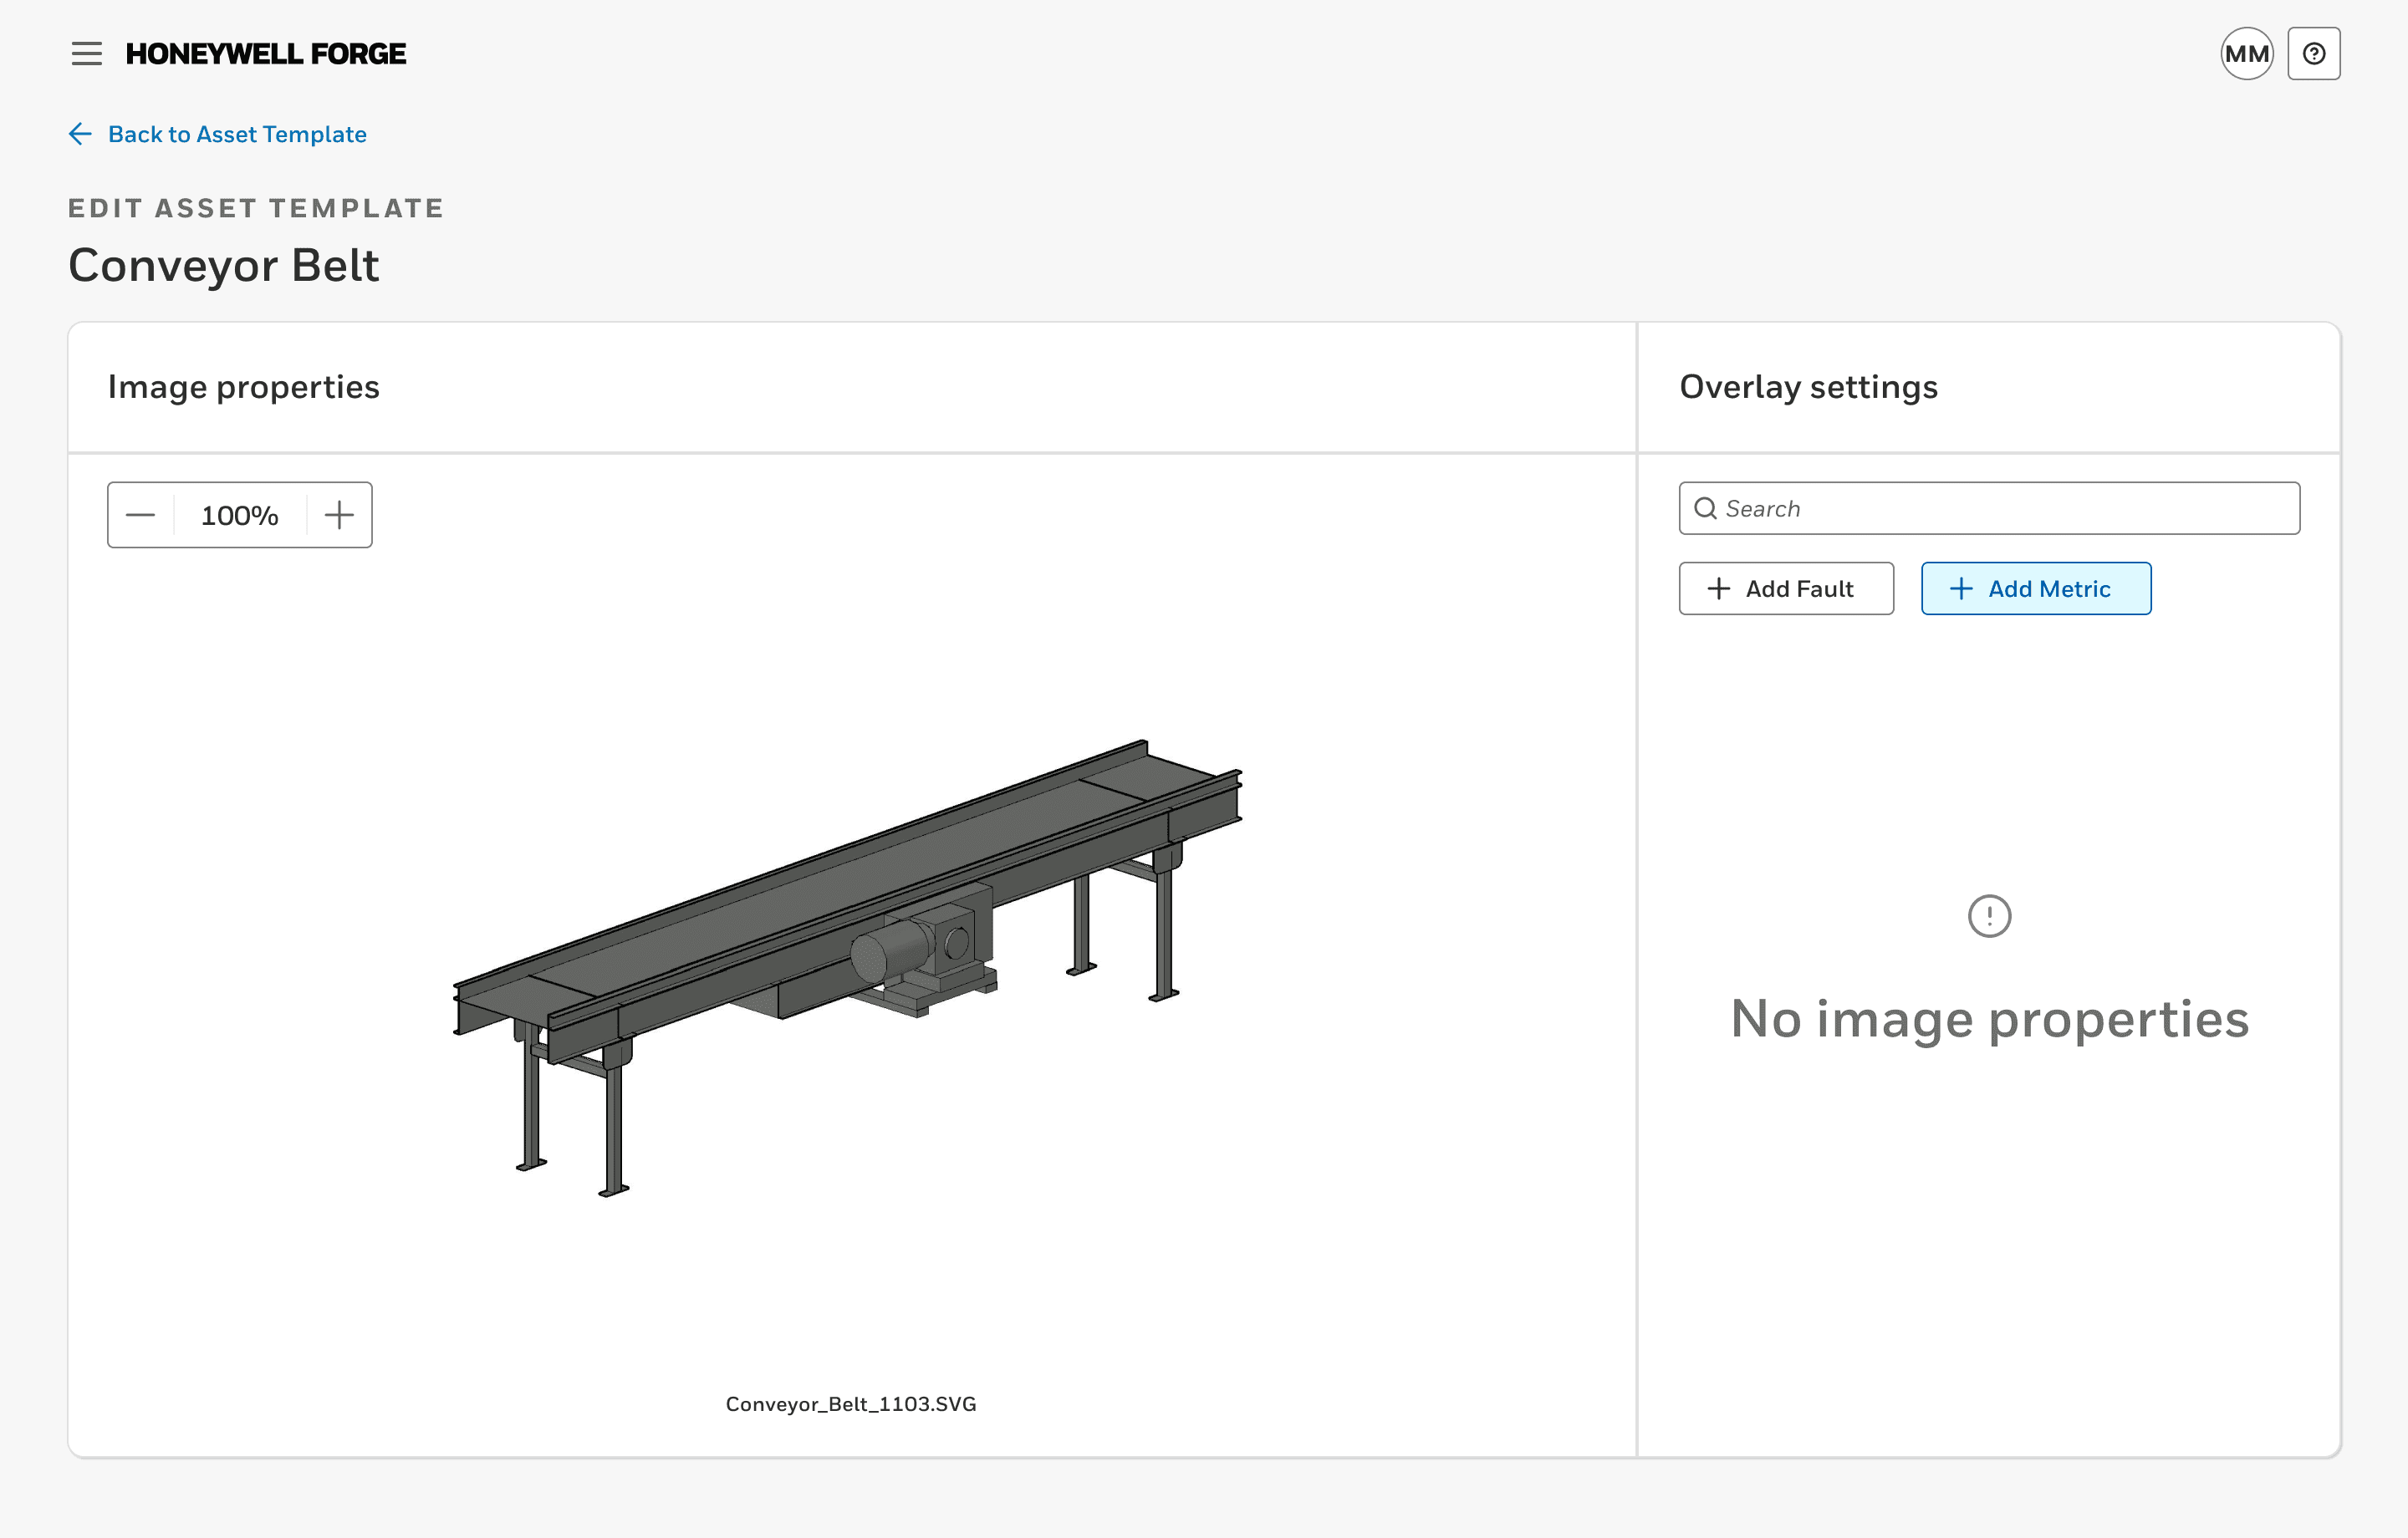
Task flow: Select a default image to access image properties
Without a template image, the user cannot access 'Edit image properties'
Select (1) image from the image library
Select 'Edit image properties' to add live overlays
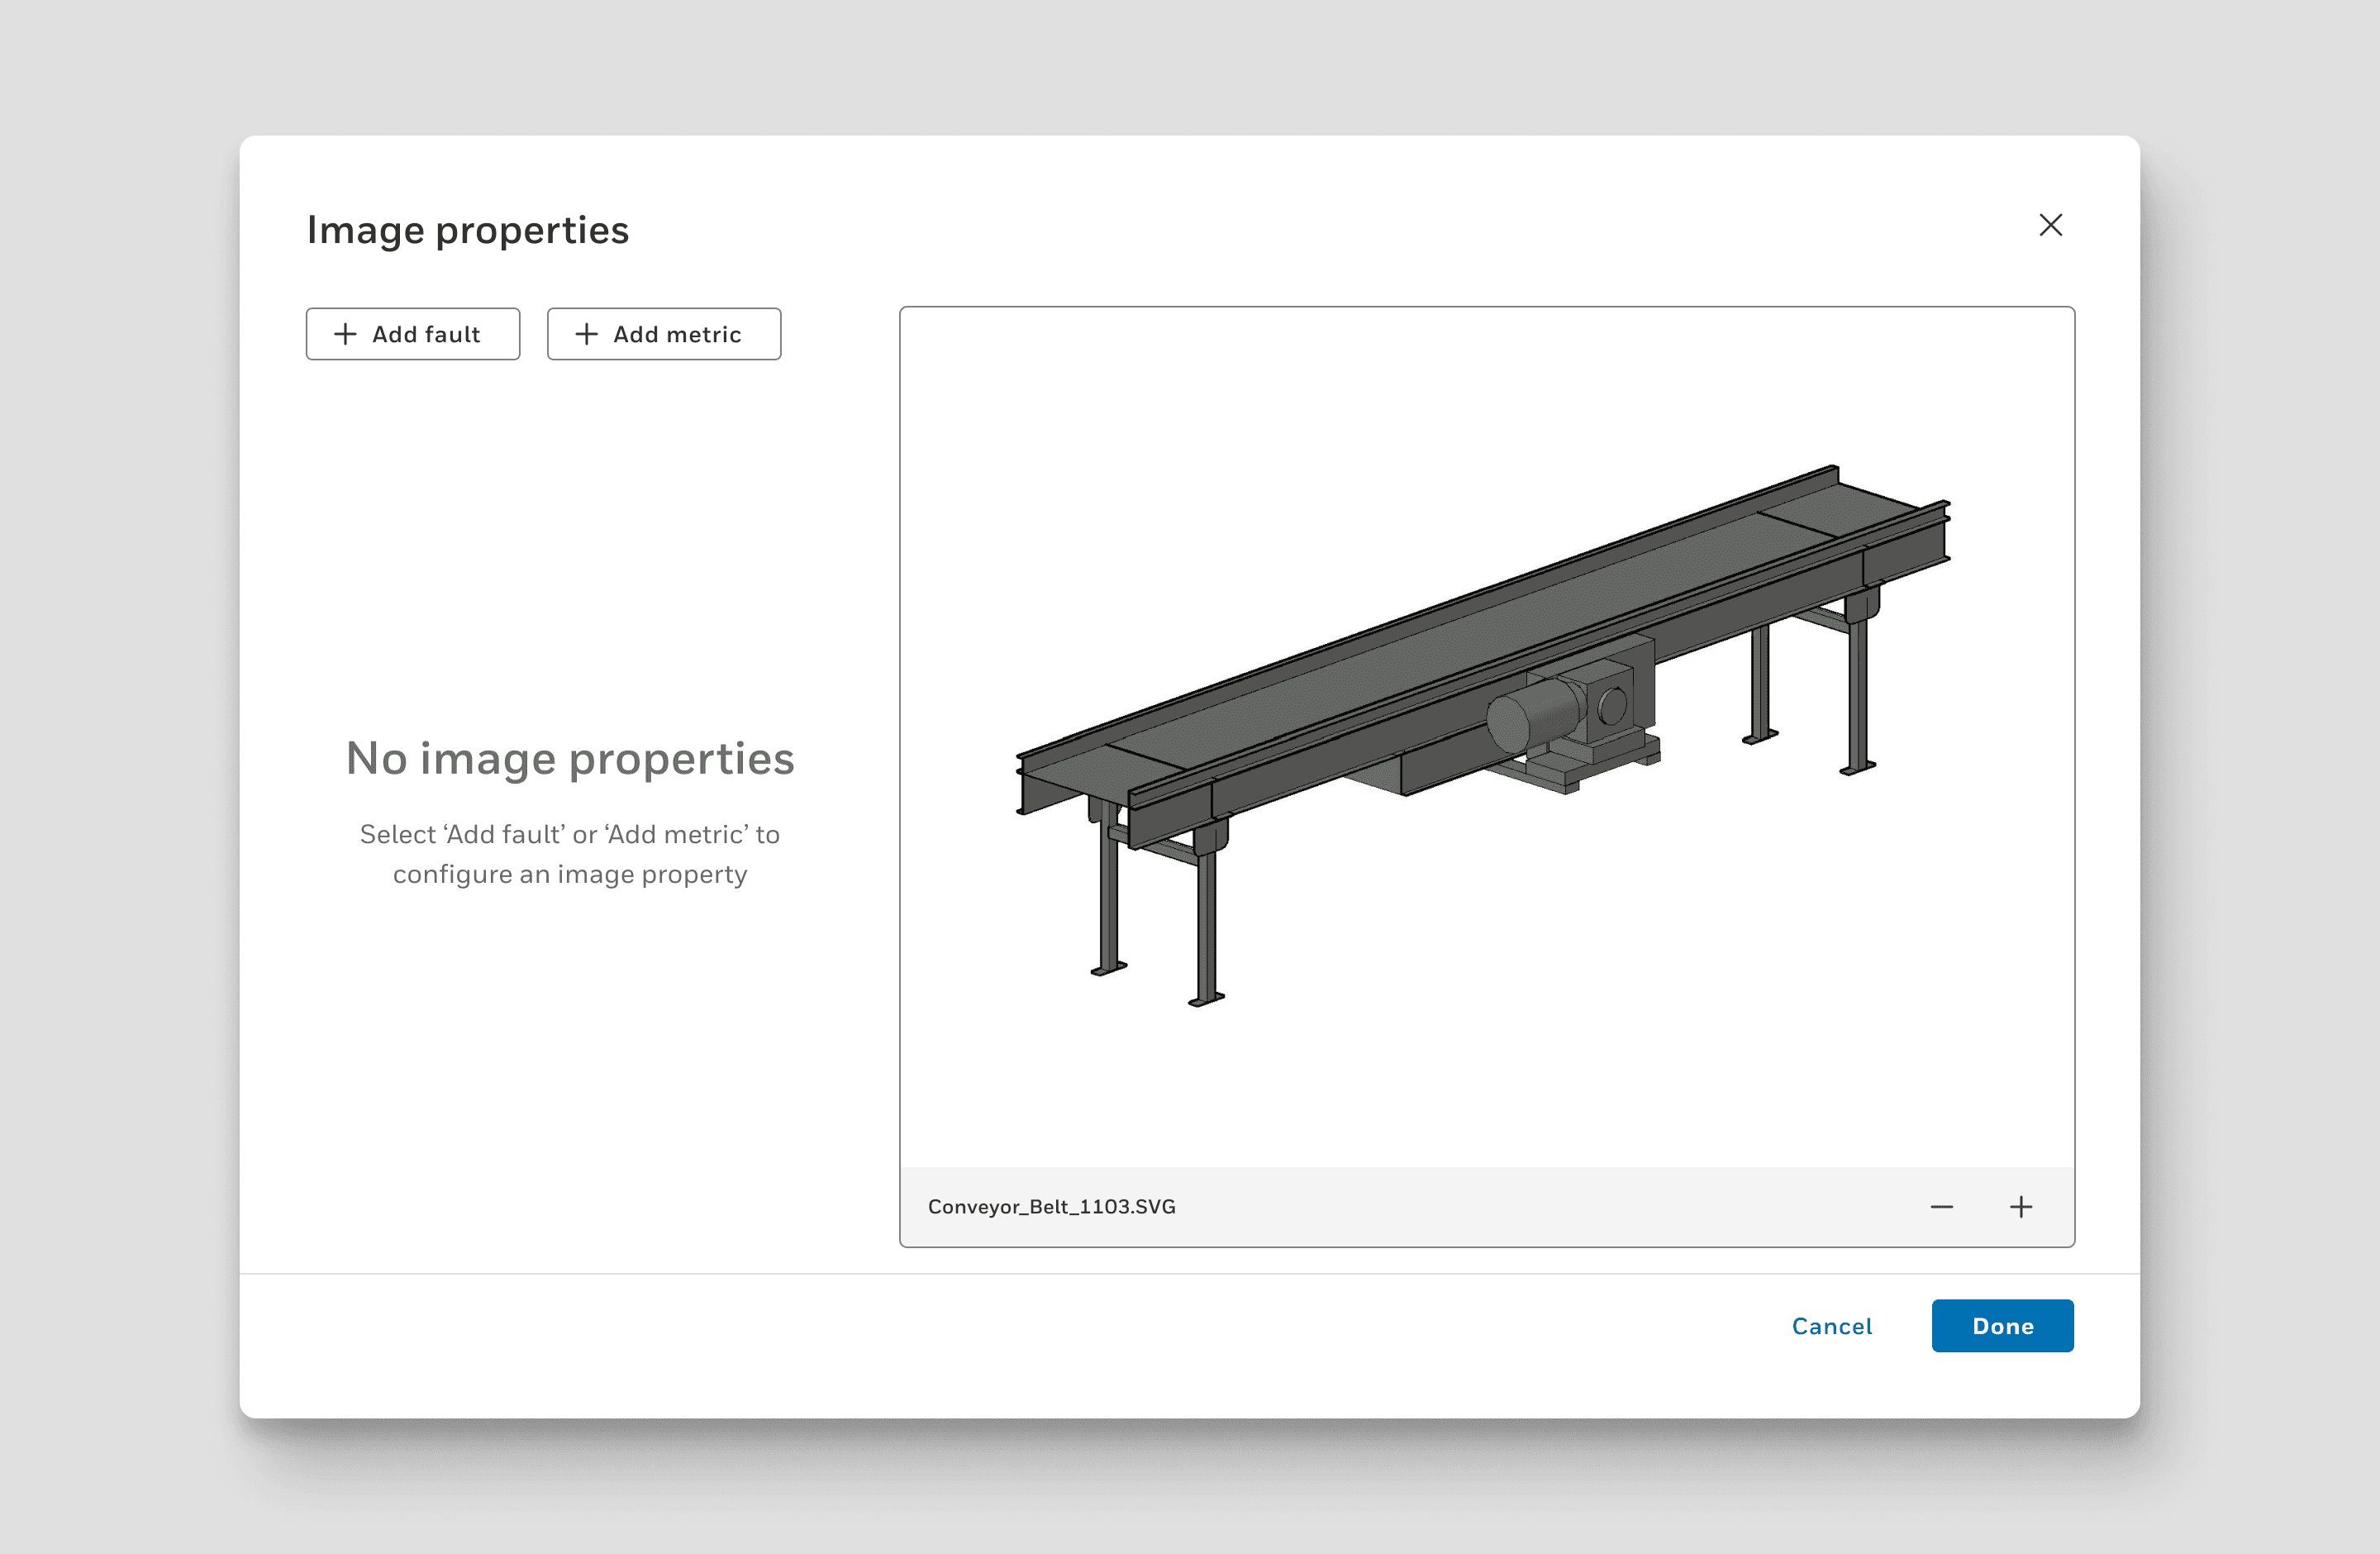
The empty state appears if there are no image properties


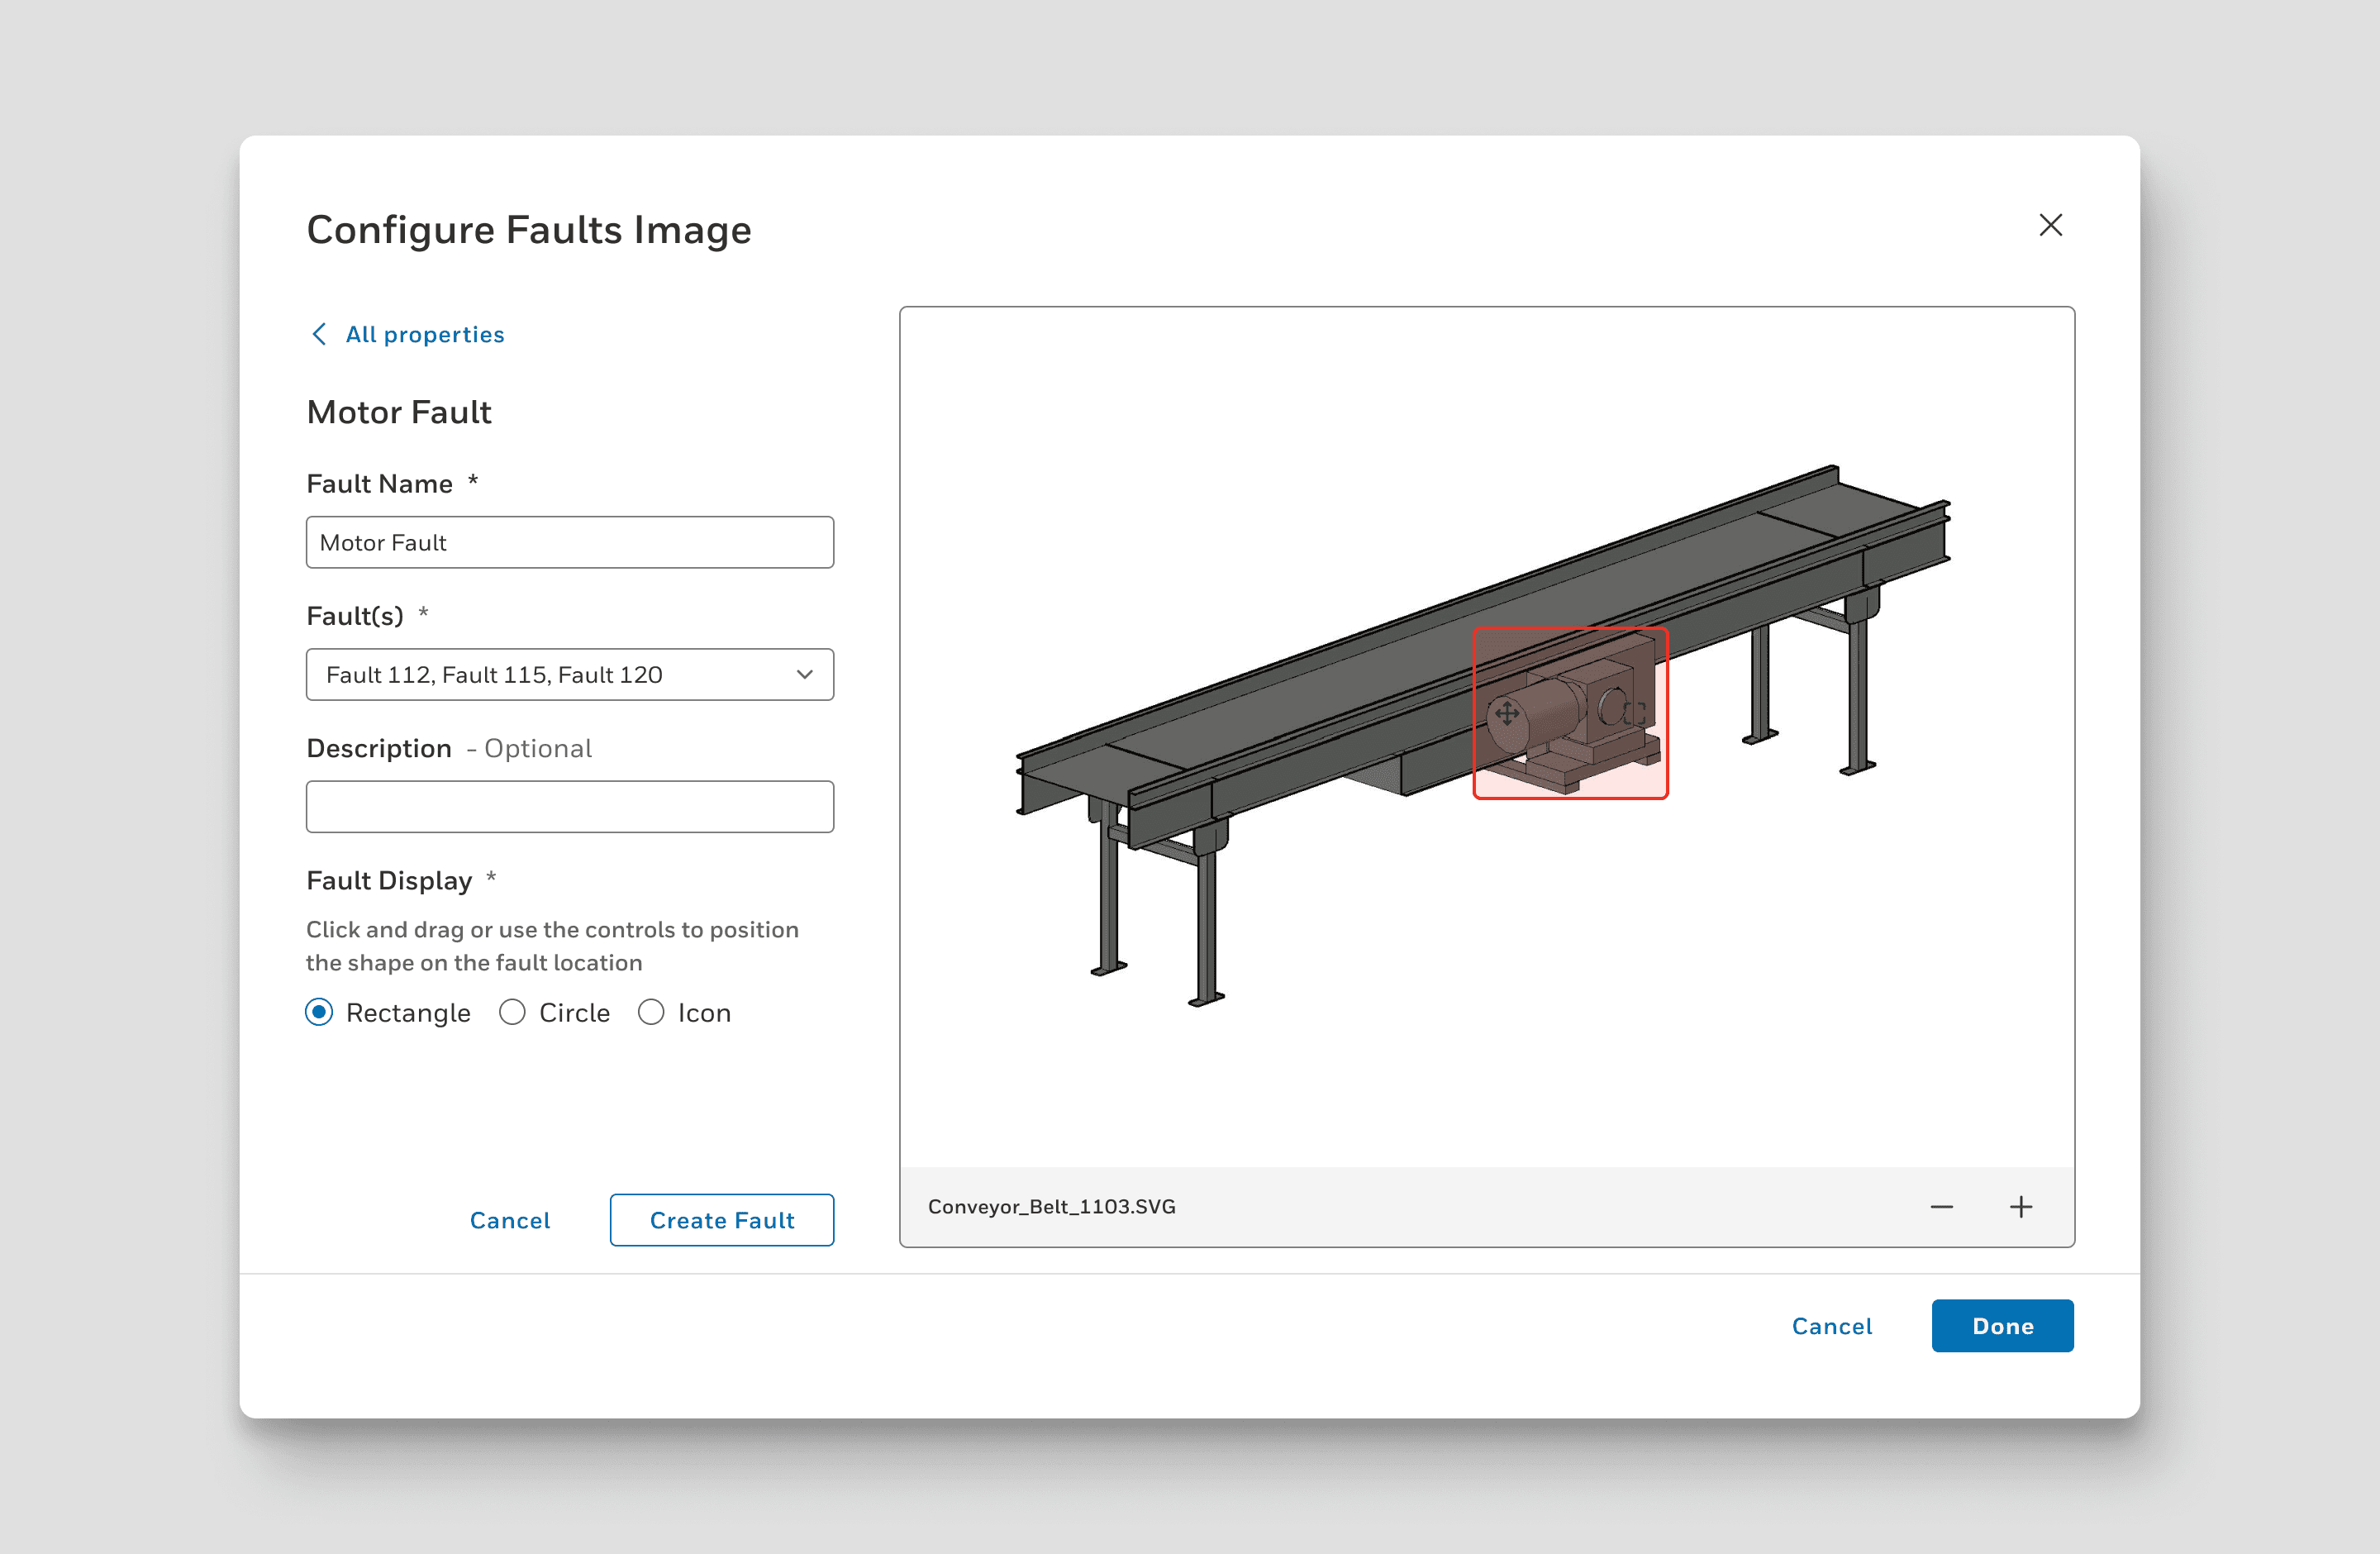
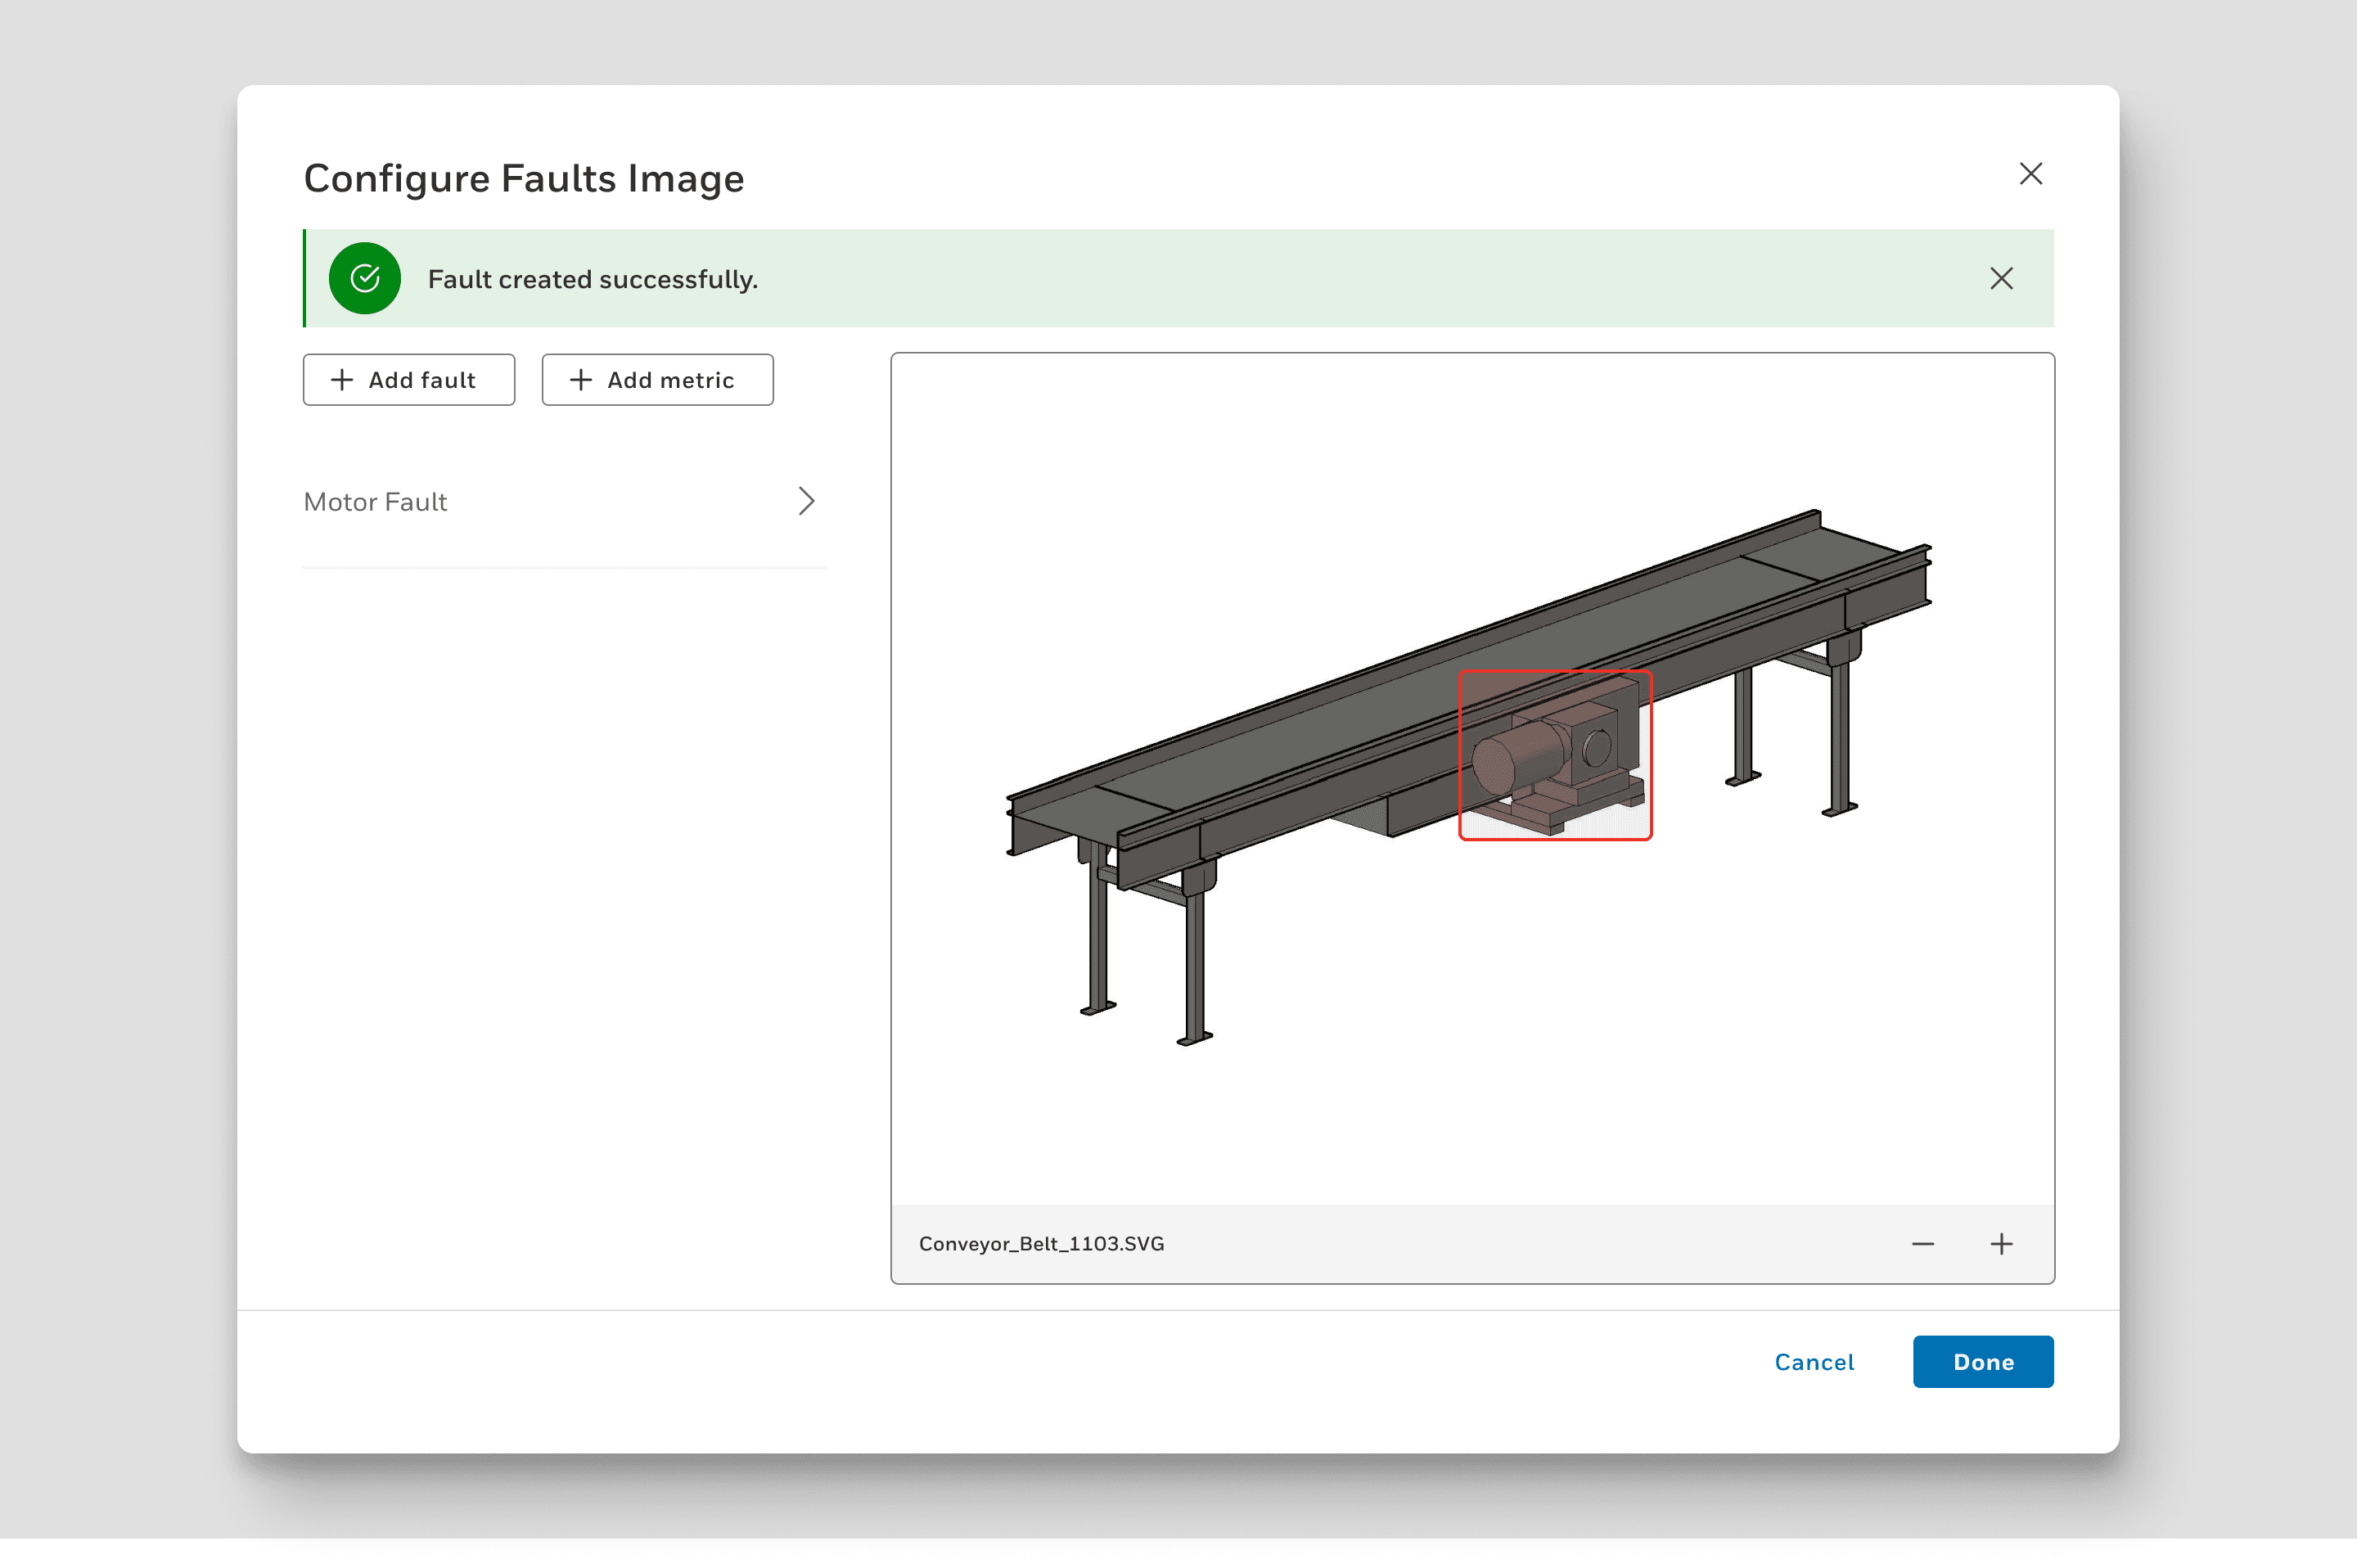
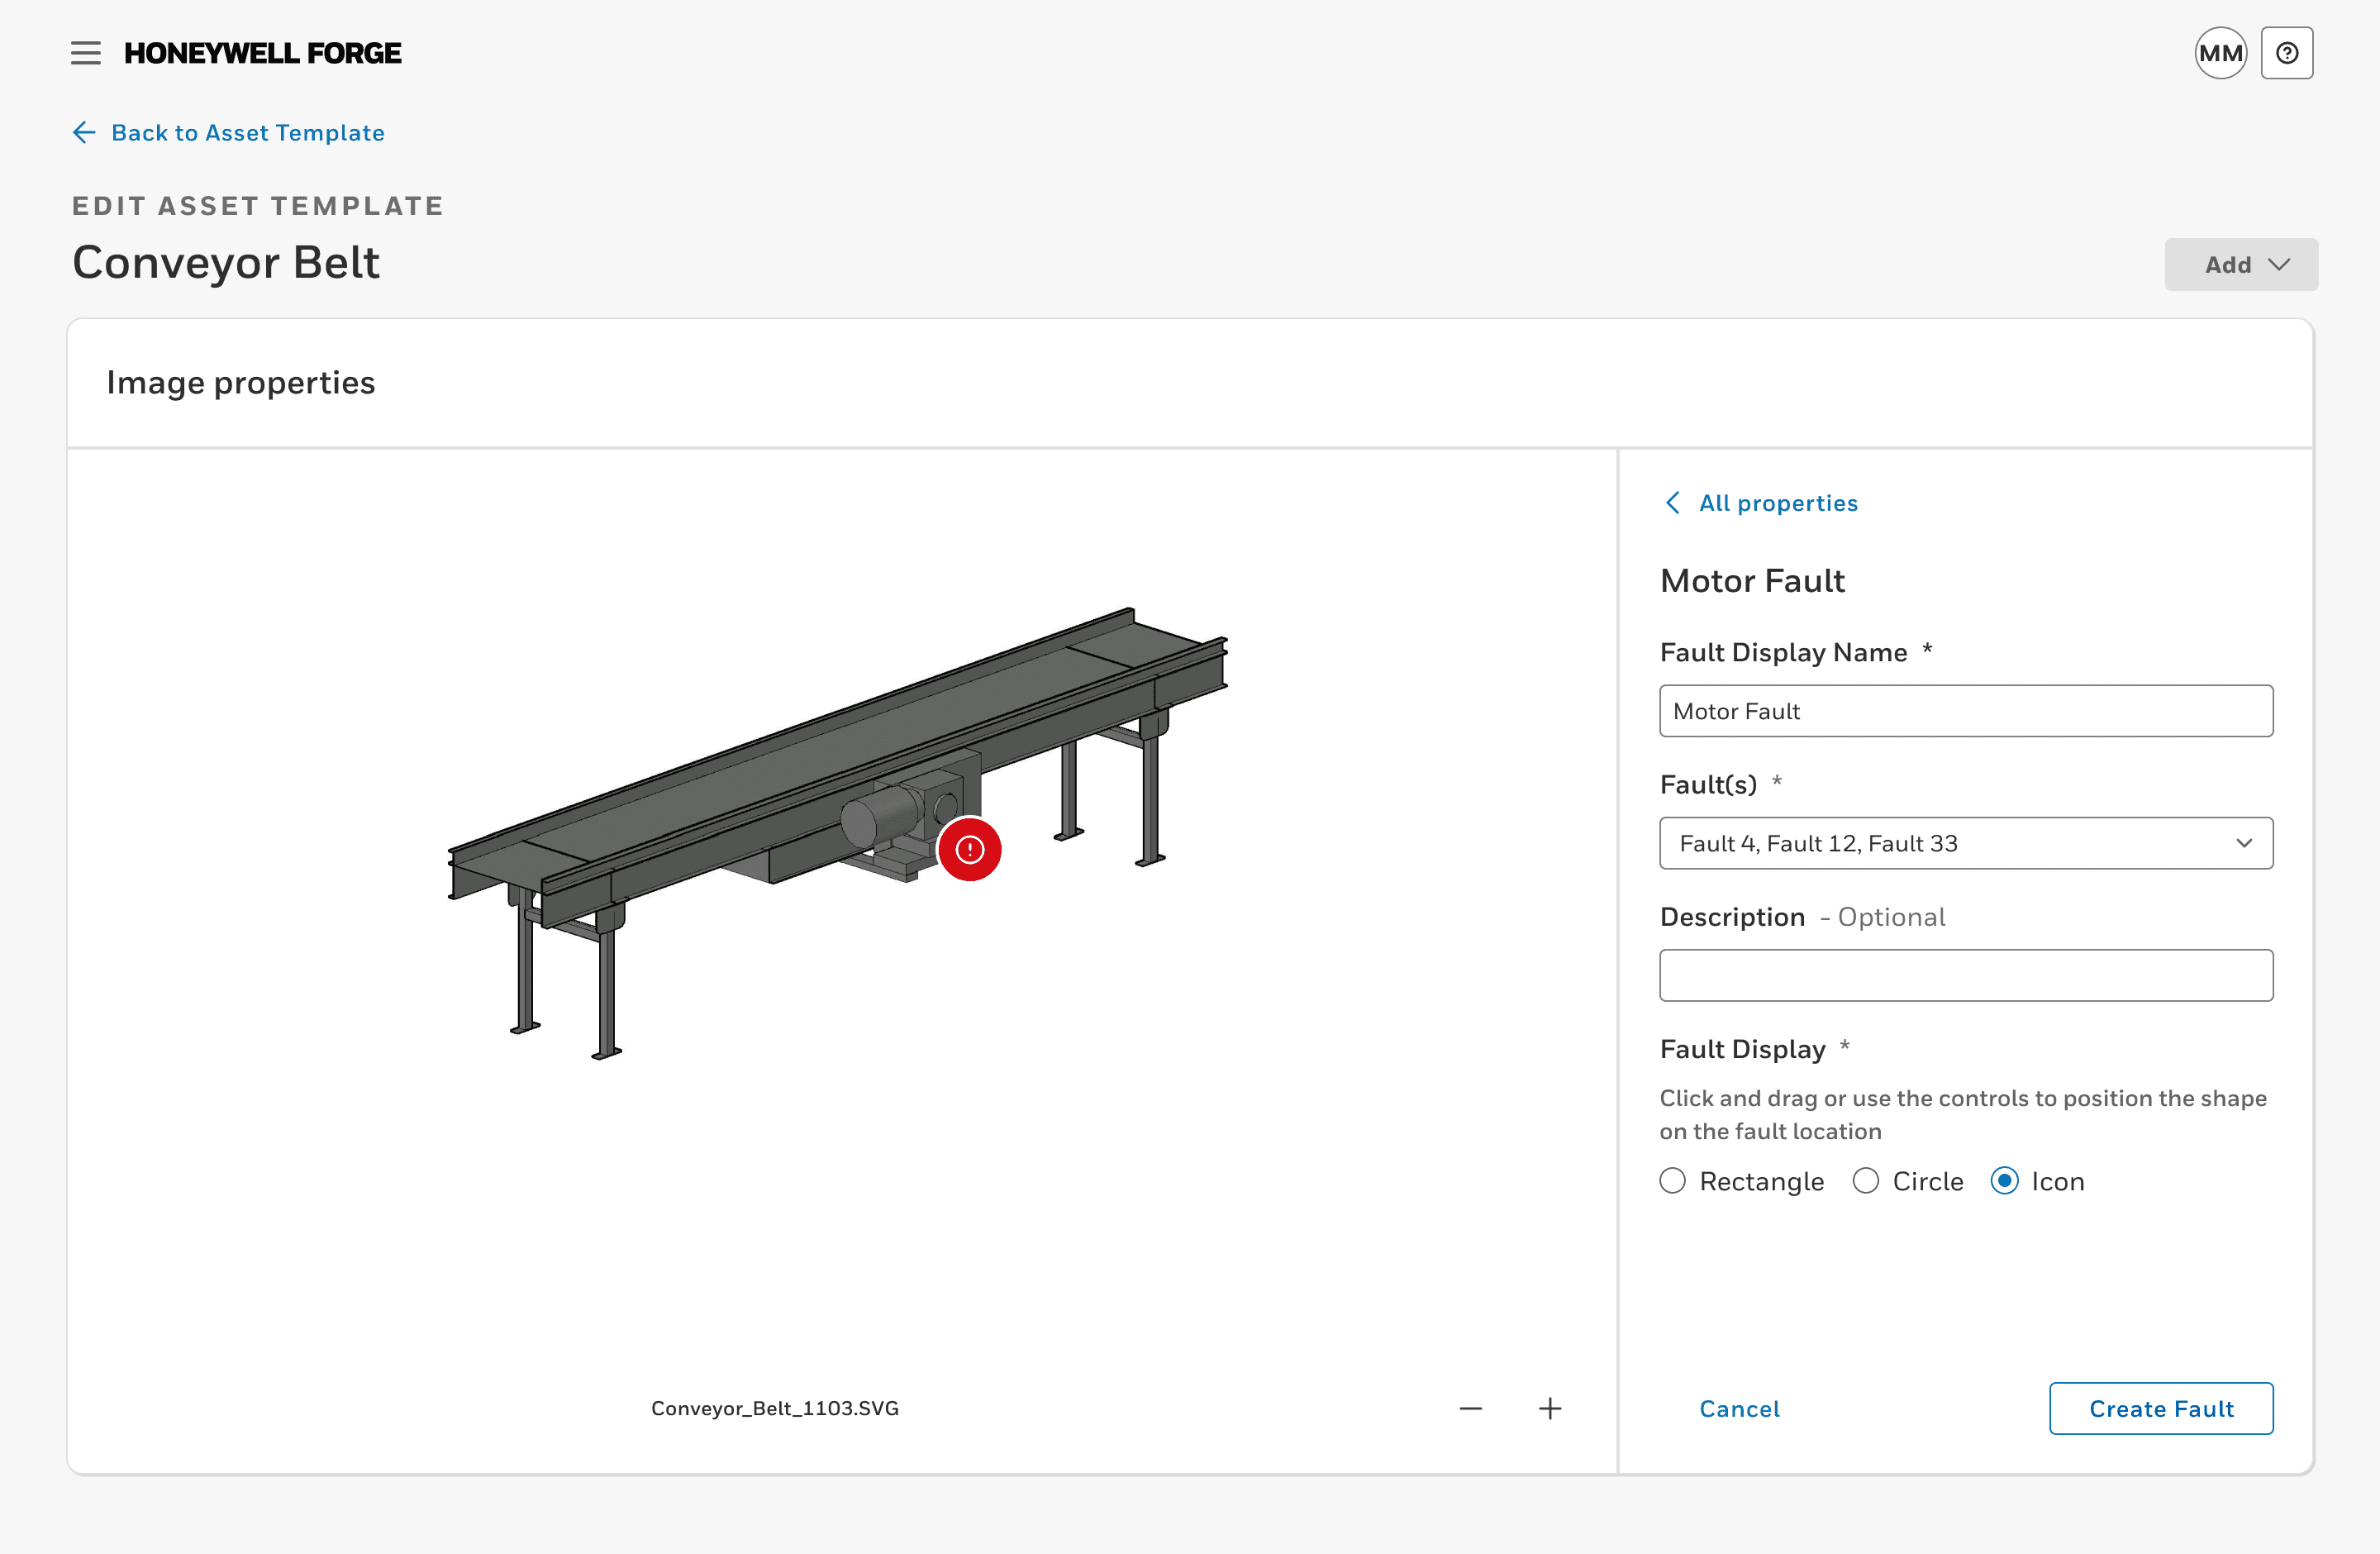
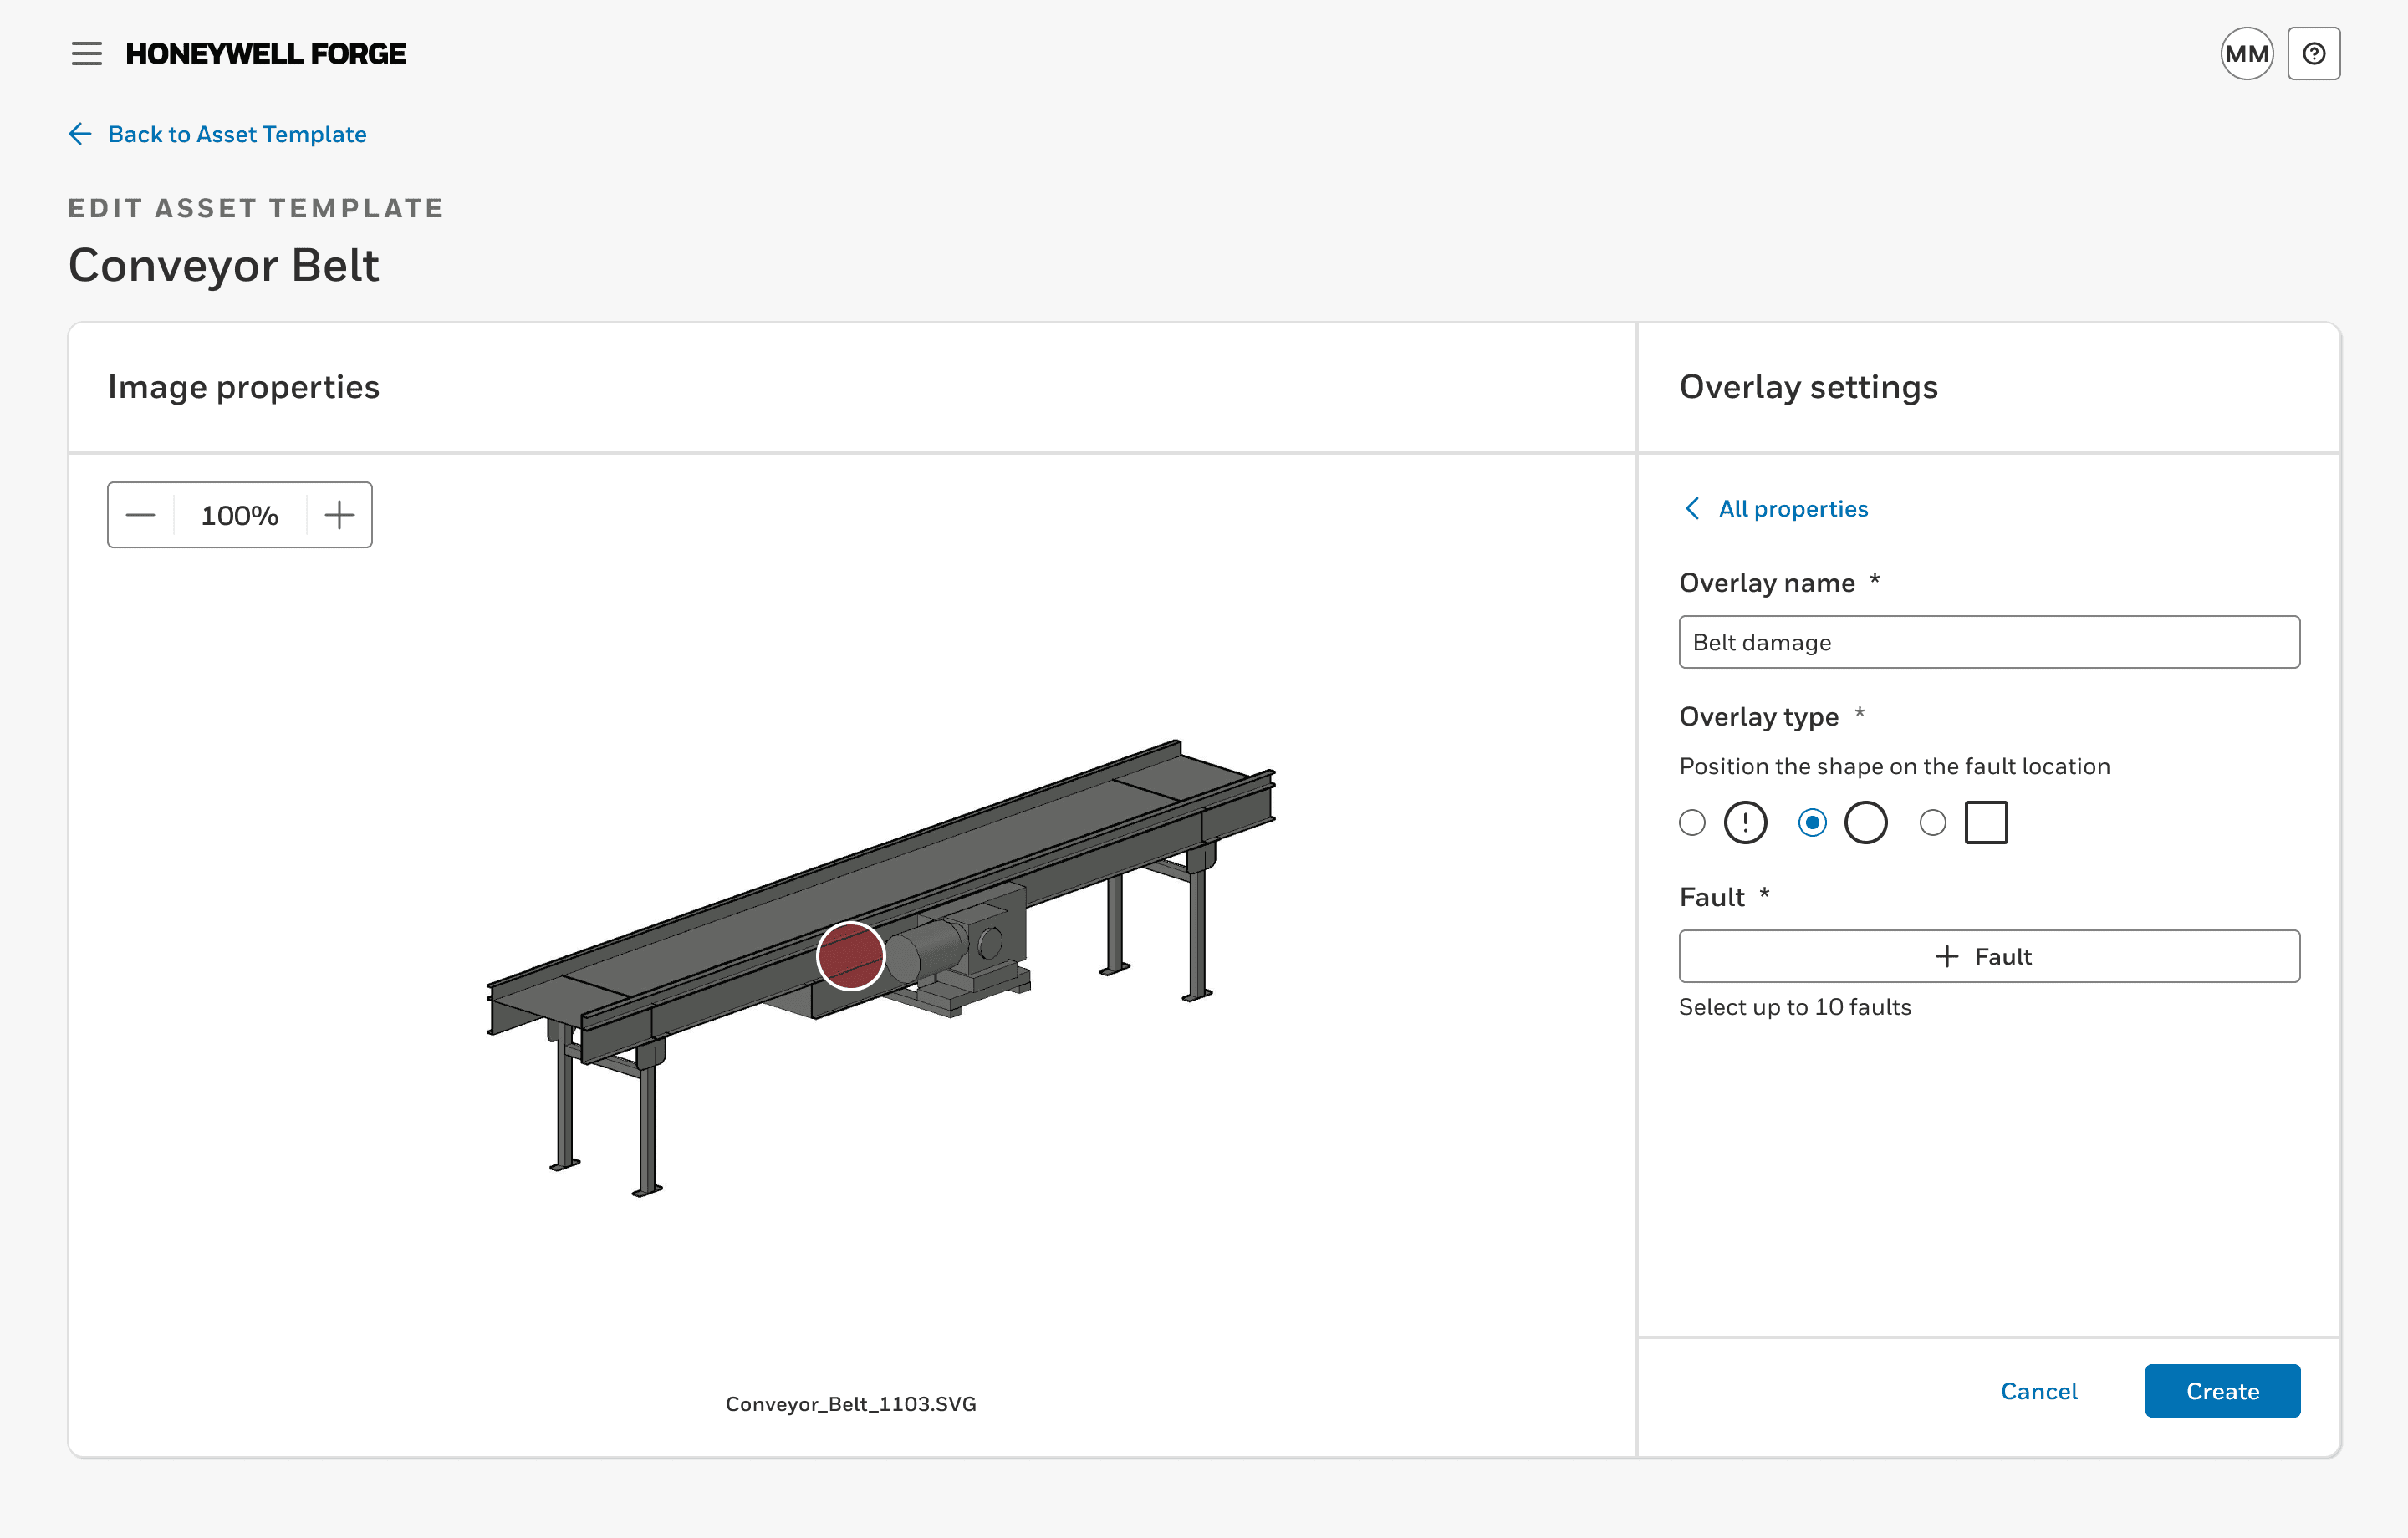
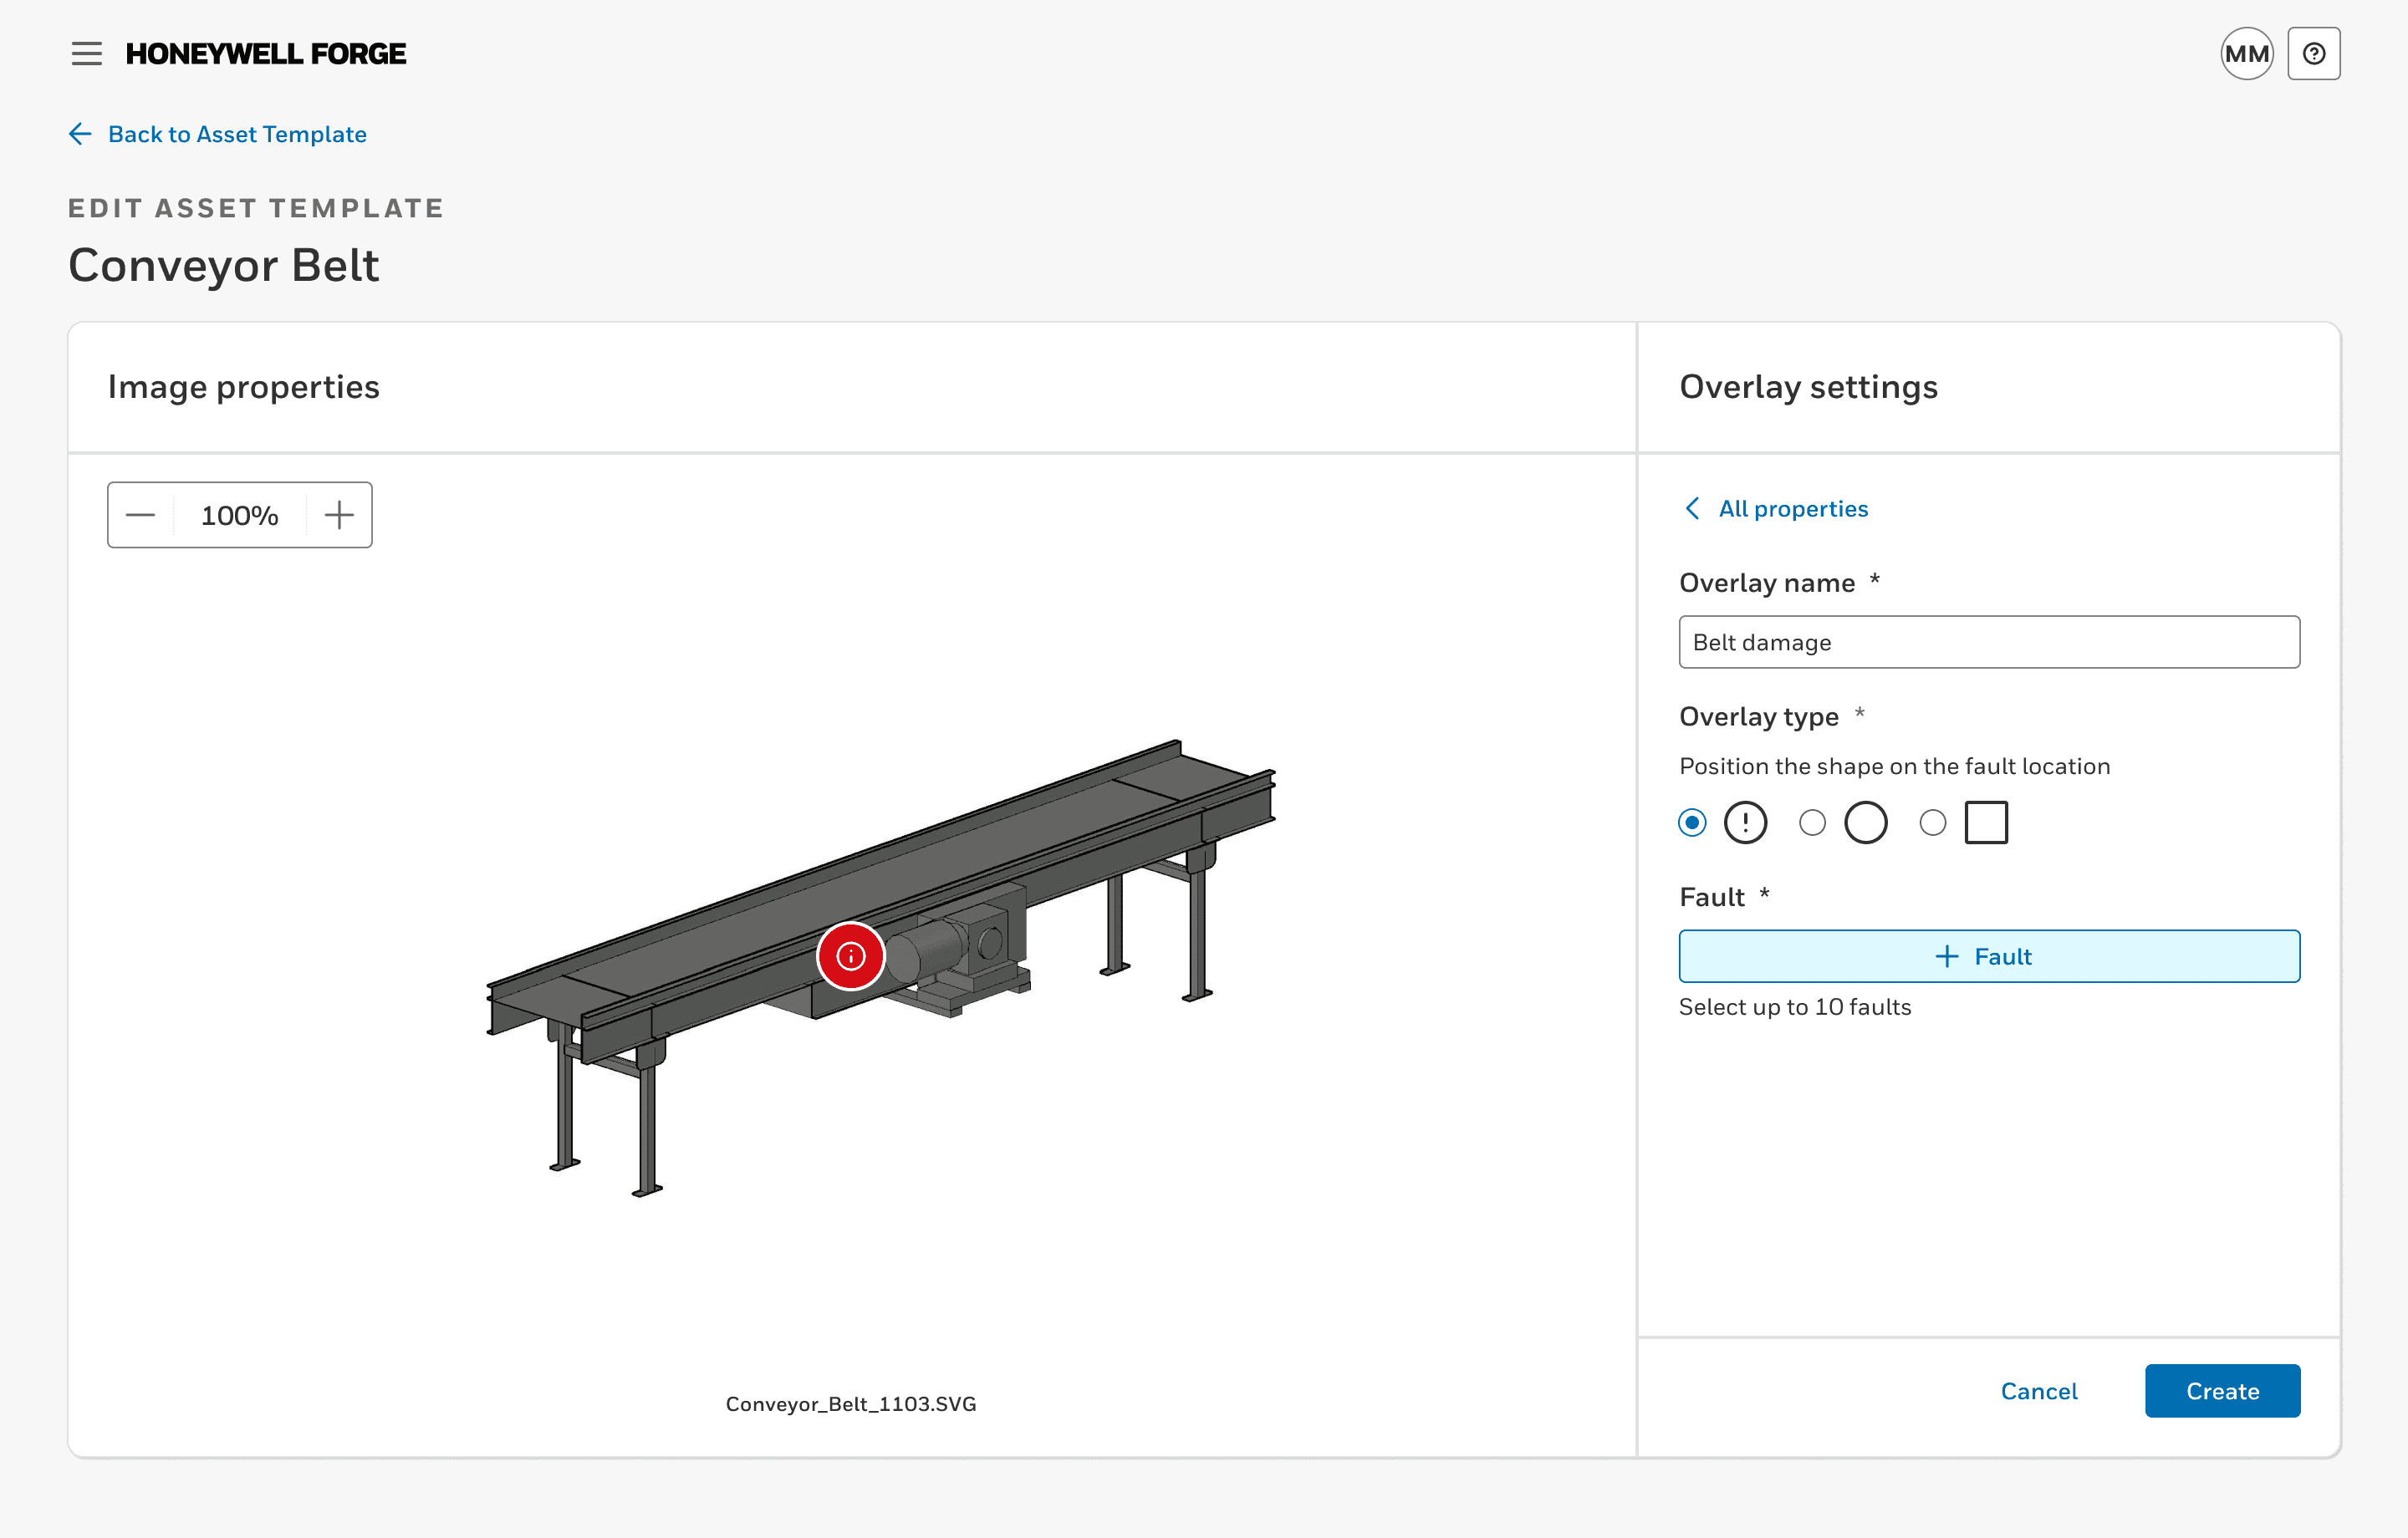
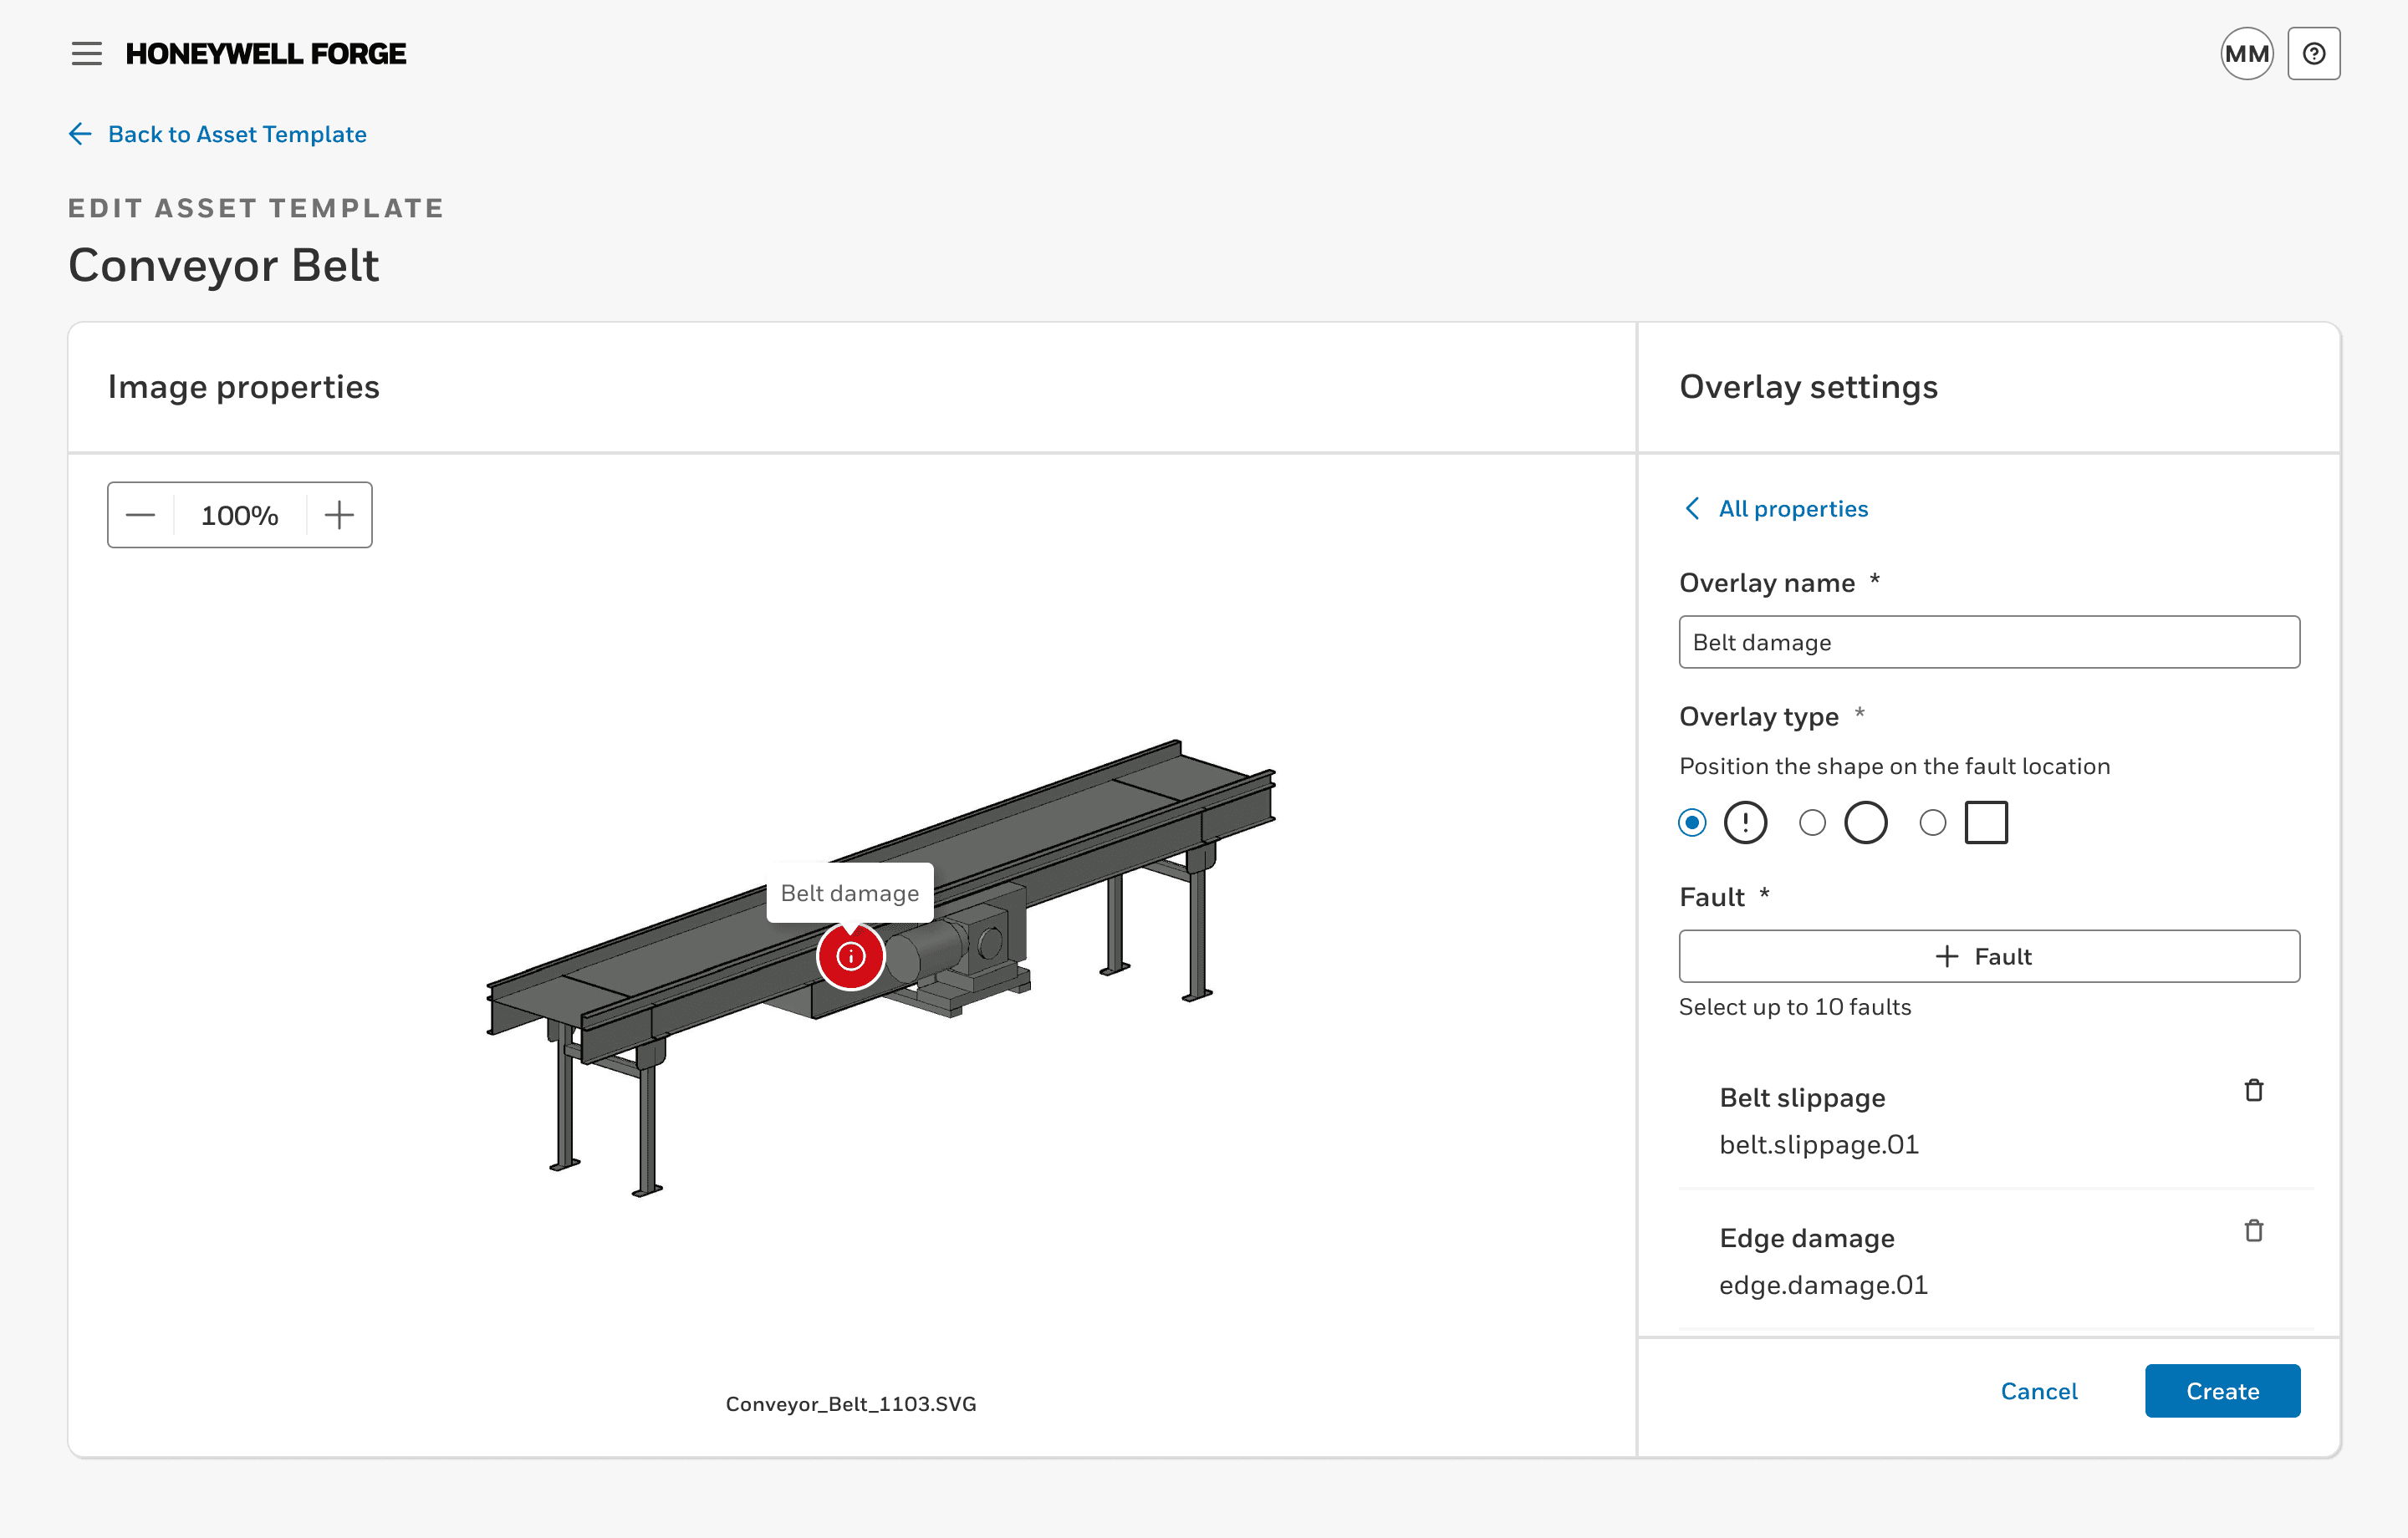
Task flow: Add a fault overlay to the image
After selecting 'Add fault', name the fault display in the form that opens
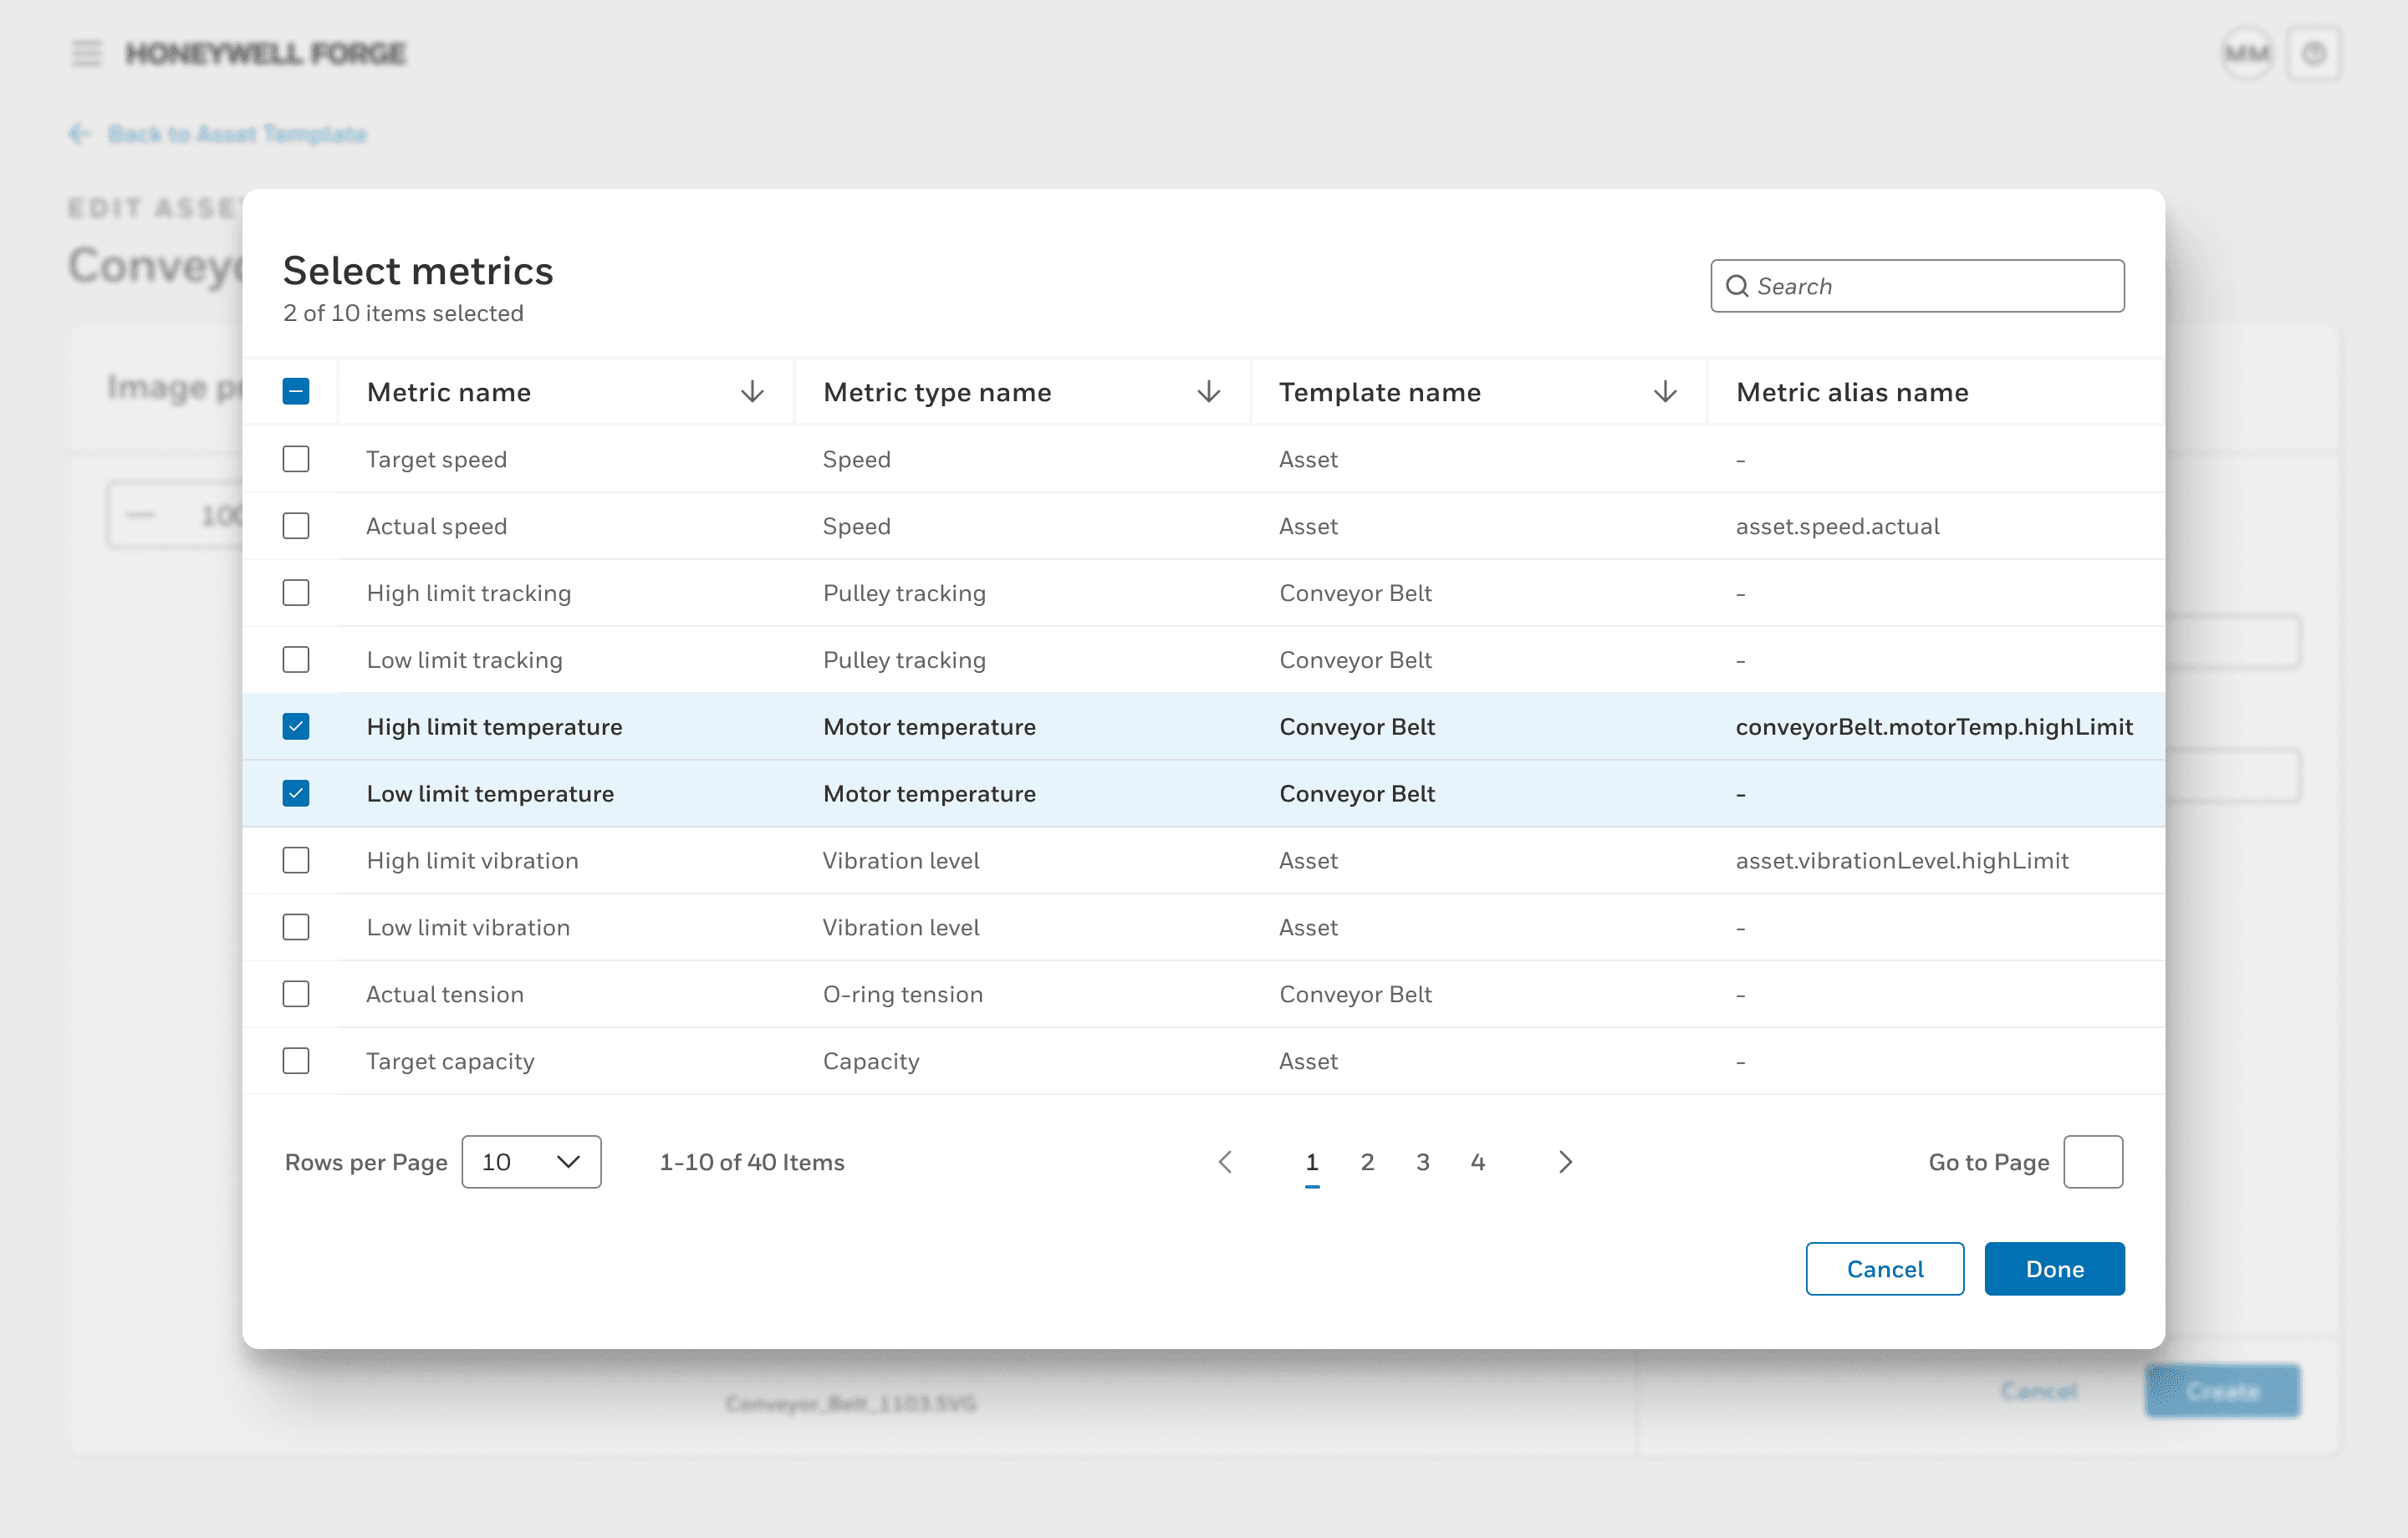
Select '+Faults' to open the modal, select applicable faults, then select 'Done'
Select '+Display' to add a new display for the fault (if needed), and re-position the display
Select 'Create' to be taken back to the original view

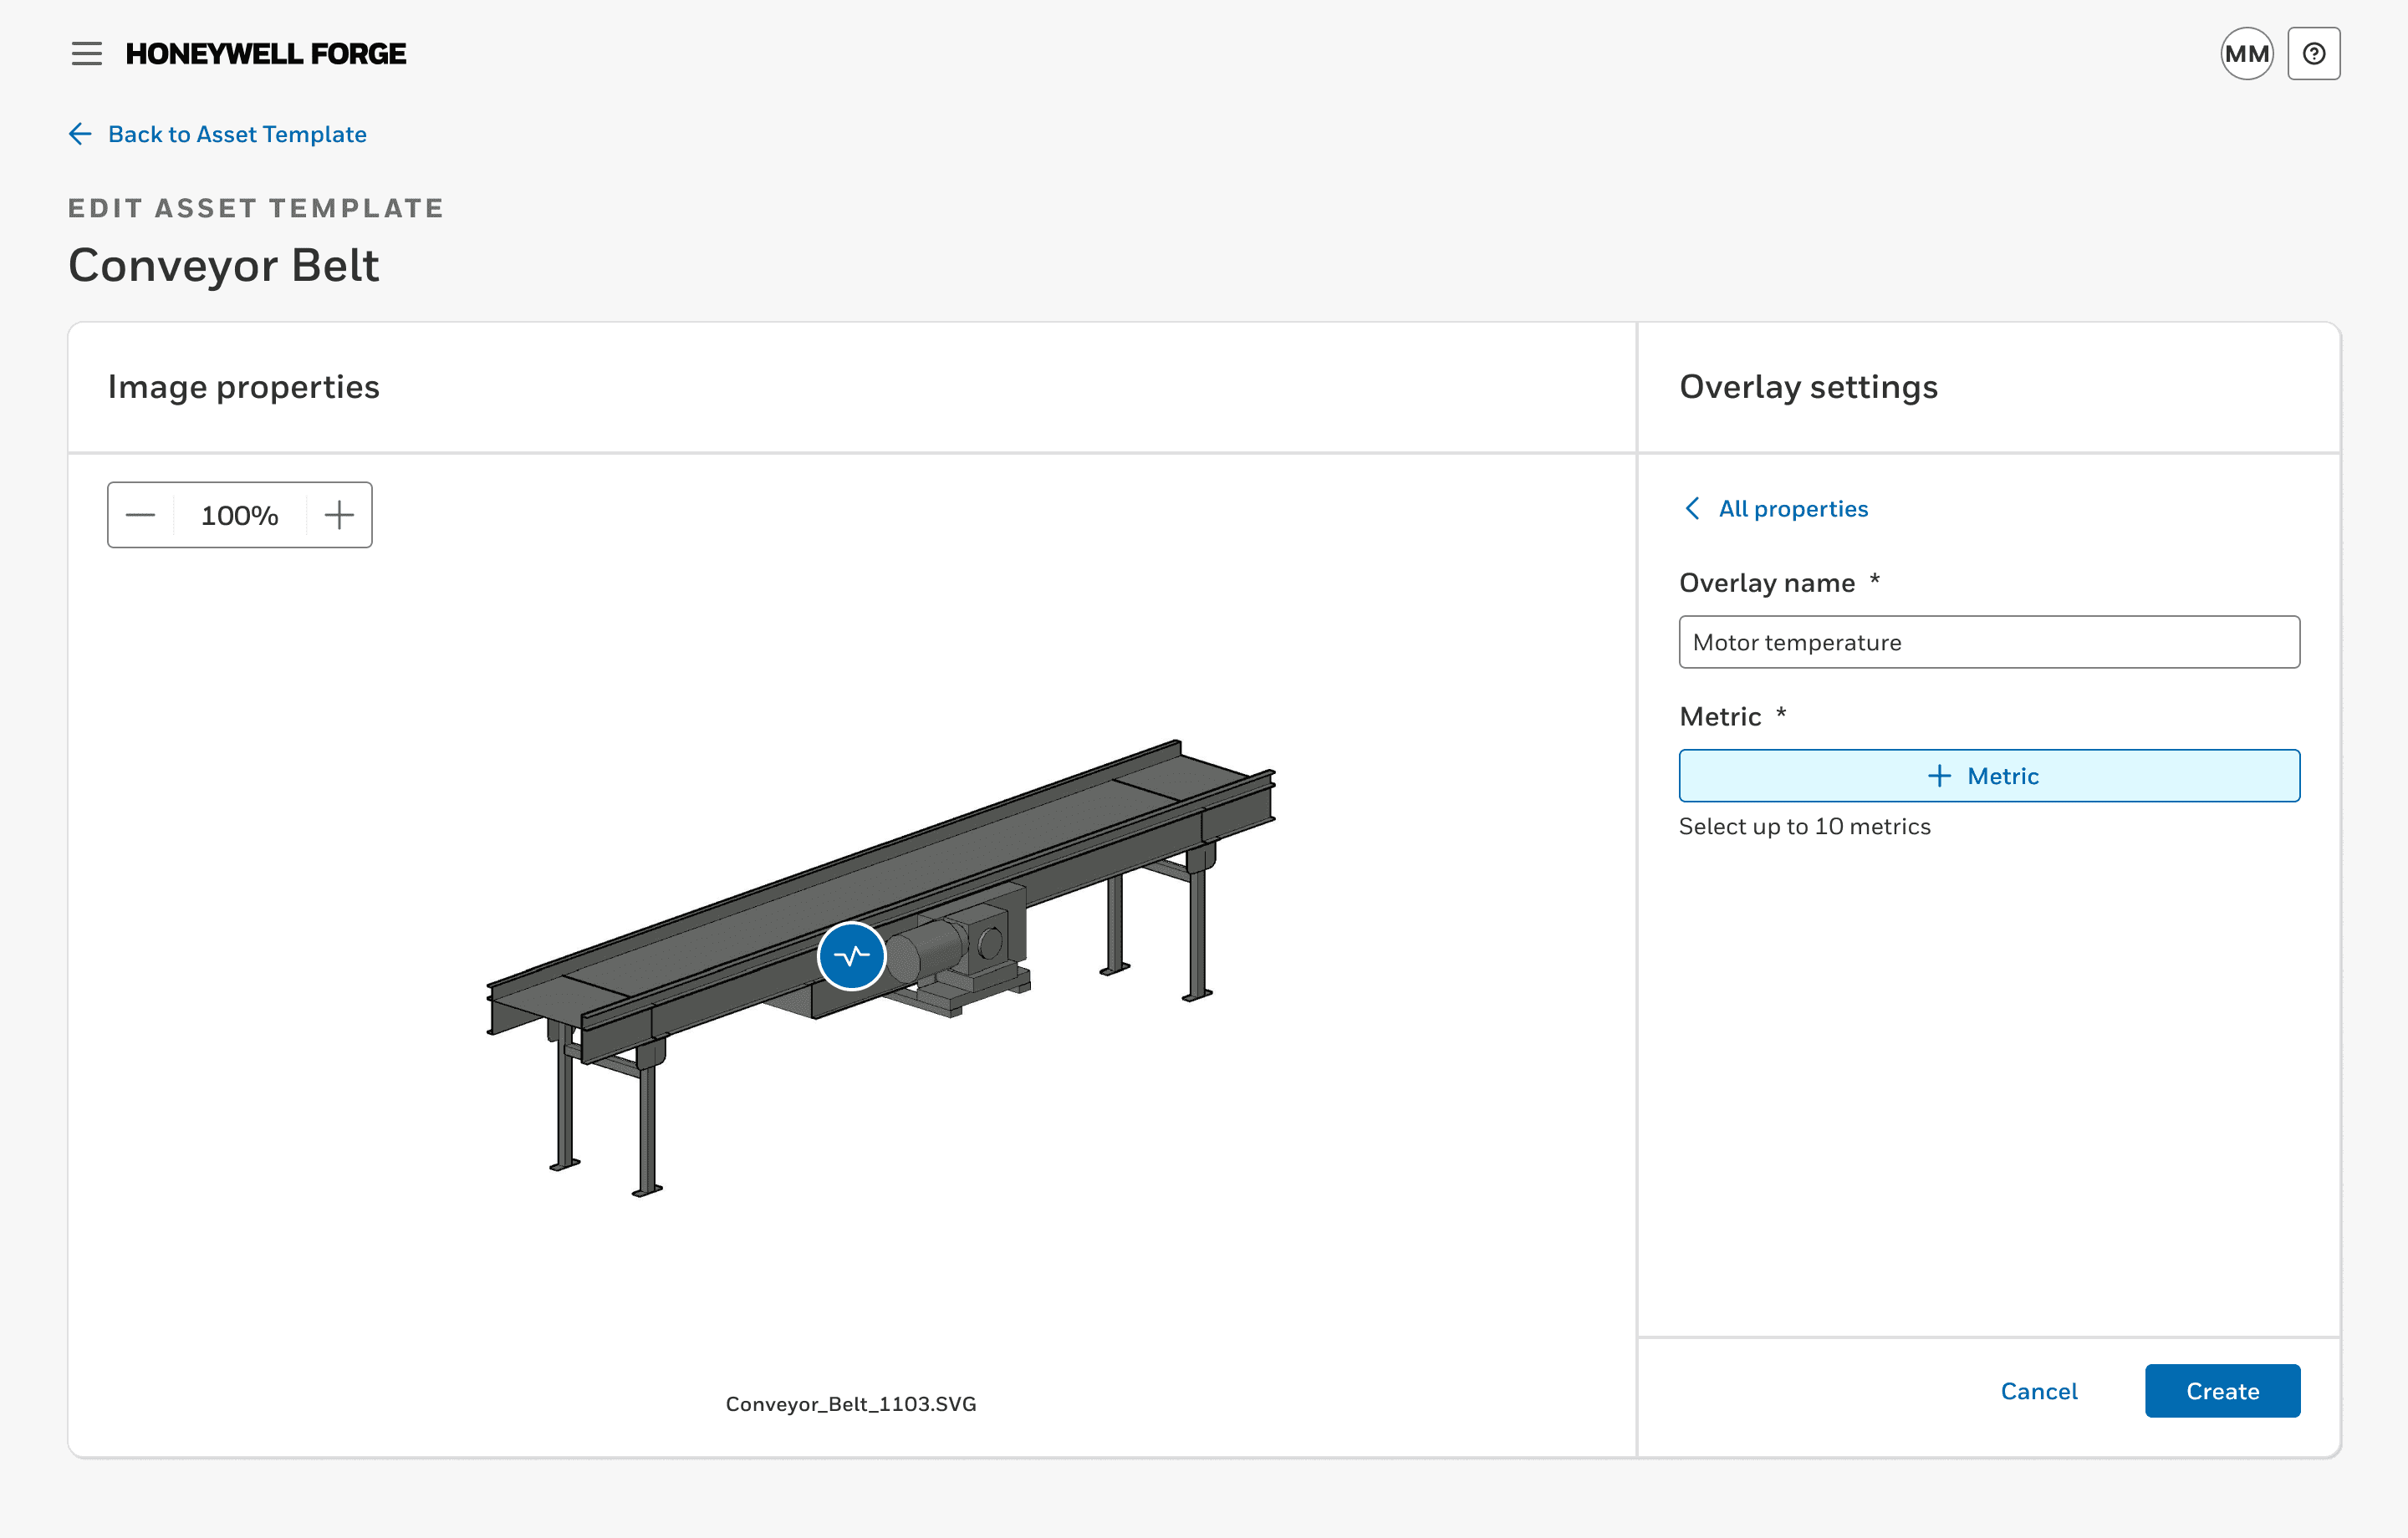
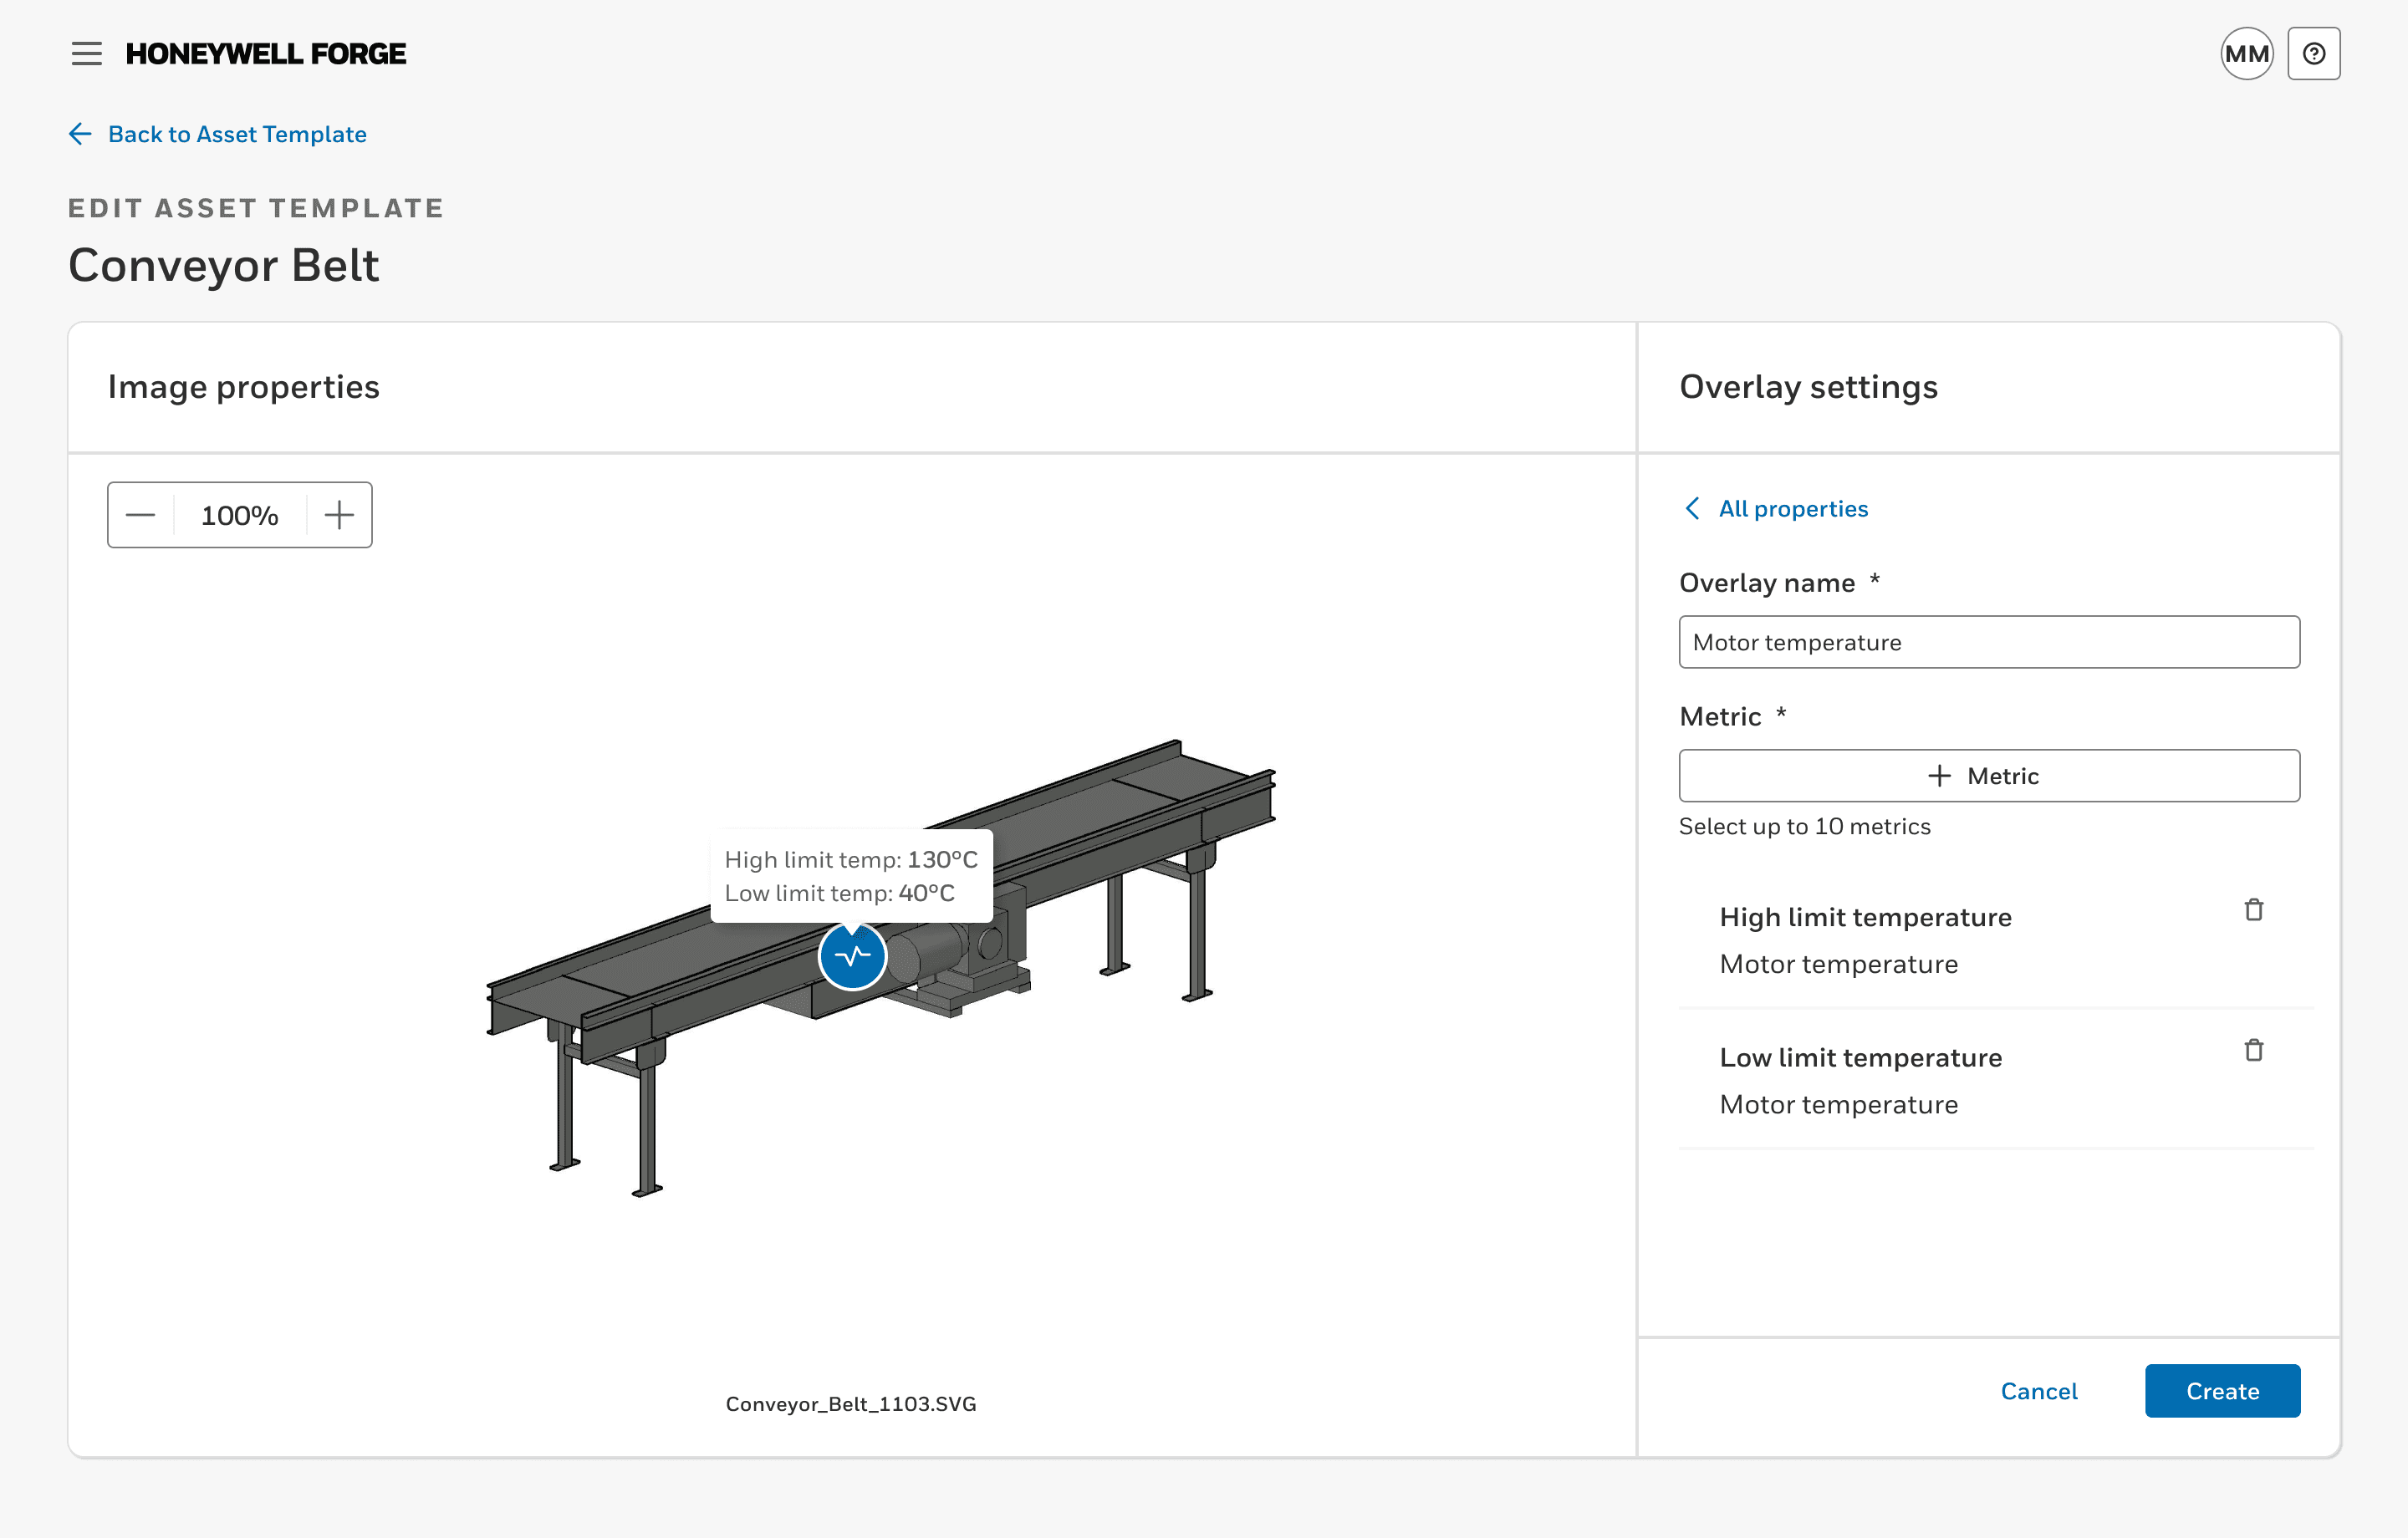
Task flow: Add a metric overlay to the image
Select 'Add metric' under the Display Settings
Name the metric display, and select the '+Metric' button
Select applicable metrics from the modal that appears and select 'Done'
Select 'Create' to be taken back to the original view
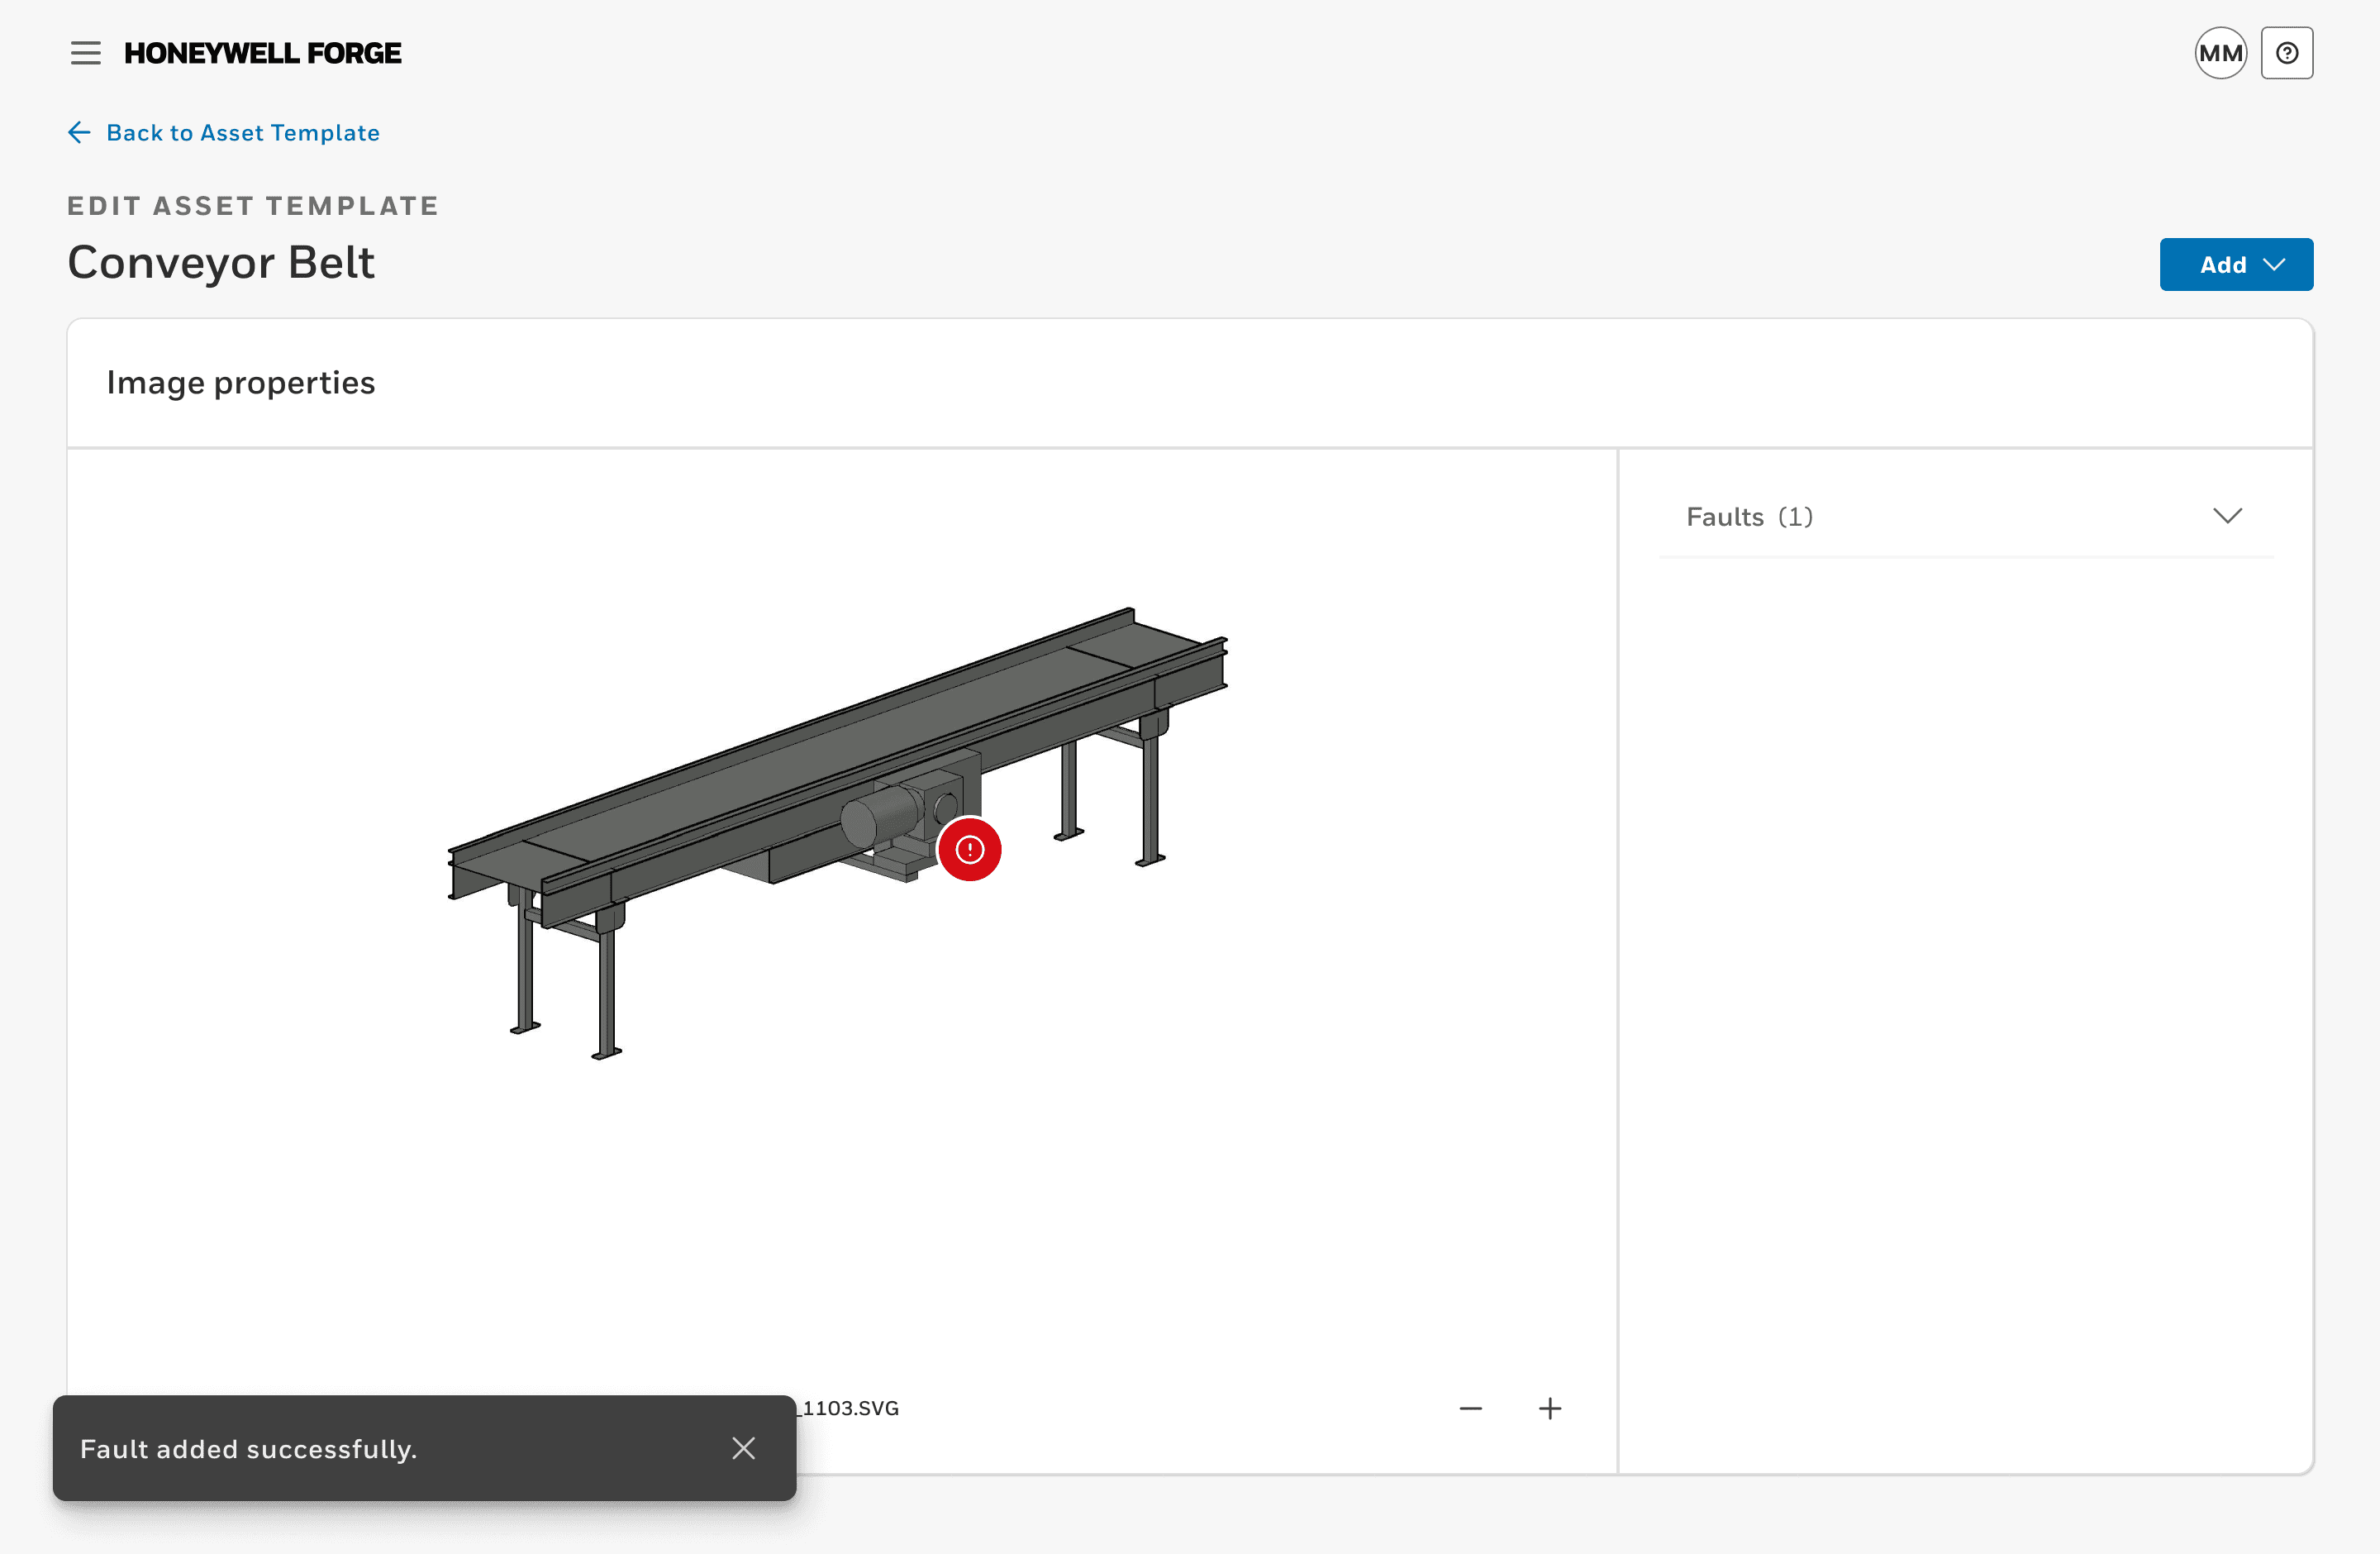
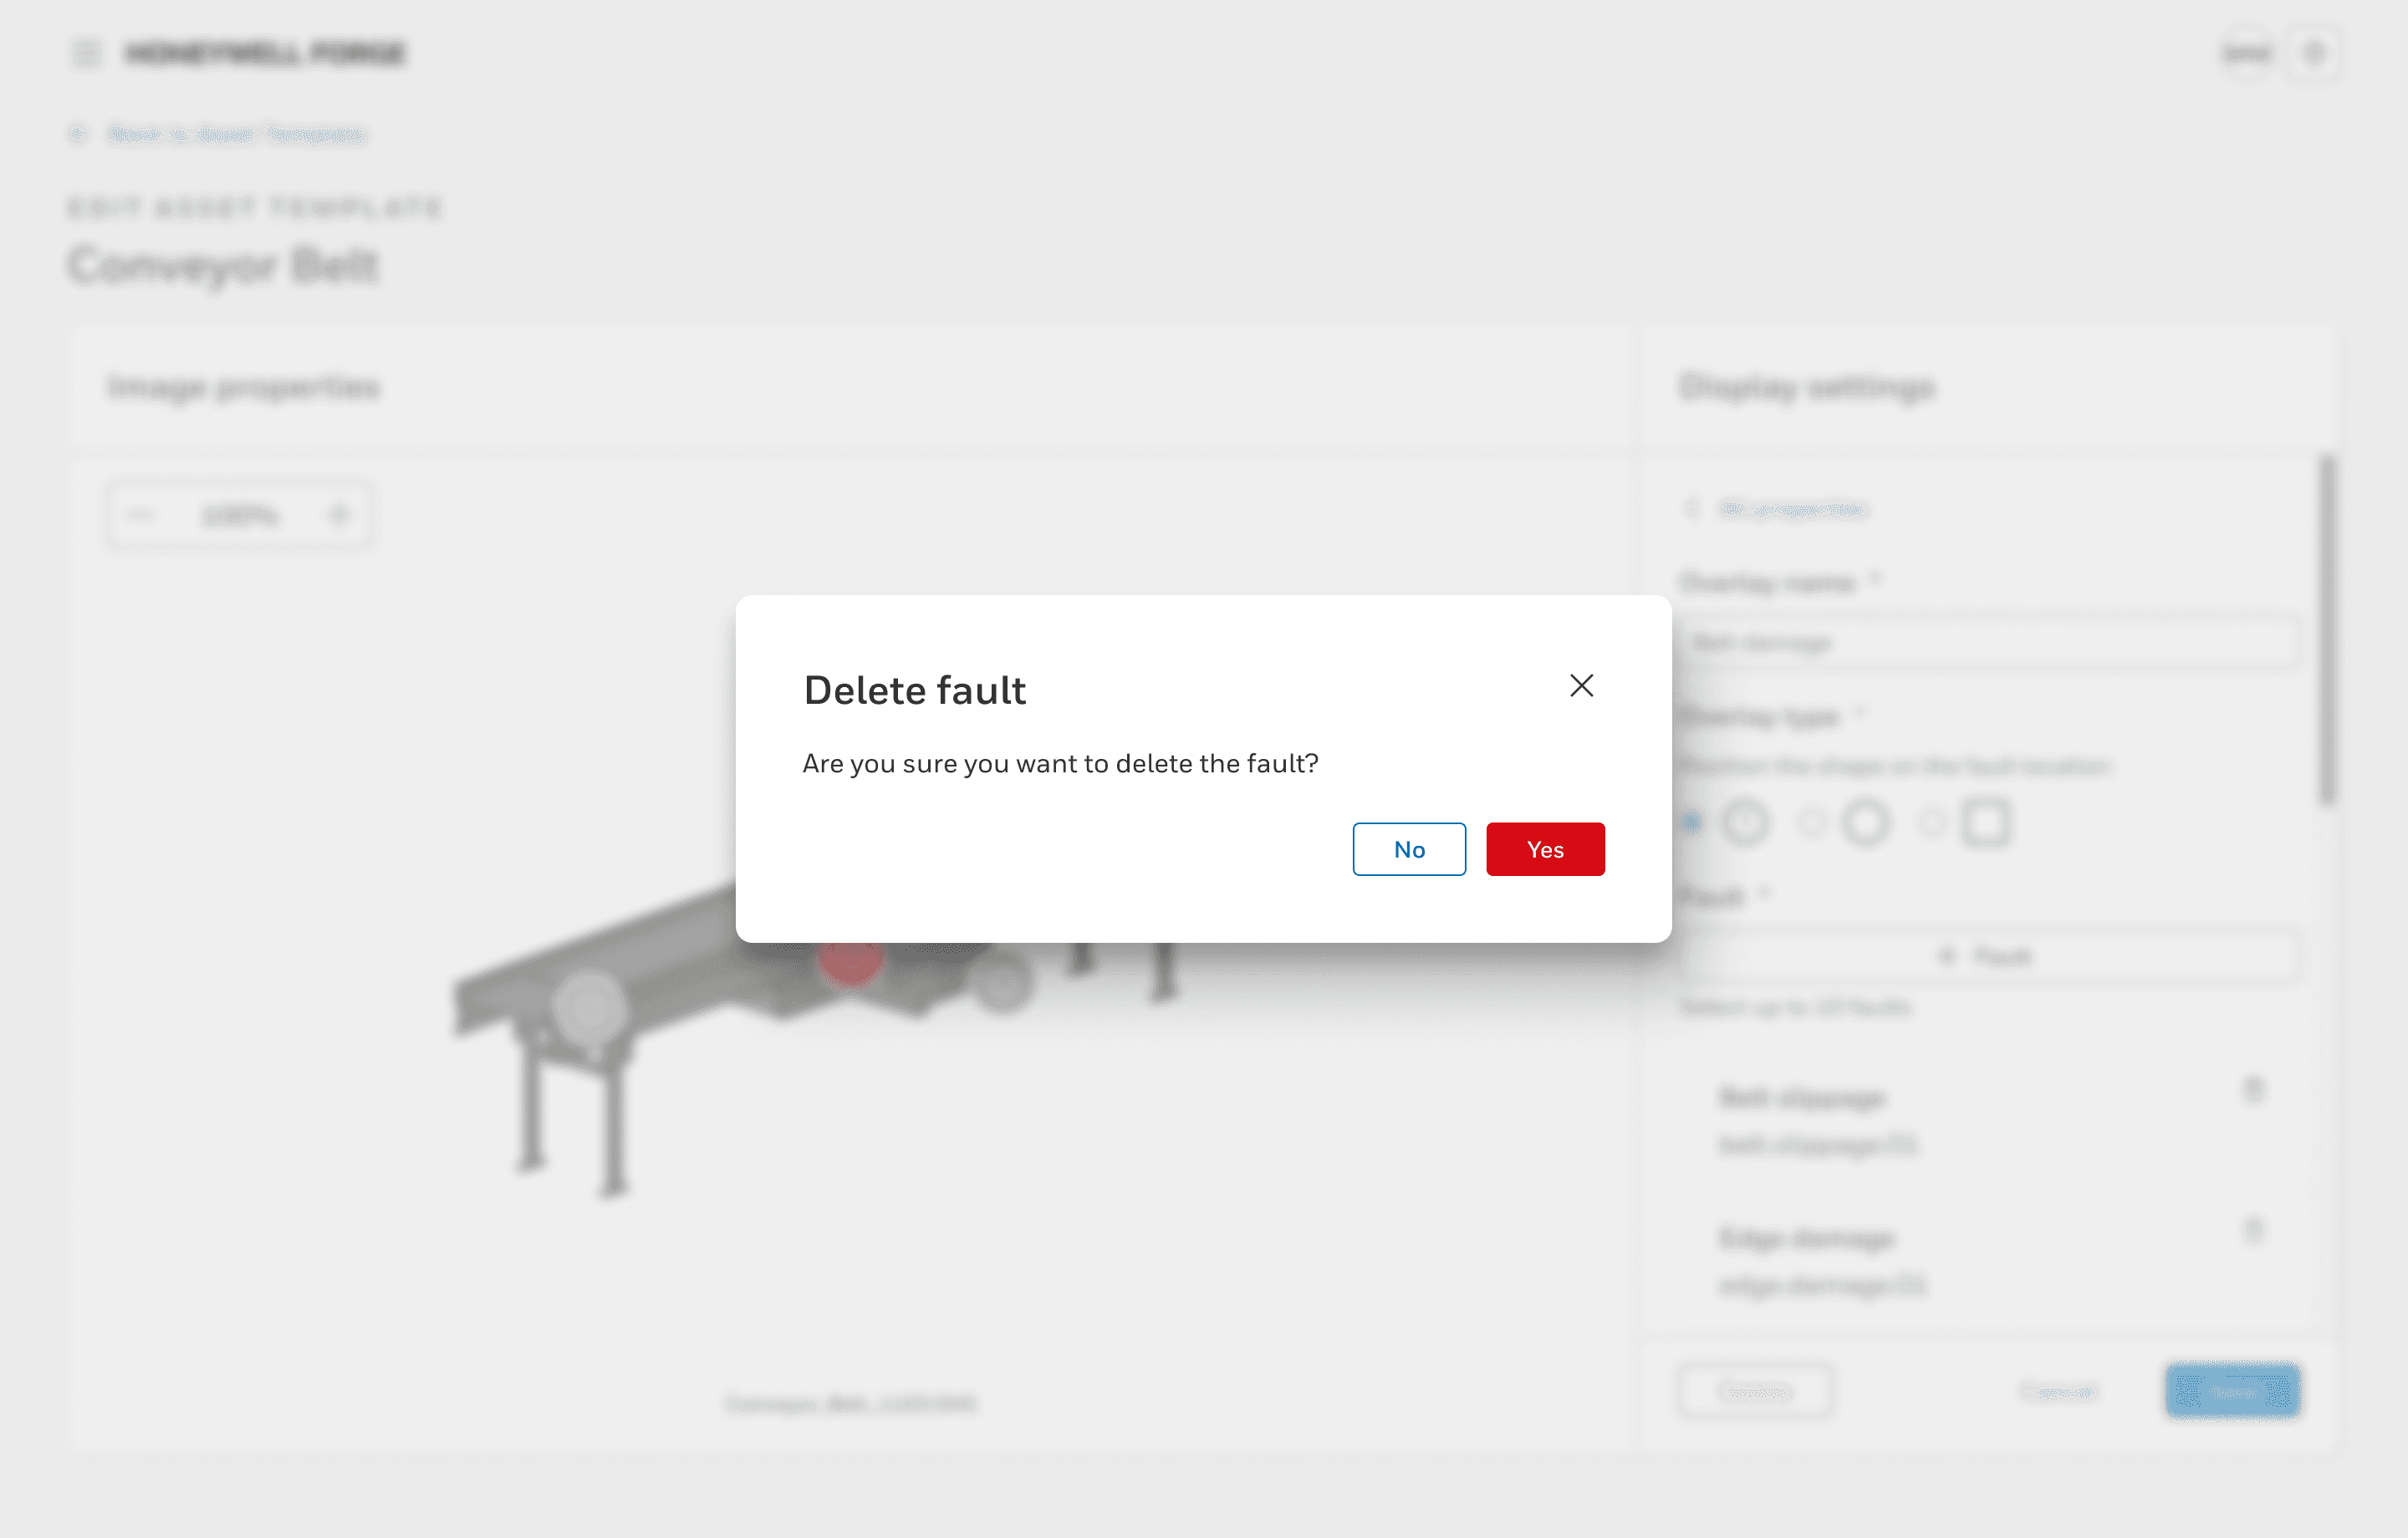
Task flow: Edit or delete created overlays
Select the edit icon on fault or metric that needs to be modified
Select 'Delete' in the button group of the overlay
Select 'Yes' on the confirmation modal
The overlay is deleted on the image properties page
Note: For editing, the user would make their edits then select 'Save'.
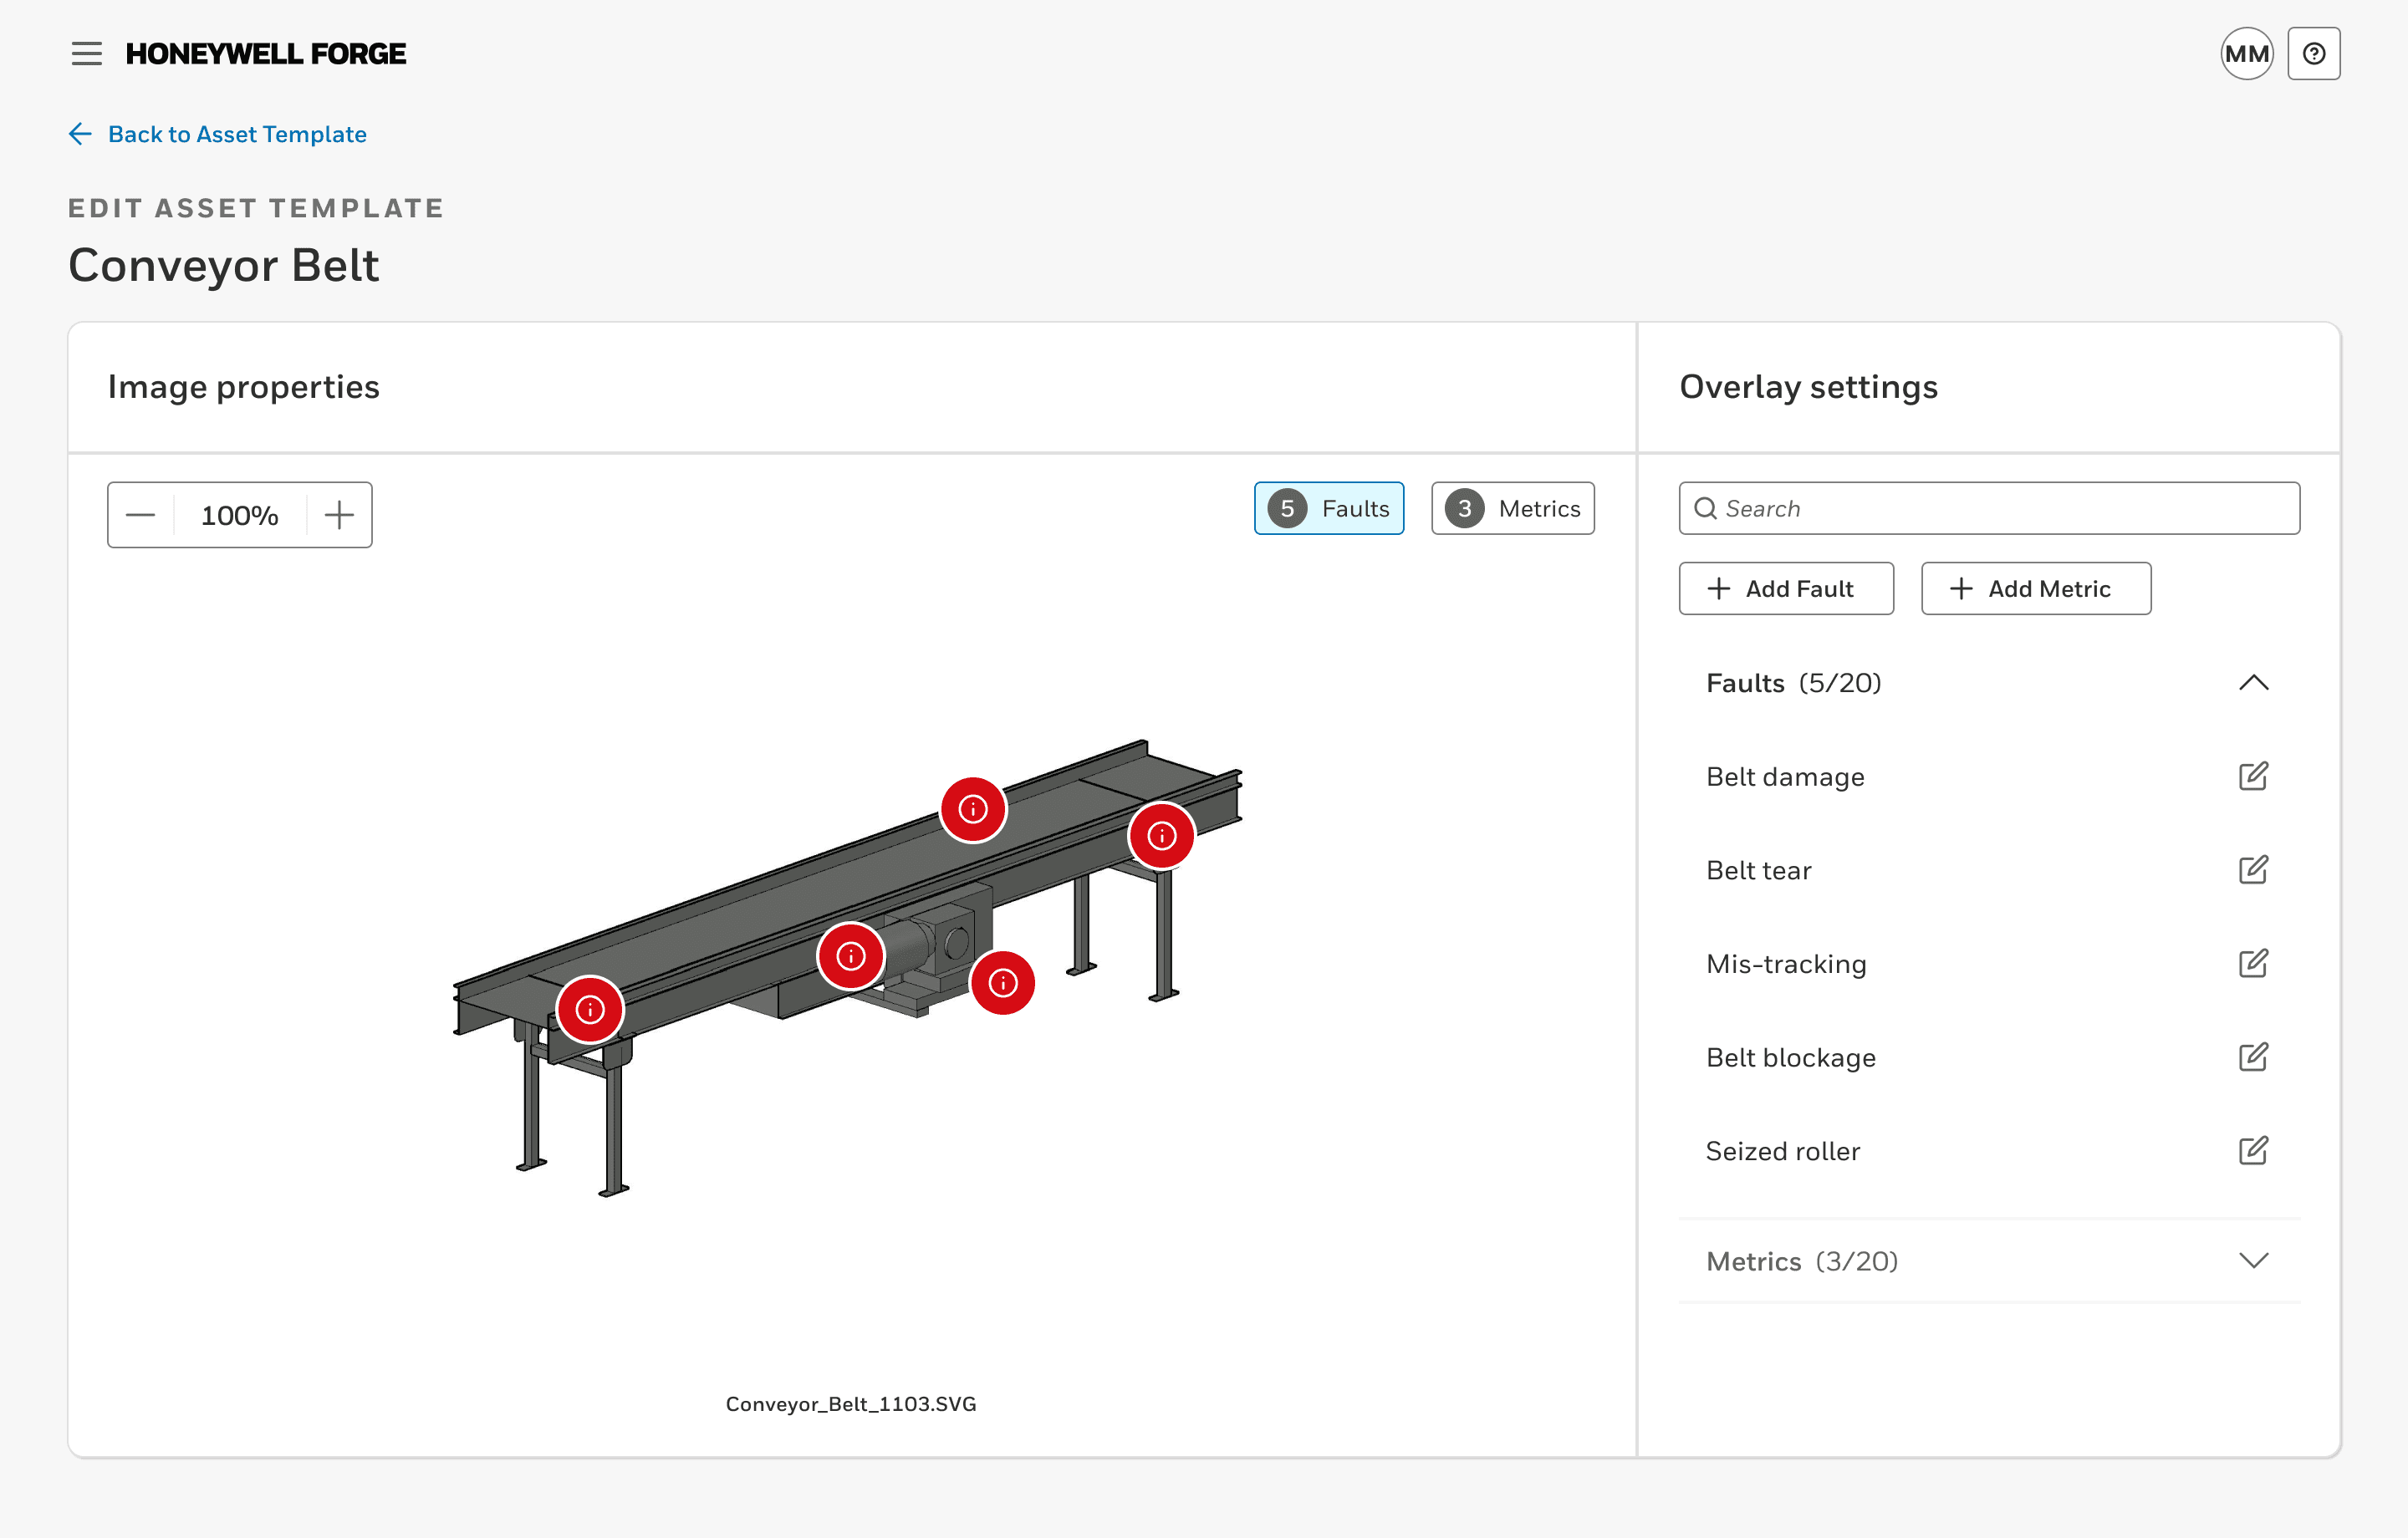


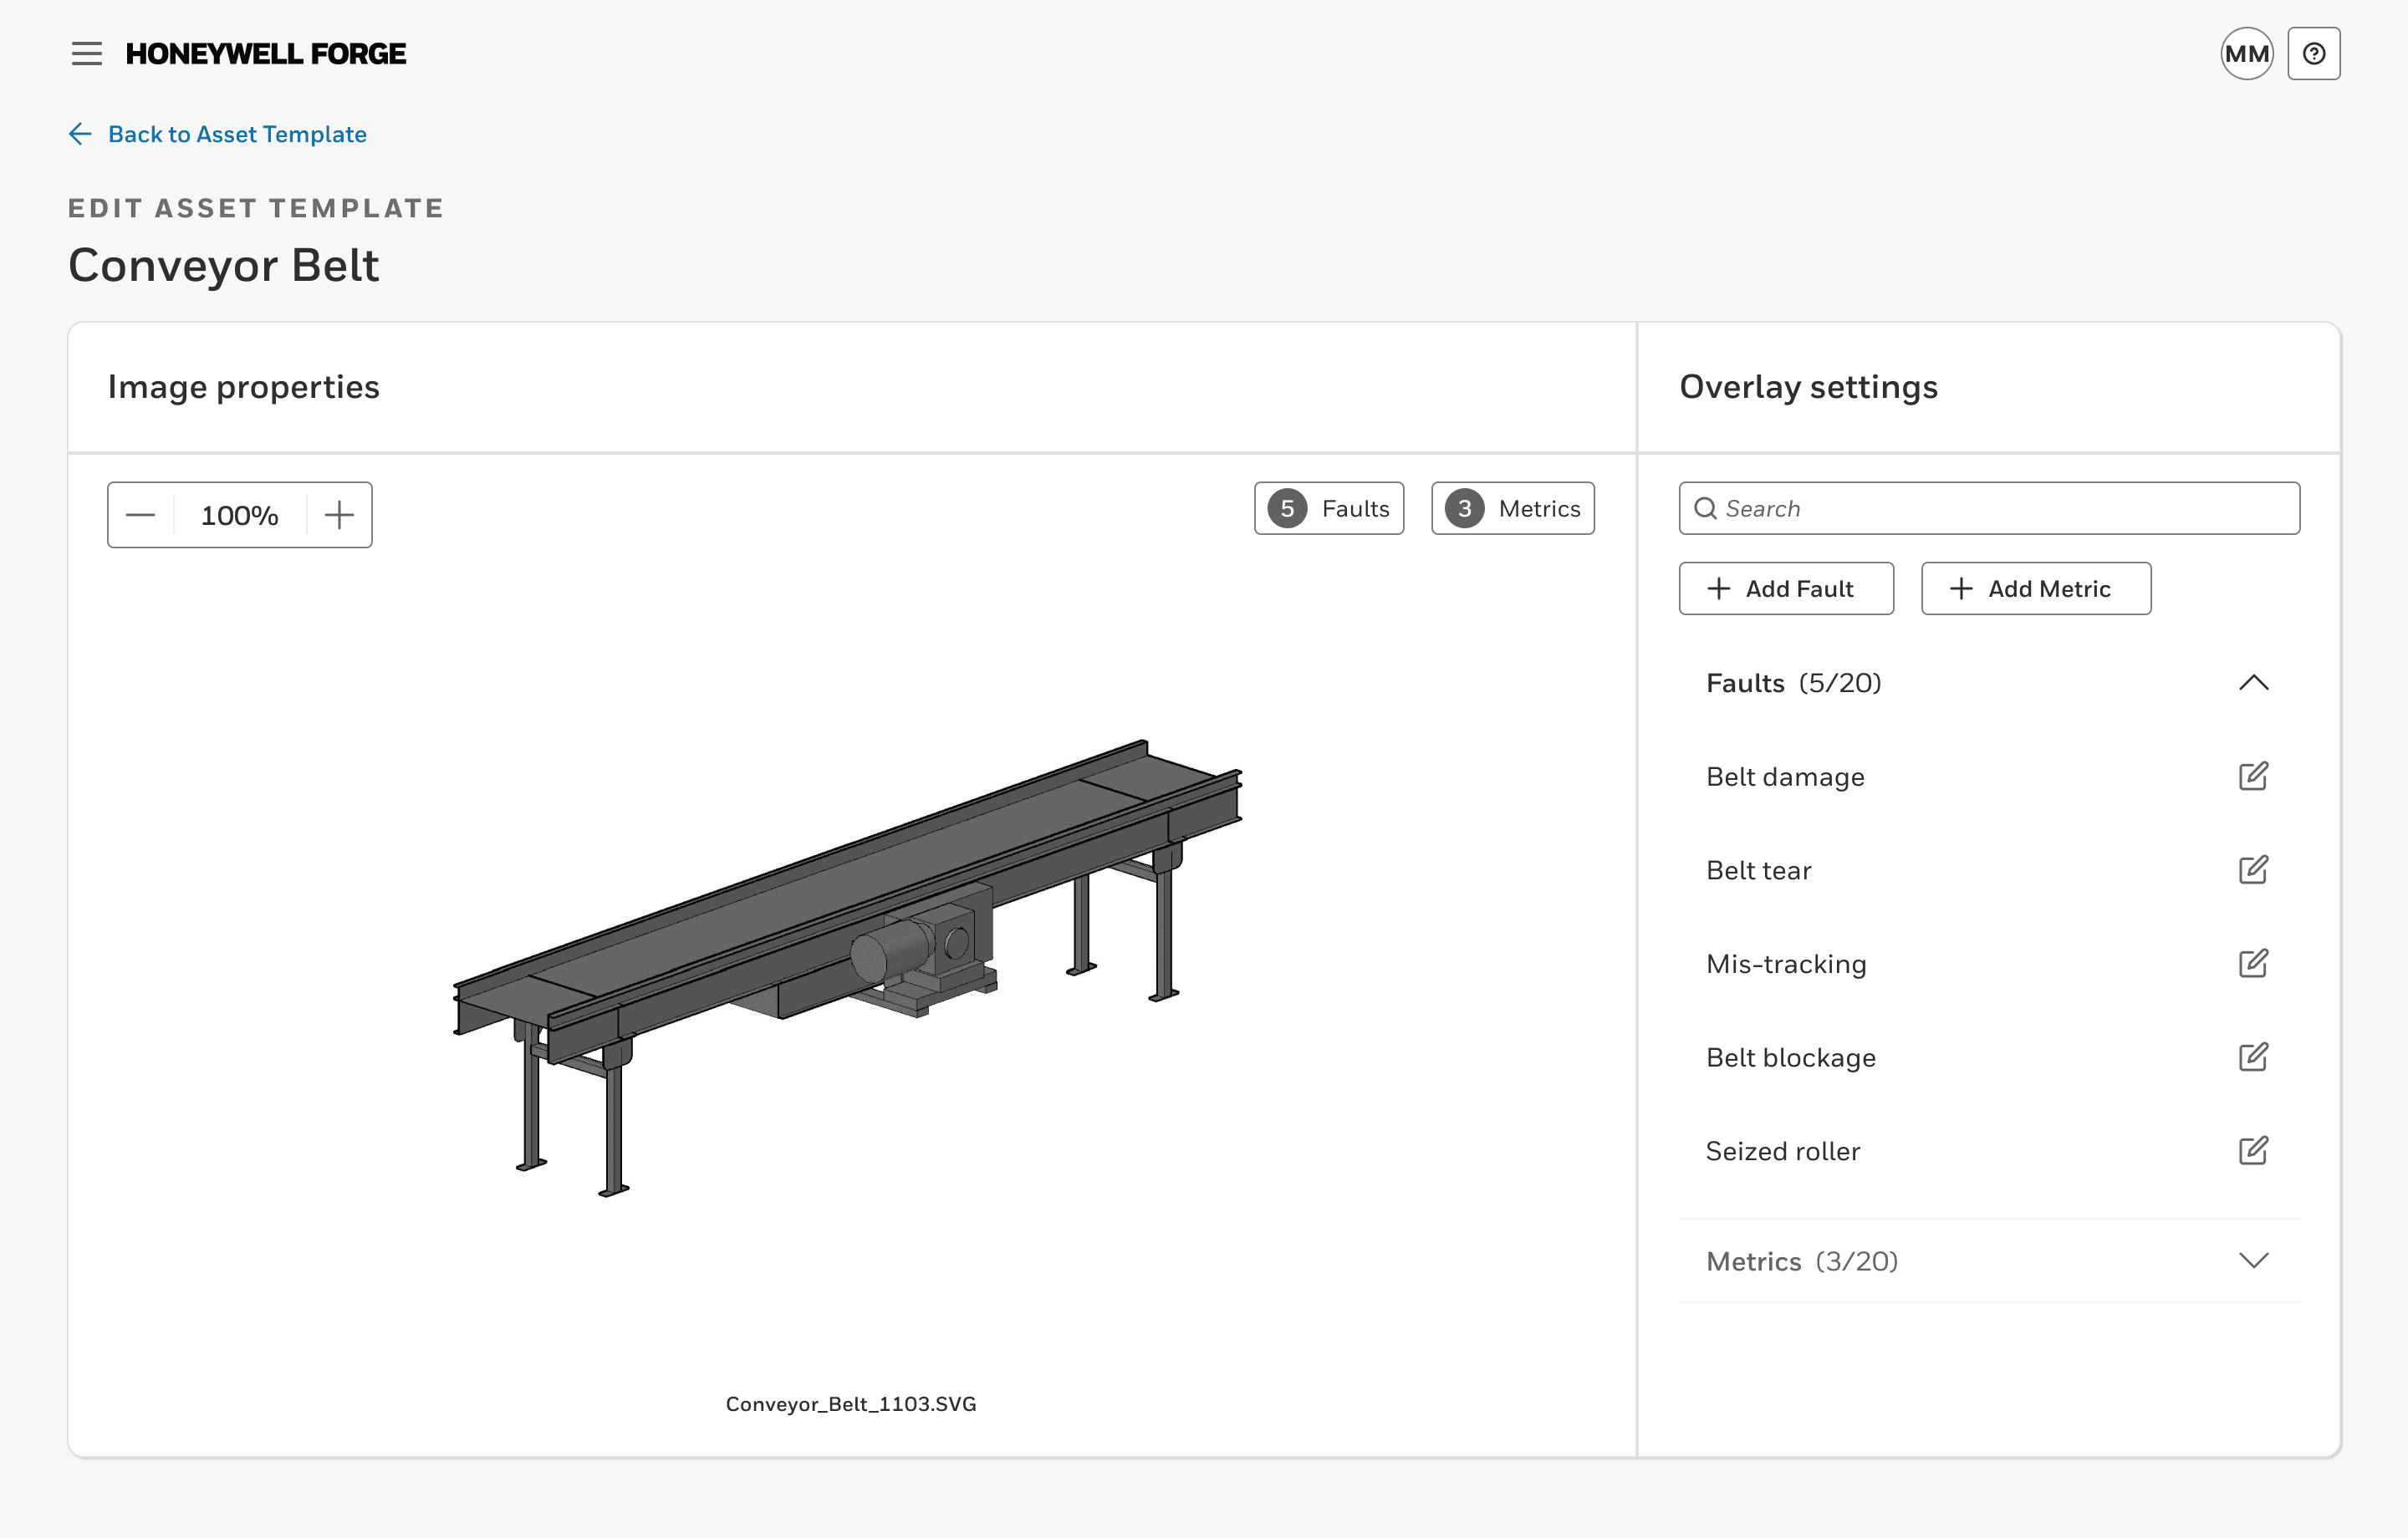
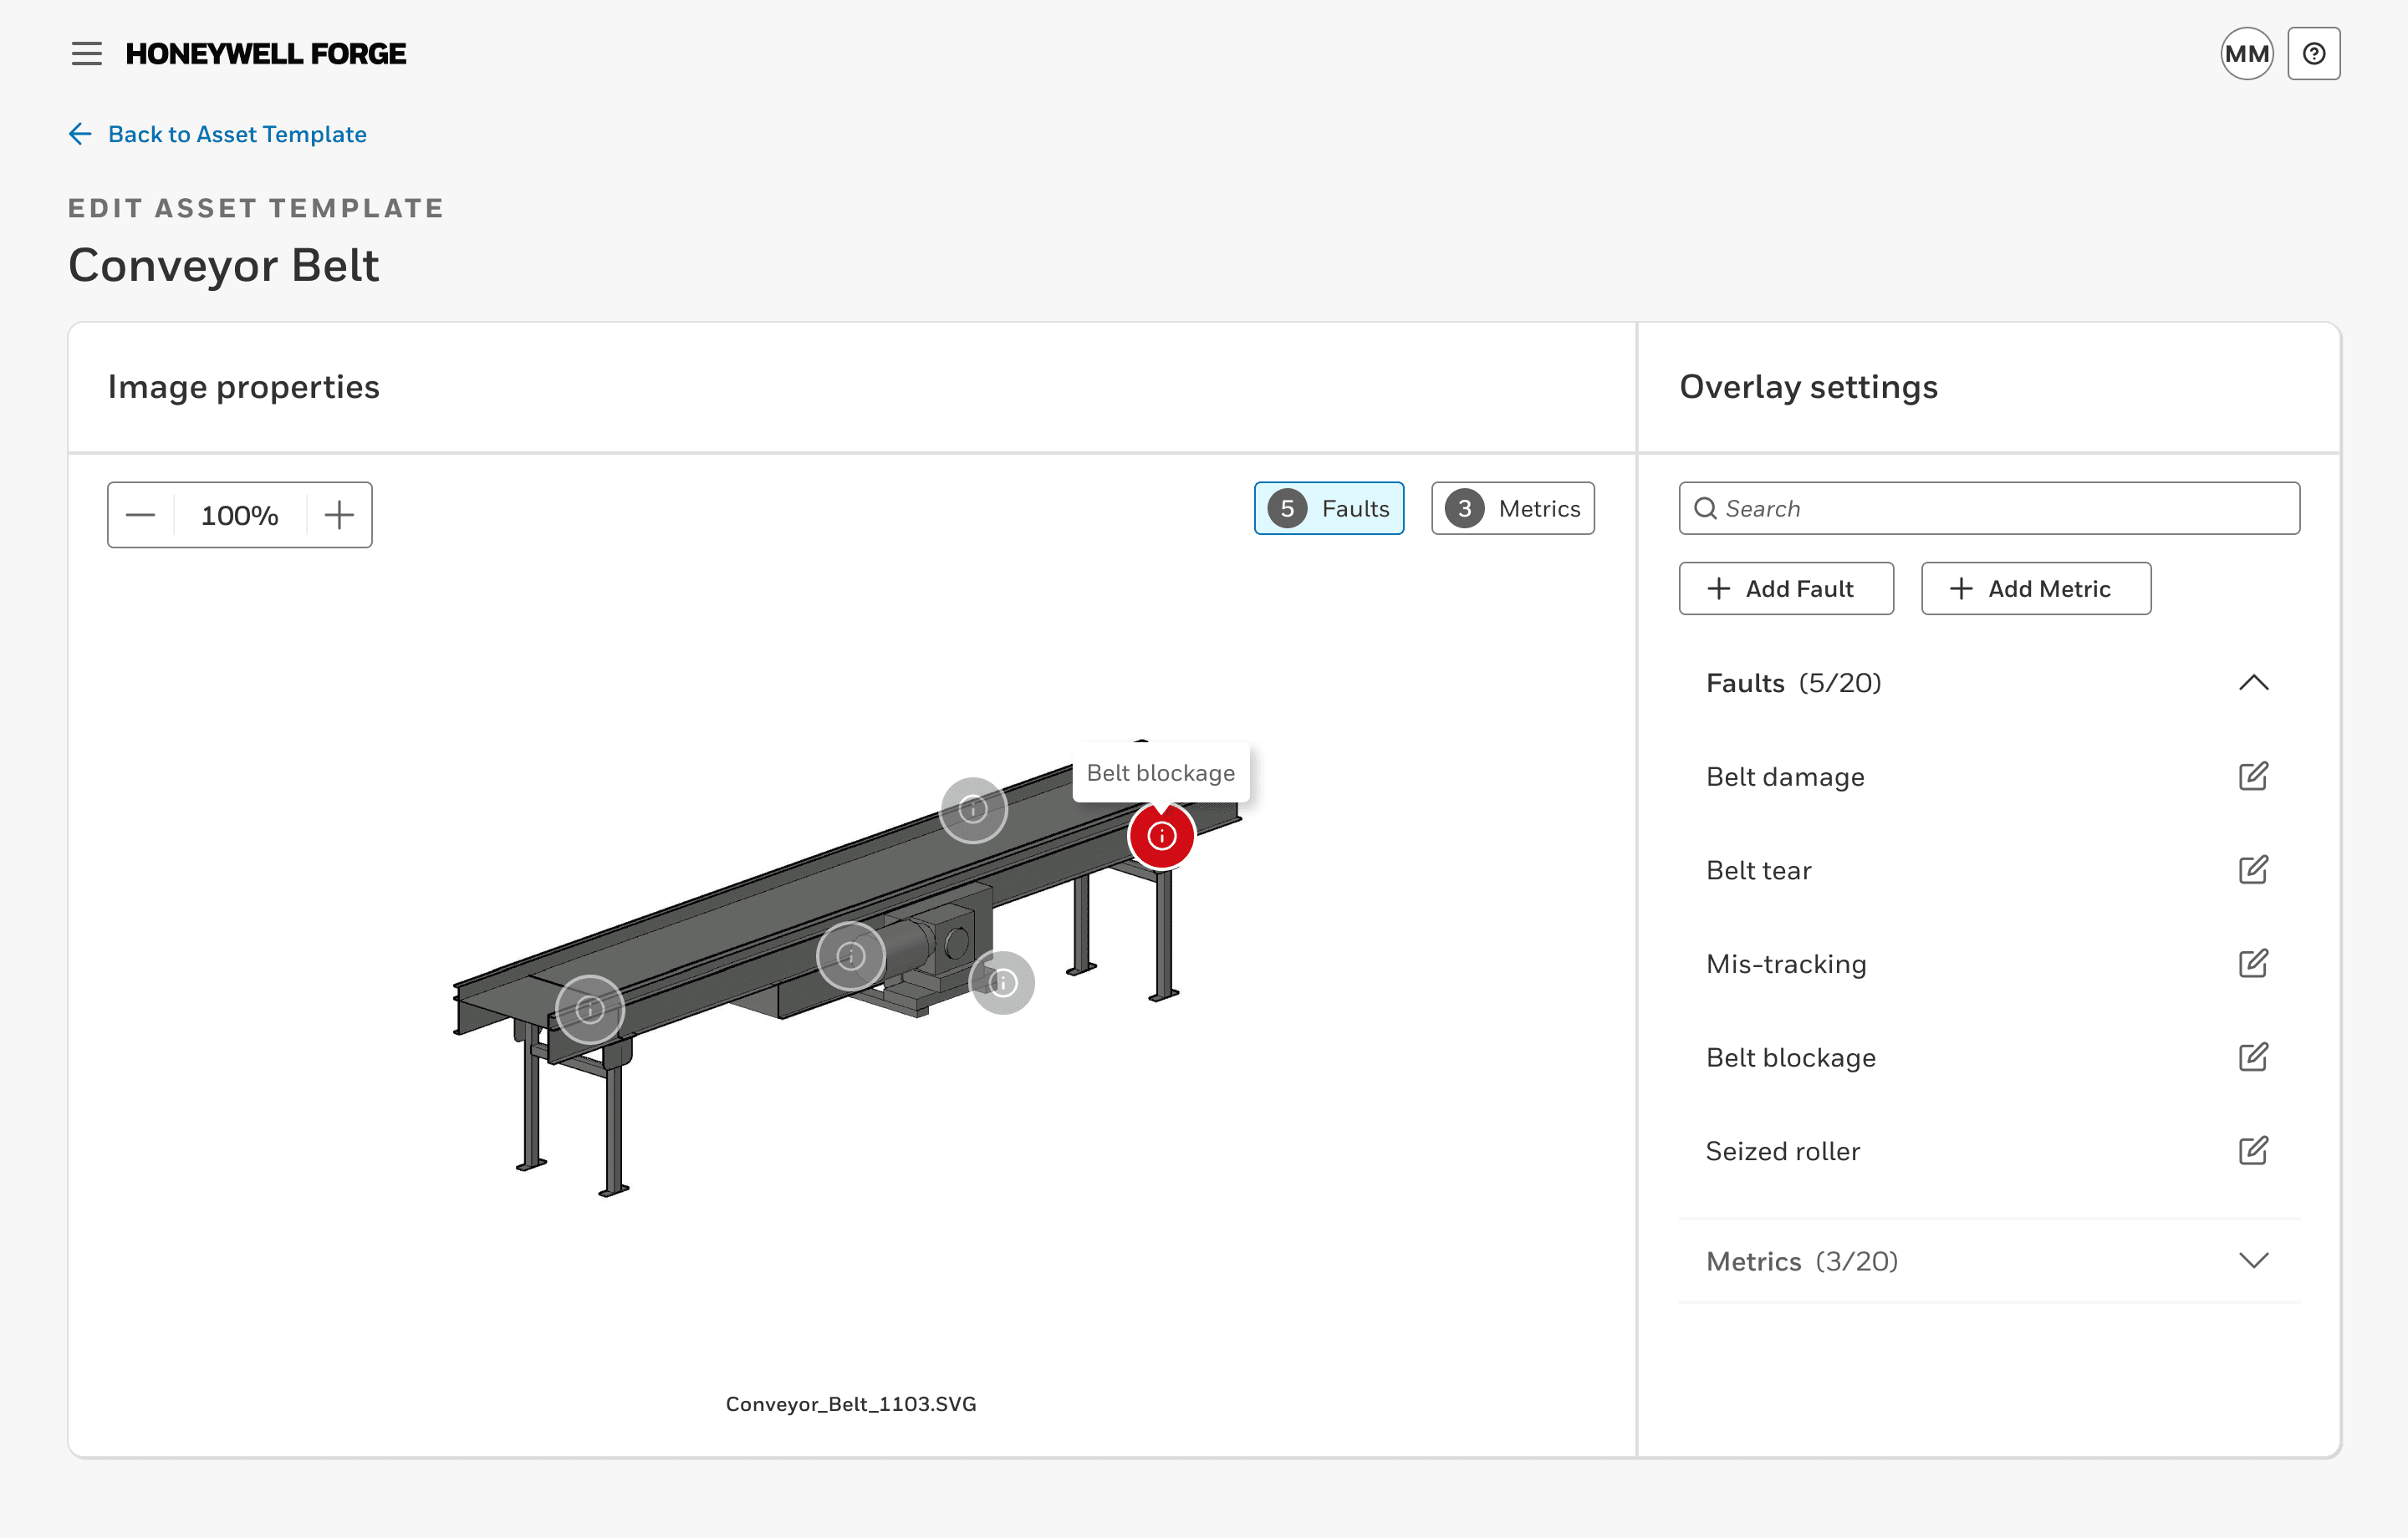
Task flow: View all created overlays
Select the 'Faults (#)' or 'Metrics (#)' accordion to expand the list
Select the 'Faults' chip in the image panel to filter the fault overlays
Hover over the overlays in the image or the list view to isolate the fault
Note: Either faults or metrics can be shown at a time.


Demo
Add a fault overlay to the template's default image
Add a metric overlay to the template's default image
View and manage live overlays of a template's default image
CONCLUSION
Outcome
Throughout the design process, I was able to collaborate with both my project manager and engineering teammates to ensure the design of the feature was technically feasible. I was also able to walkthrough my designs with the Forge UI design system team to verify that the feature was aligned with the product guidelines.
Once finished, I handed off the Figma file with the task flows, annotations, and UI components for the engineering team to reference and clarify questions.
Lessons learned
Collaboration was a must for this feature. Because the live overlays were complex, I was fortunate that my engineering teammates were willing to review early designs and give feedback. With regular review sessions, I was able to get questions answered and quick feedback from the team to deliver the designs on time.