IMAGE LIBRARY
Upload and manage images for core object templates in the Honeywell Forge Onboarding Portal.

TL;DR
Overview
The Honeywell Forge Onboarding Portal is a configuration software that supports the ability for customers or setup configurators to build the 'digital twin' of core objects like sites, spaces, and assets. A digital twin's details and real-time data run in the Honeywell Forge front-end applications so customers can best monitor their physical objects and overall operations.
Currently, the core object templates do not support image upload or management. Customers gave feedback that they need the ability to better visualize their digital twins in the front-end applications so they can better distinguish core objects and their location in a site.
To address this pain point, this feature allows configurators to select out-of-the-box images, upload custom images, and manage images for core object templates.
Note: This feature will set the foundation for the Live Overlays for images.
Goals
Design a streamlined access point for users to open the image library
Consider user scenarios of uploading, managing, and deleting images in a template (CRUD - Create, Read, Update, Delete)
Allow users to customize the 'default' image for the template
Design an experience for users to view images attached to templates at a larger resolution
Ensure Section 508 compliance of designs and interactions
Role
UX UI Designer Lead
Duration
Winter 2024
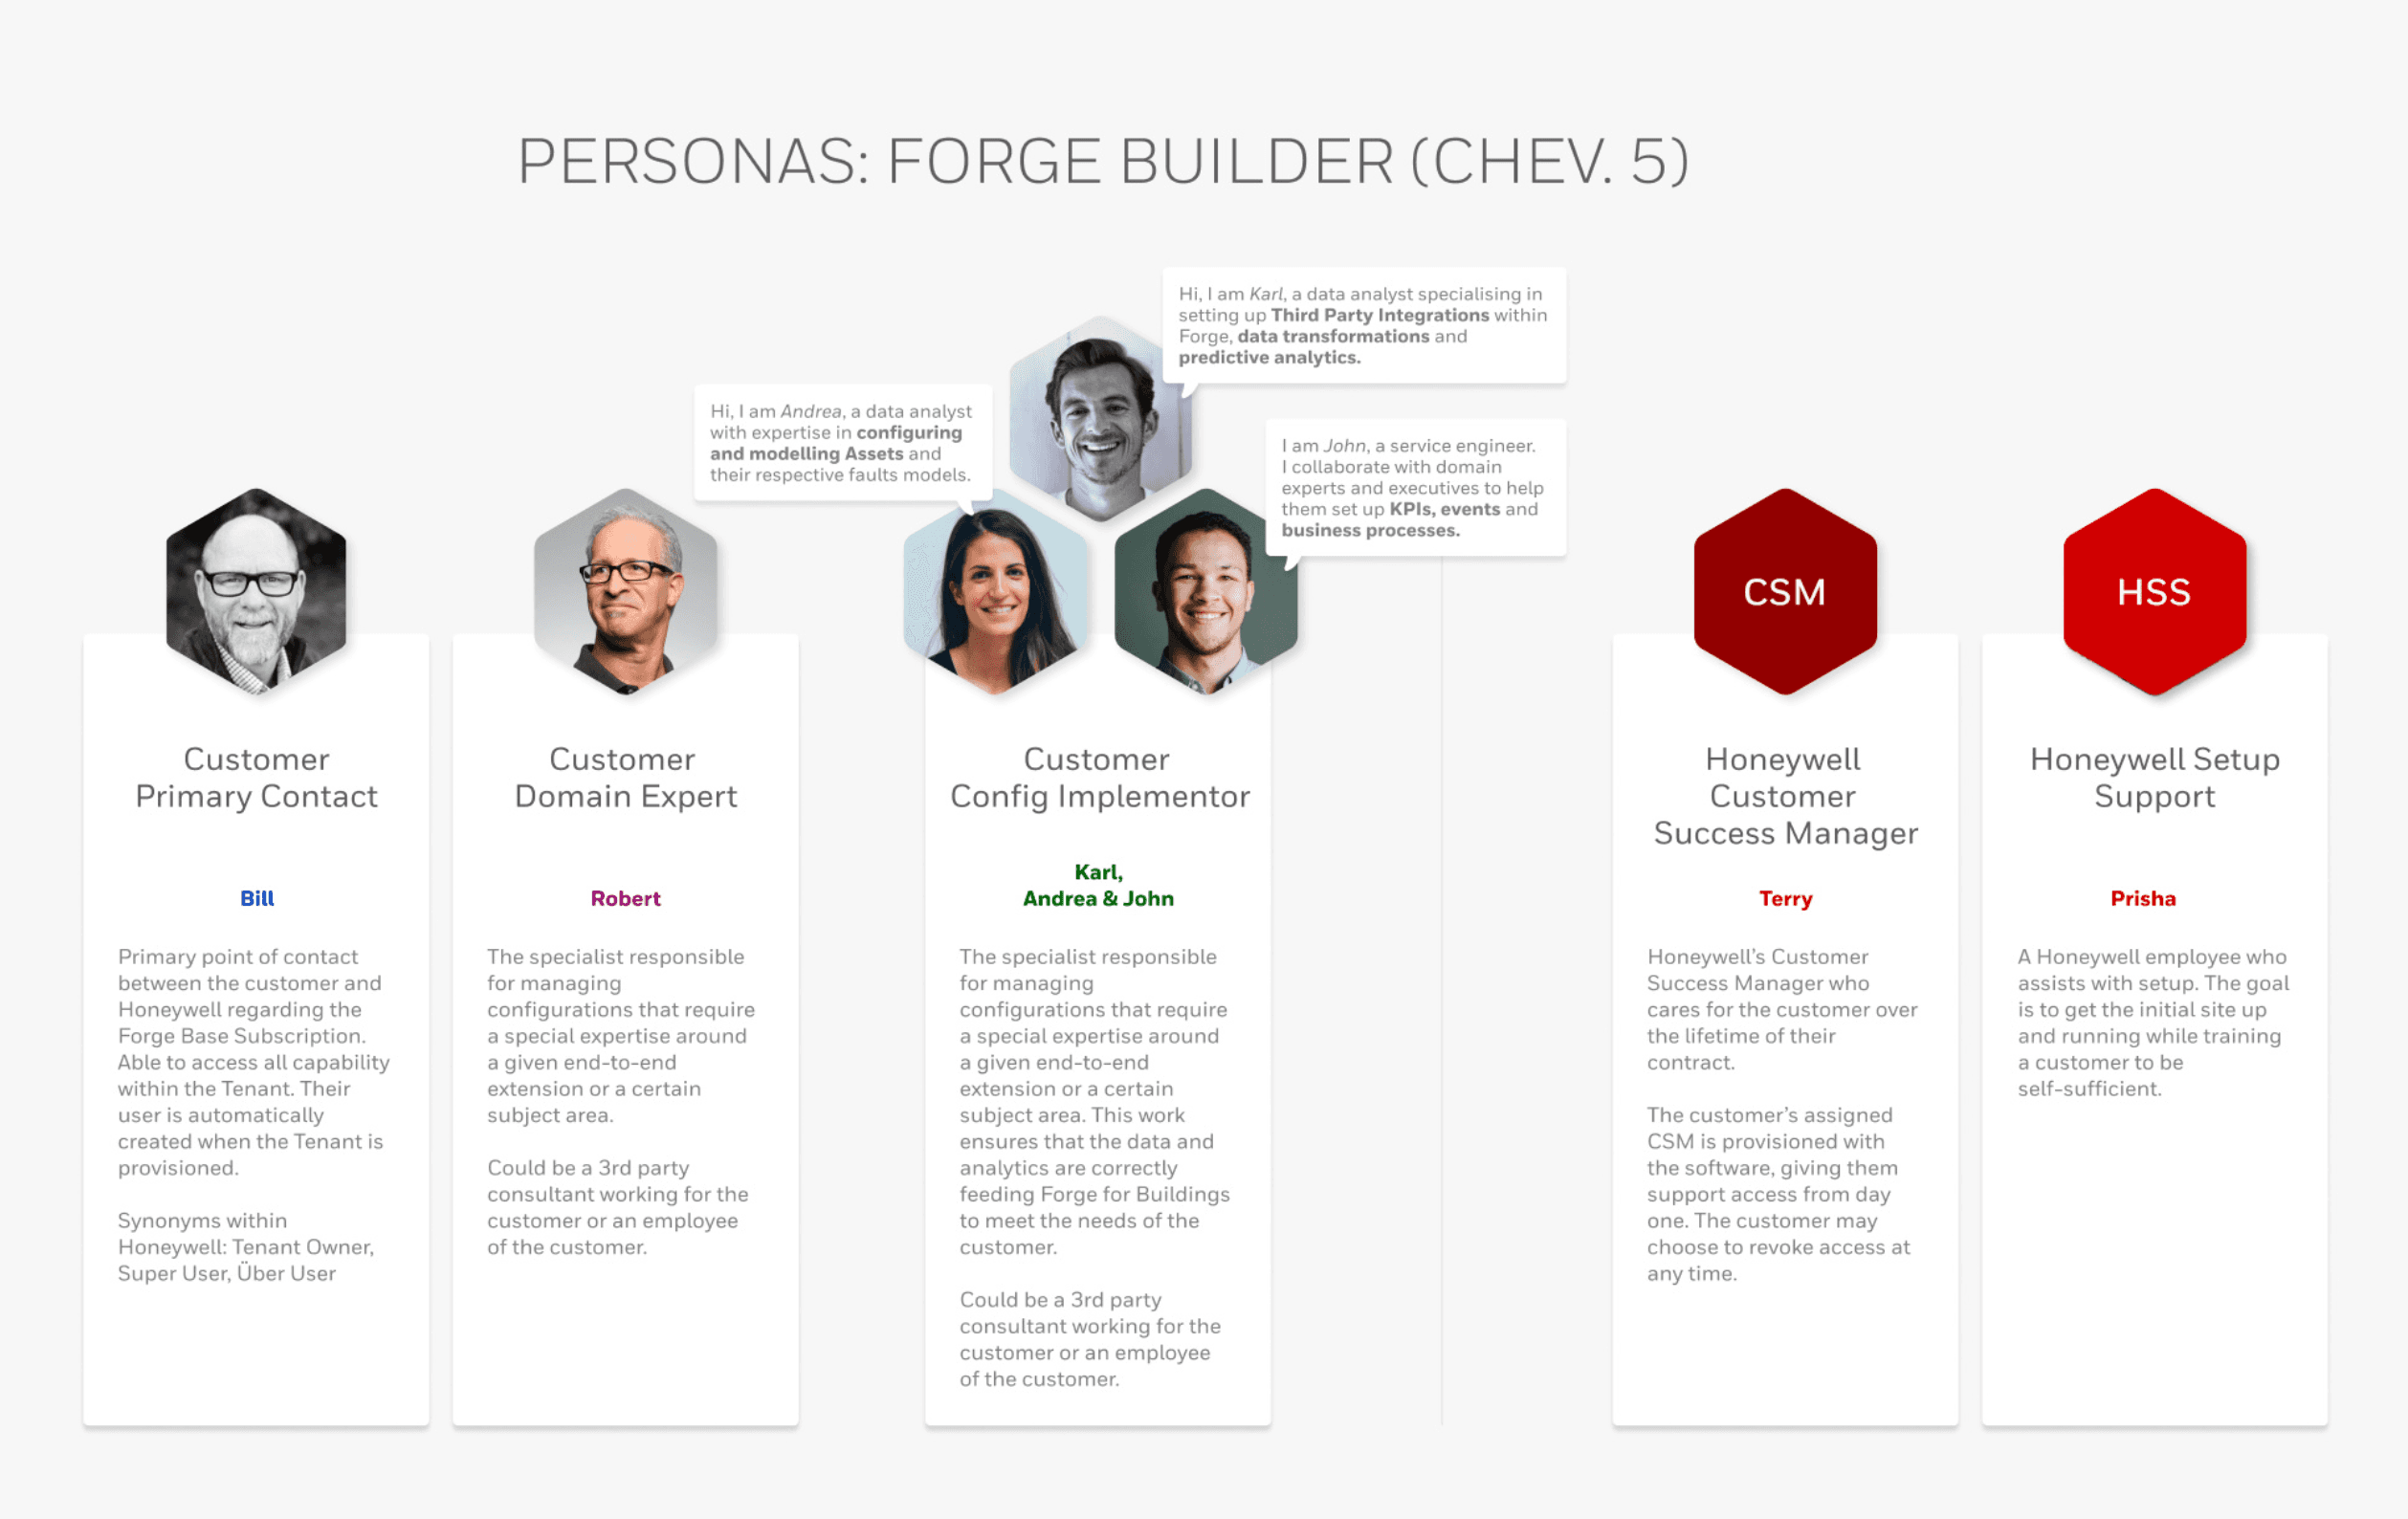
PERSONAS
The Onboarding Portal is built for two main users: Honeywell Setup Support and Customer Configurators. Both persona's end-goal is to configure the customer's 'digital twin' of core objects efficiently and accurately, and undergo the same user tasks to accomplish this.
Honeywell Setup Support:
"As Setup Support at Honeywell, I need to efficiently configure the customer and create digital twins of their physical core objects so they are set up to use the Honeywell Forge front-end applications."
Customer Configurator:
"As a customer configurator, I need to configure the core object modeling for the physical assets, sites, and spaces so the digital twin hierarchy is correct and data is flowing to the front-end applications."
TASK FLOWS
The image library feature would include three primary task flows: Upload and add images to a template, manage images in a template, and select 'default' image for a template. Each task flow would ensure the core object template includes the correct images to appear in the front end application.
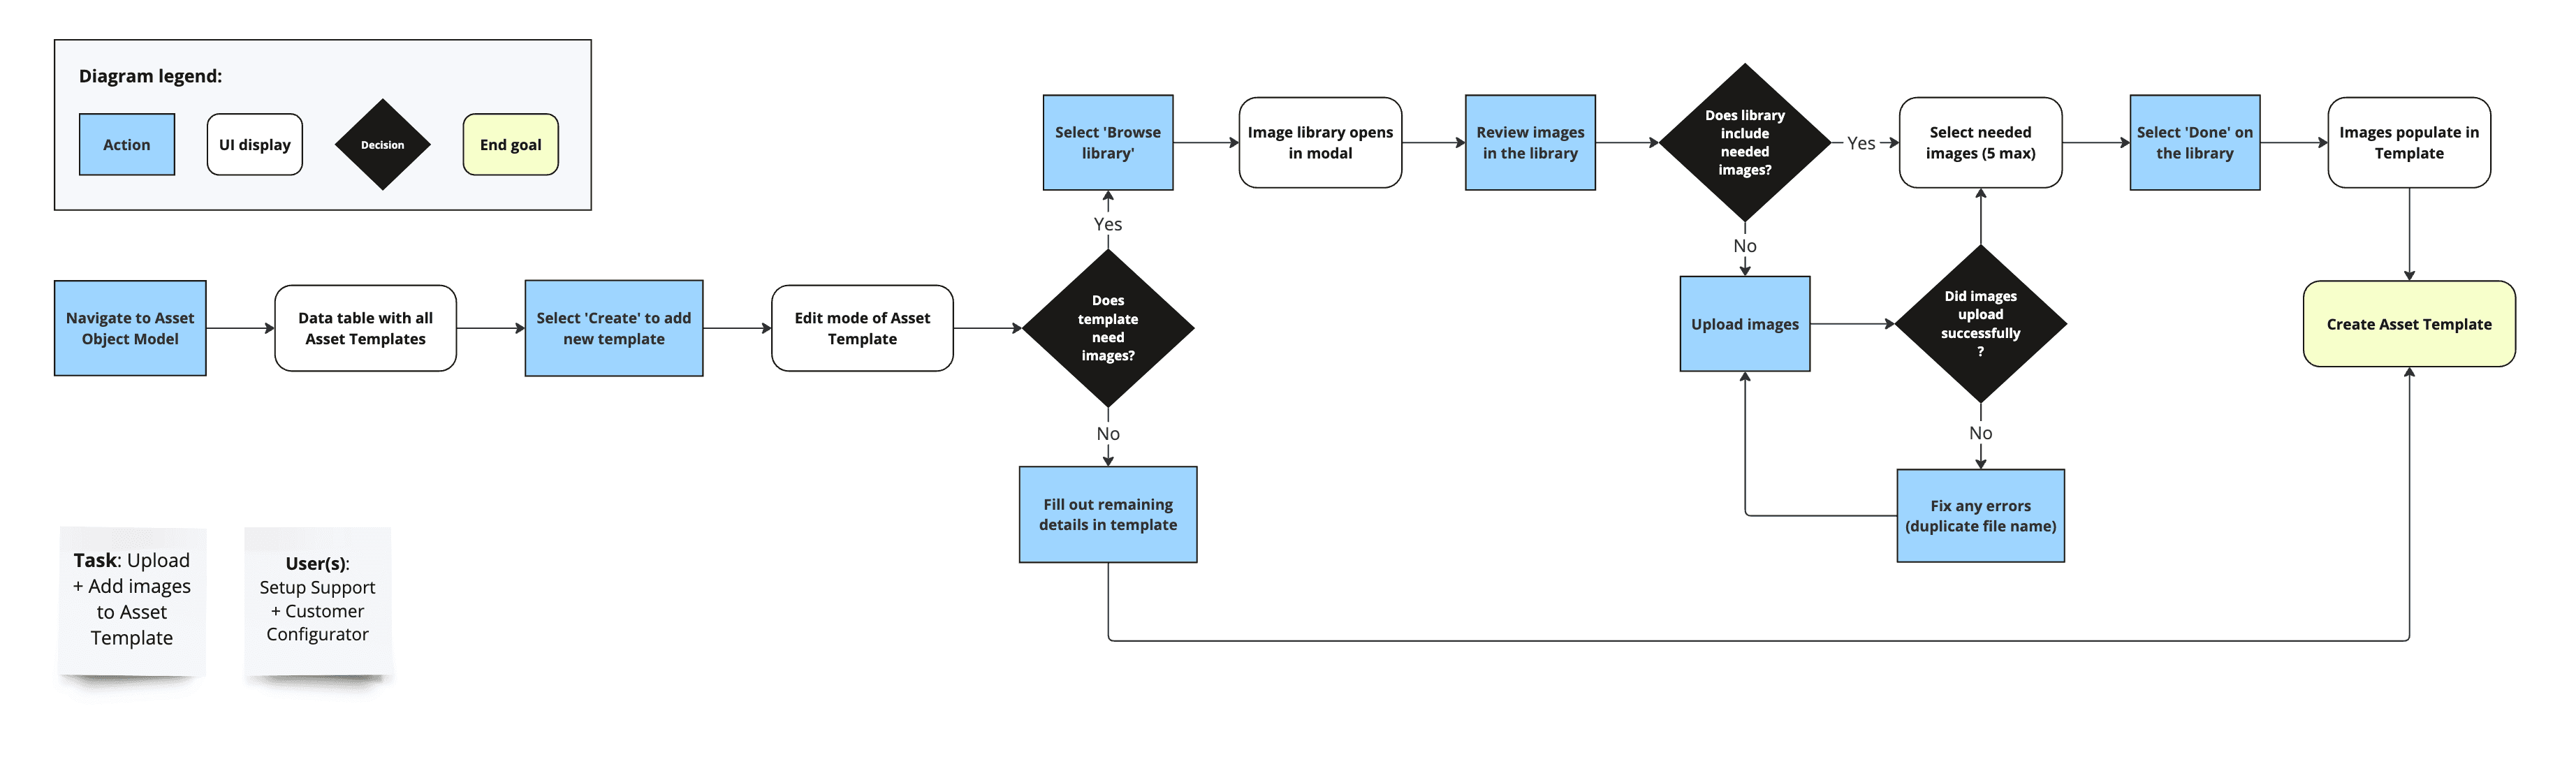
Upload images to the library + Add images to template
Primary task flow:
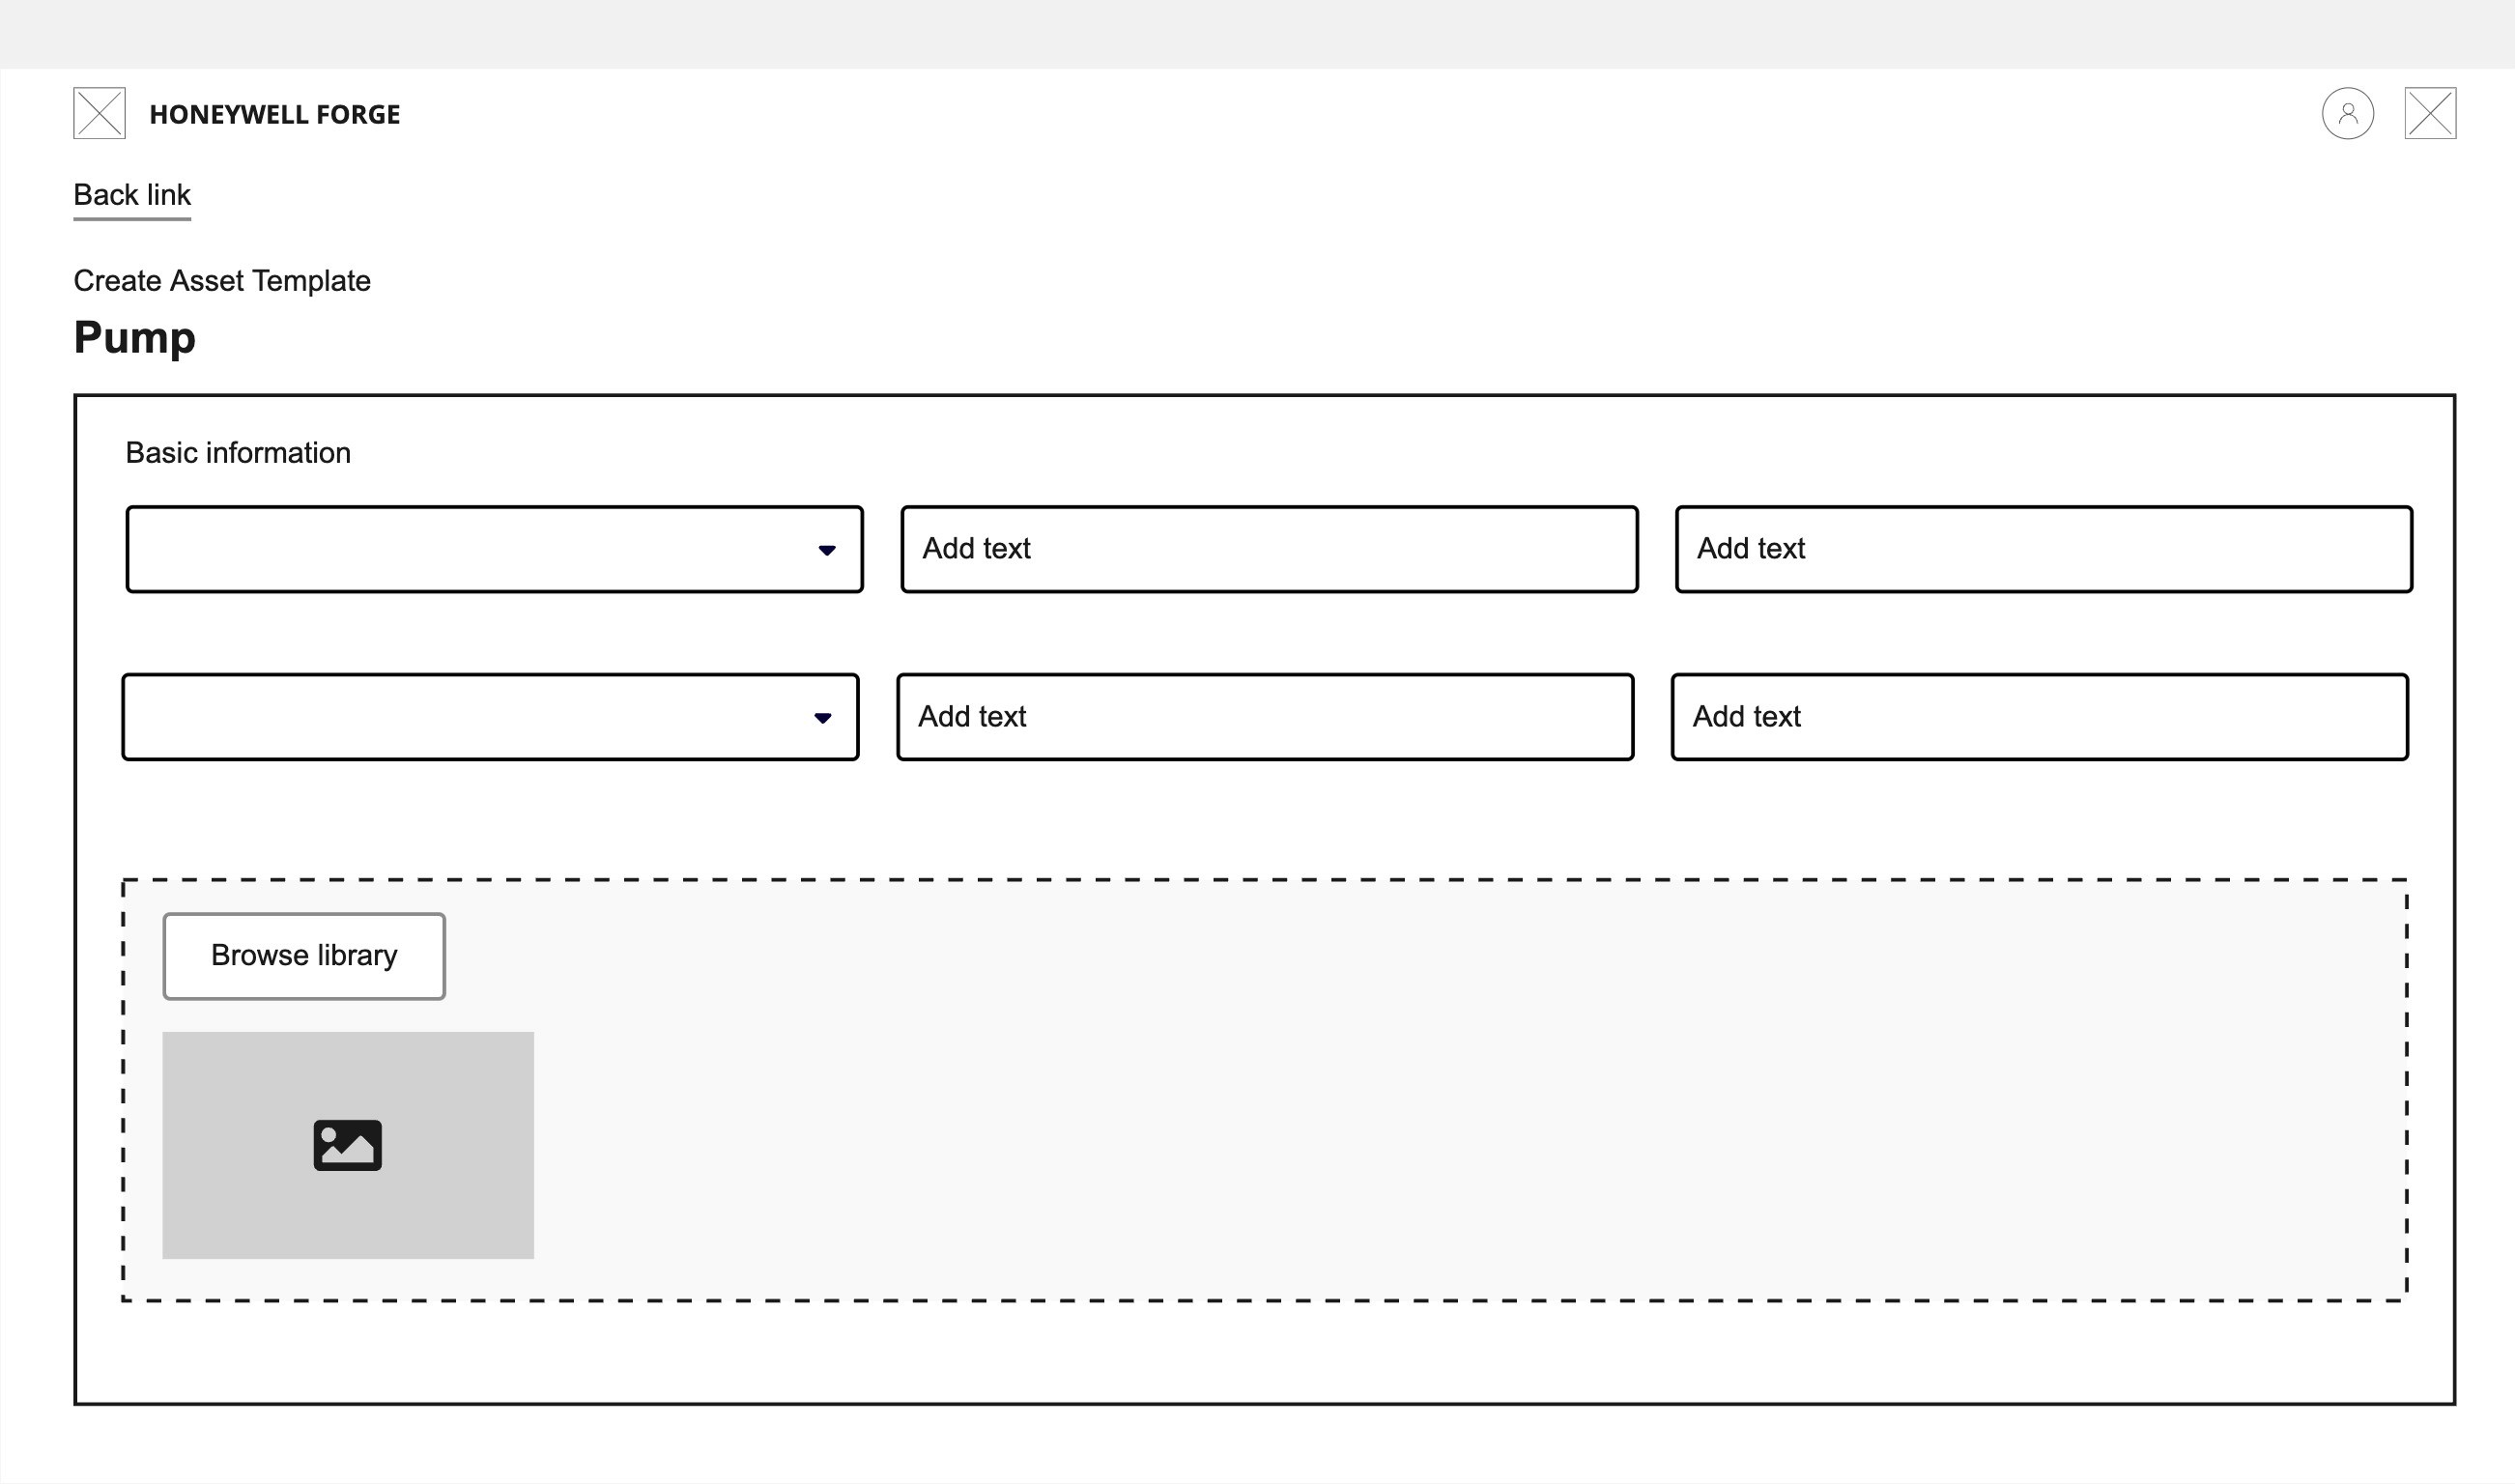
Navigate to Asset Object Model —> View templates —> Select 'Create'
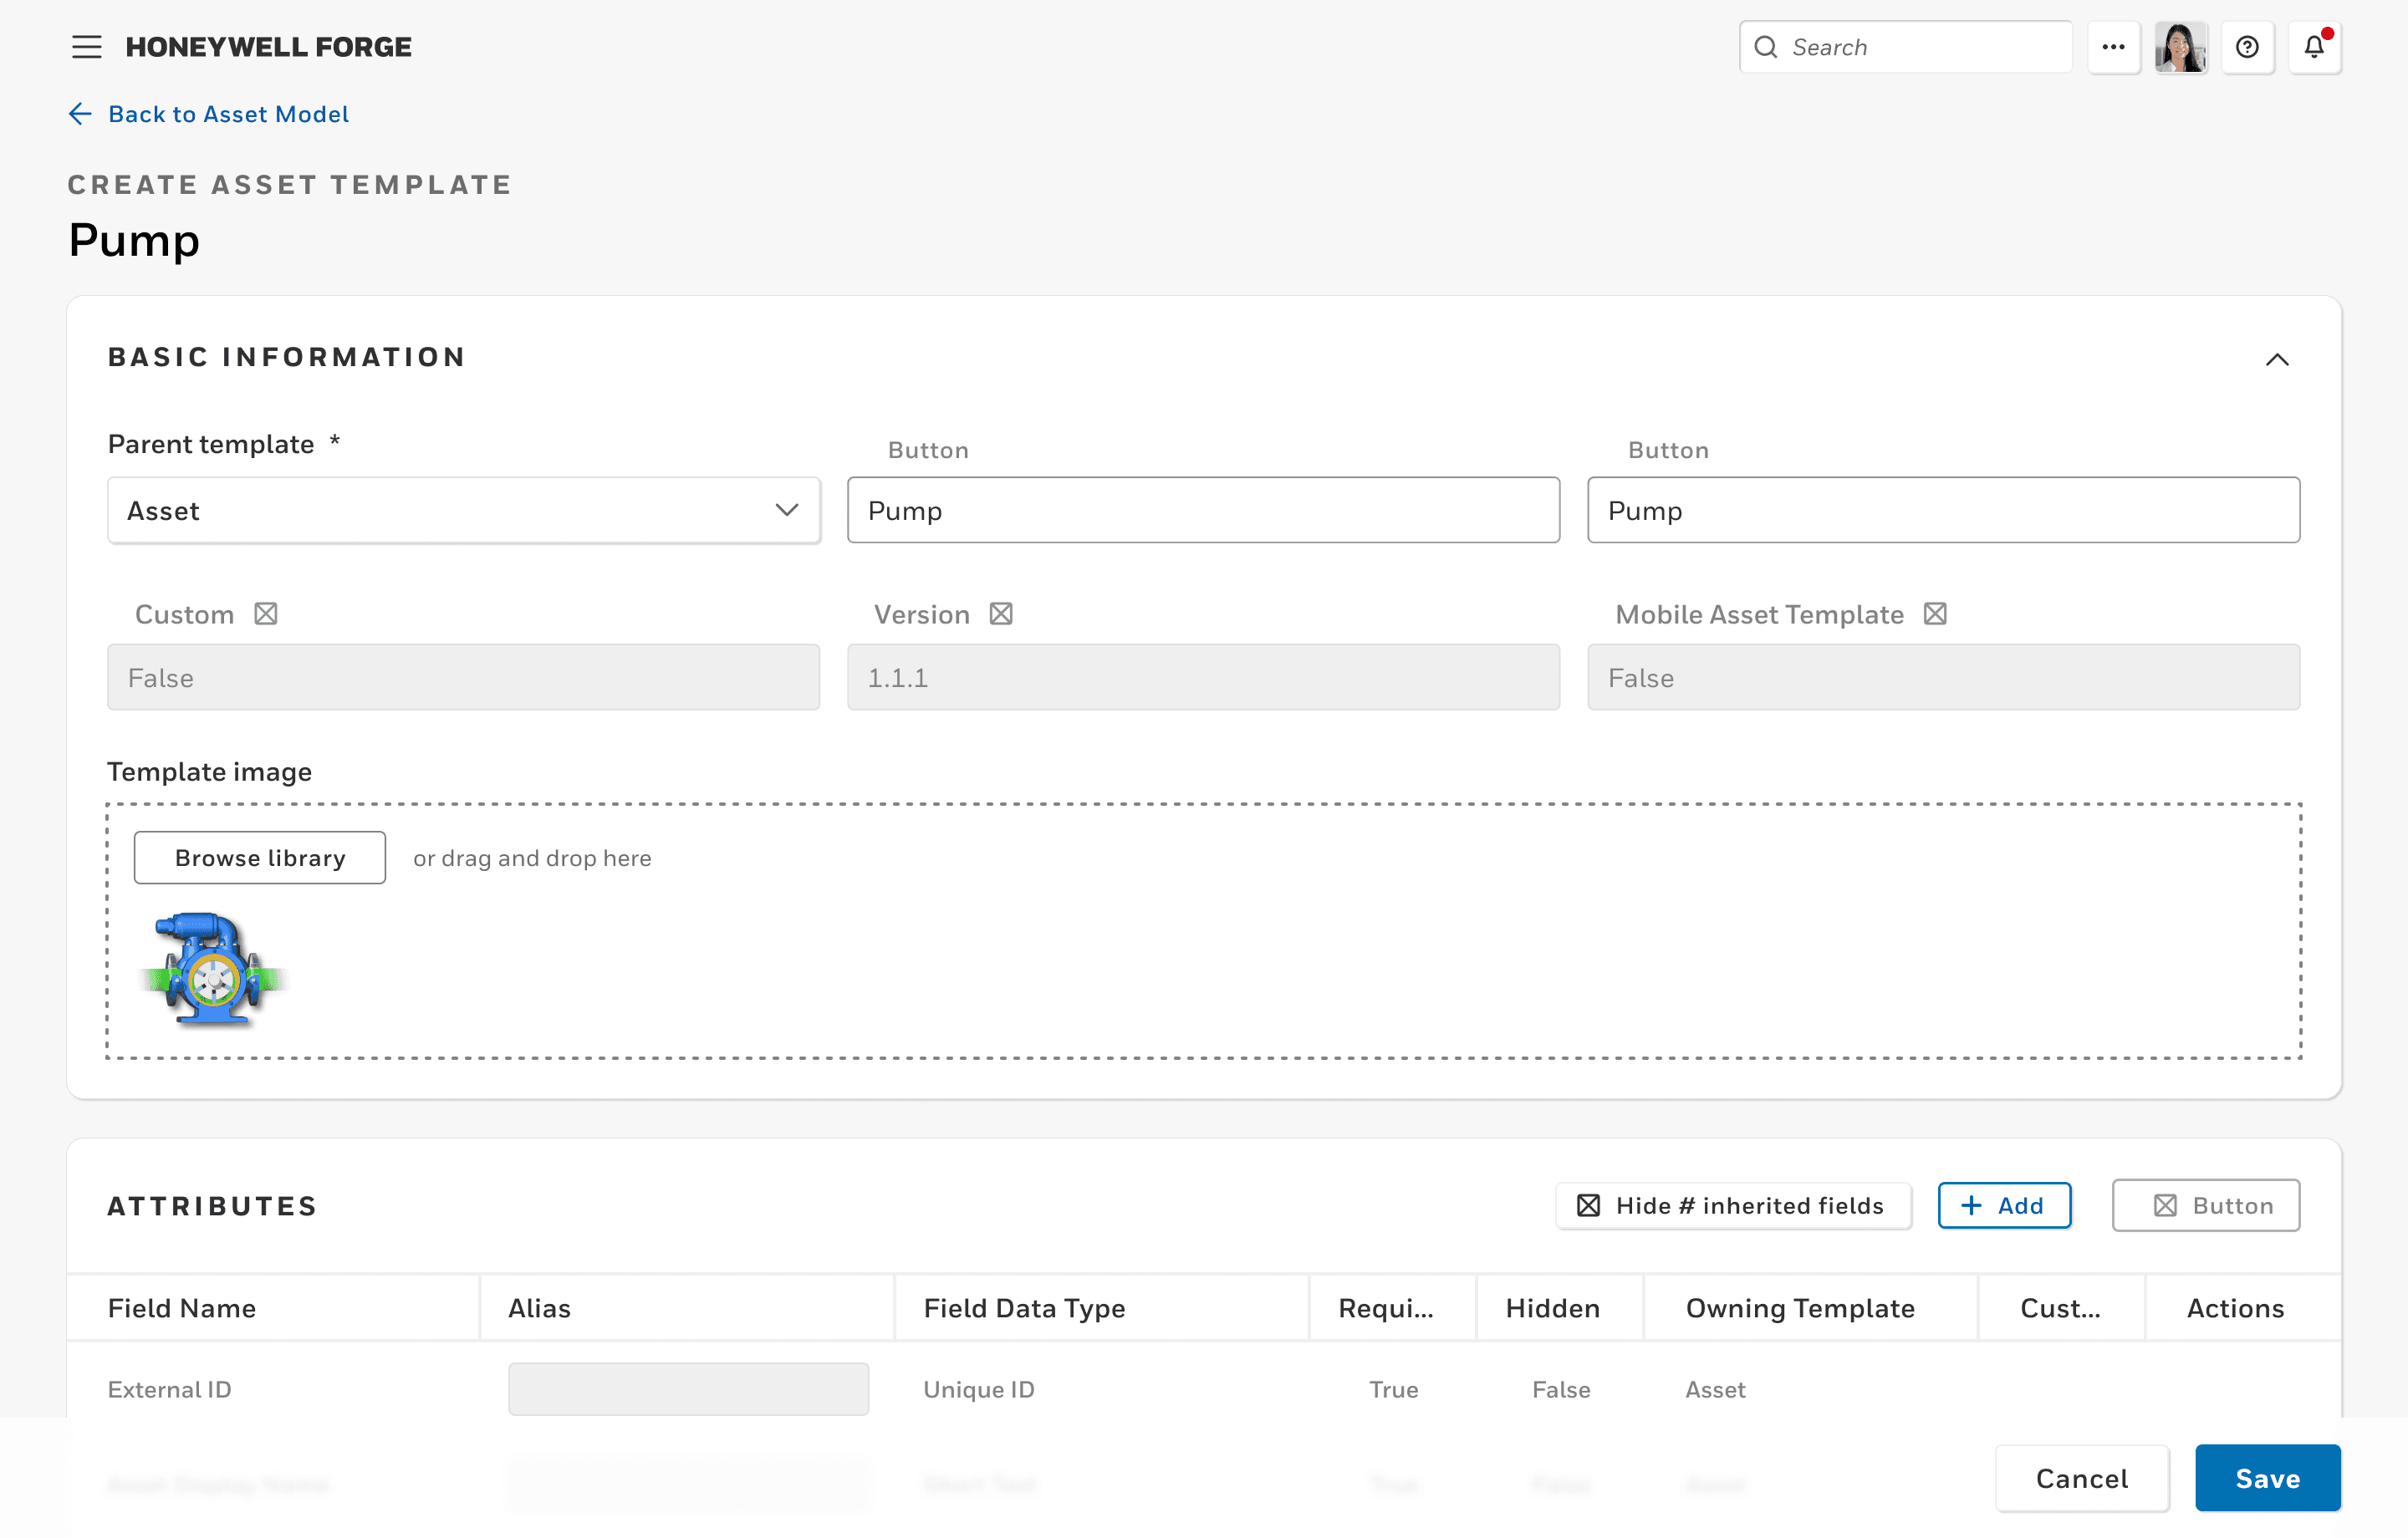
Fill out template —> Select 'Browse library' for images
Upload images into library
Select images for template (max of 5) —> Select 'Done'
Create Asset template
Manage images in a template
Primary task flow:
Navigate to Asset Object Model —> View templates
Select template to view —> Select 'Edit' on template
Select 'Browse library' —> Unselect incorrect images
Search for correct images —> Select correct images
Select 'Done' on library —> Save Asset template

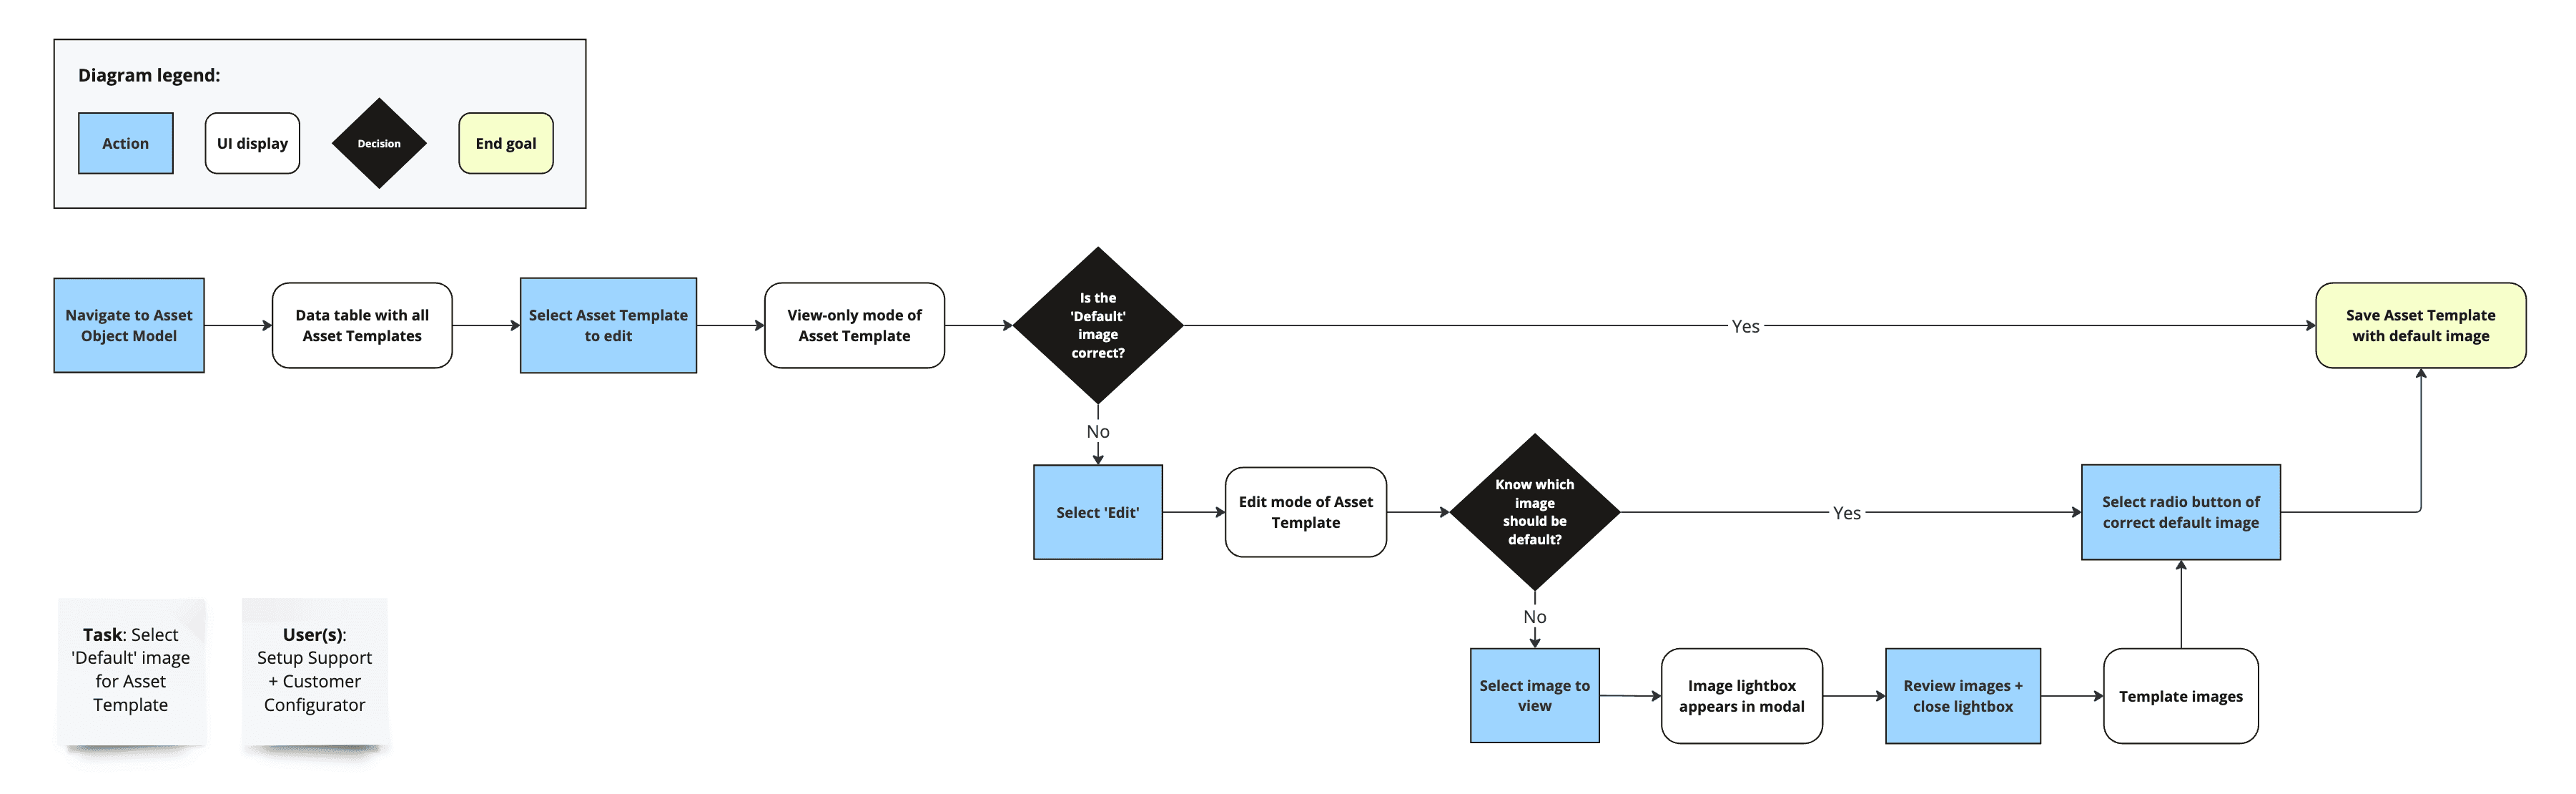
Select 'default' image for a template
Primary task flow:
Note: 'Default' image is the primary image shown for the template
Navigate to Asset Object Model —> View templates
Select template to view —> Review default image
Select 'Edit' on template —> Open images in lightbox
Close the lightbox —> Select the correct default image
Save Asset template
WIREFRAMES
Feature requirements
Access an image library in a modal* to review and upload images in 3 tabs:
All images (user-uploaded and Honeywell-owned)
Honeywell images (out-of-the-box)
Your images (customer-uploaded)
*Note: A modal was decided to be used to keep users in the same context of the template, but the library would need to remain simple enough to not require being on a separate page.
Manage images in the library and templates
Add images to a template
Remove images from a template
Delete customer-owned images from the library
Search, sort, and filter images in the library
Handle errors when uploading images in the library
Duplicate names, large file sizes, malware, or when the network is down
Preview images in the image lightbox
Review images at a larger resolution
Delete and download images from the lightbox view
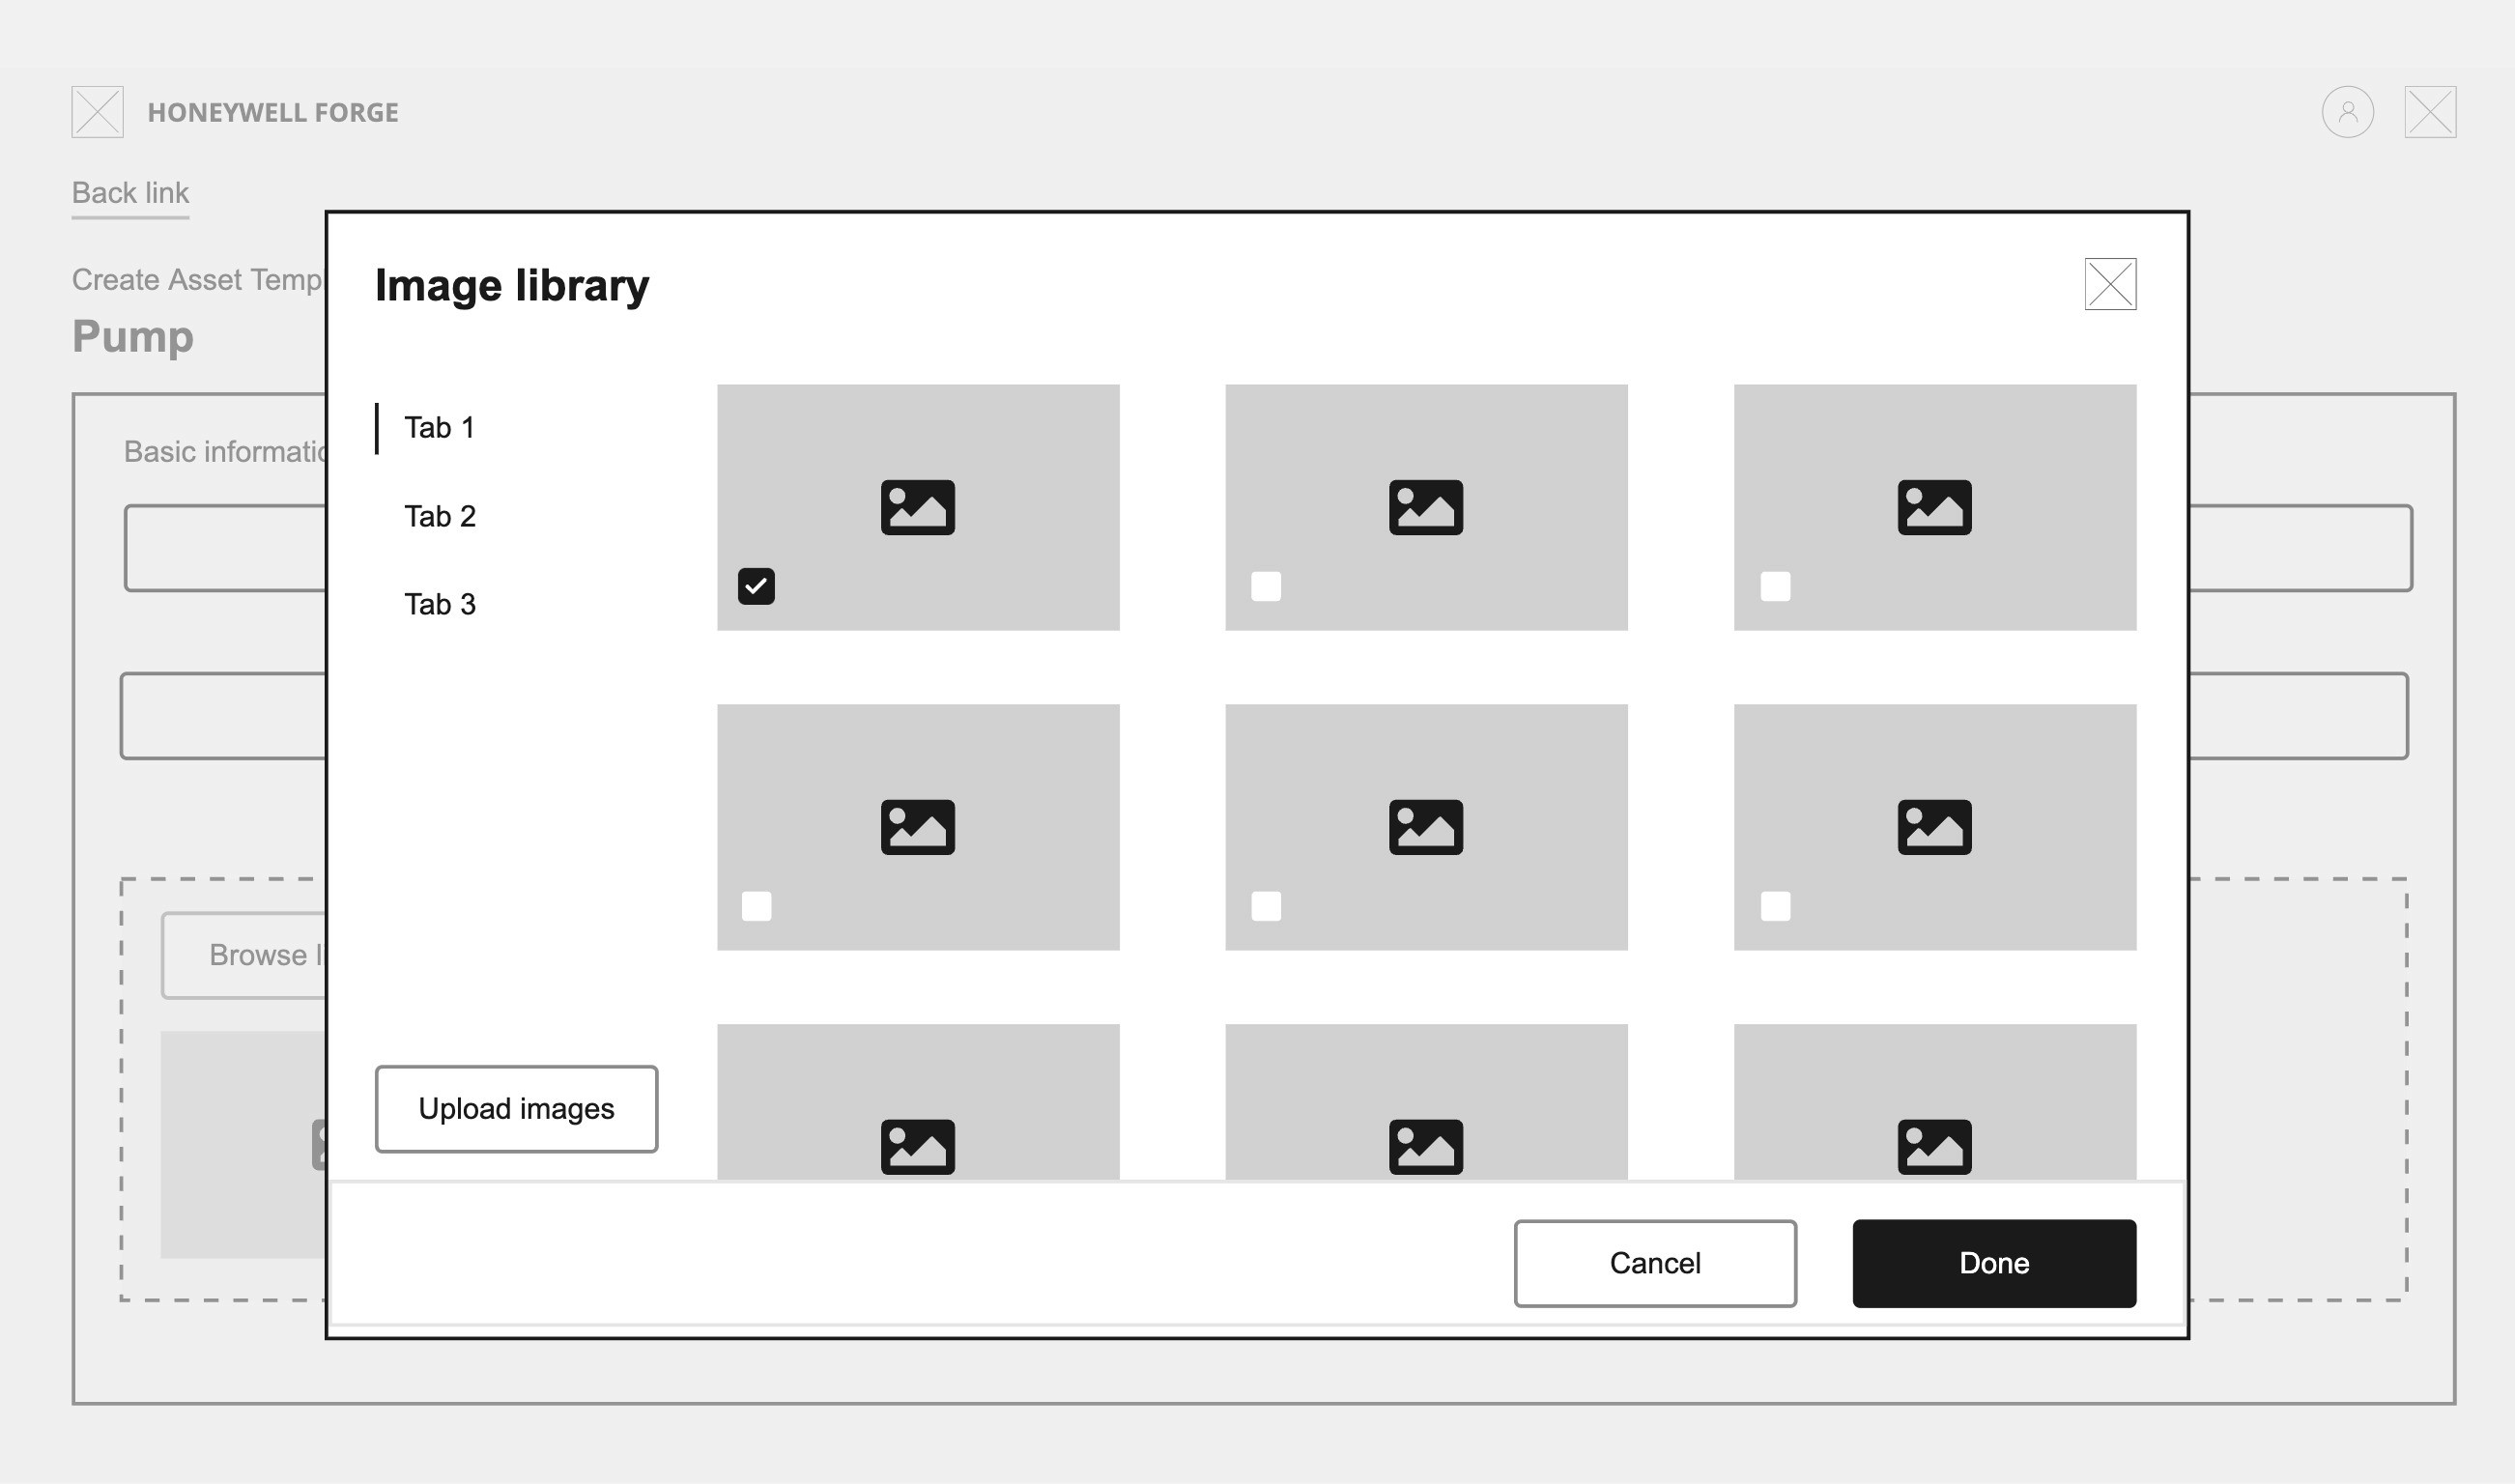
Wireframe v1 - Vertical tabs
Vertical tabs provide a local navigation feel, and separate the different types of images housed in the library, including Honeywell out-of-the-box and user-uploaded images.
The user would select 'Browse library' from the template page
Image library modal would appear in center with vertical tabs left-aligned
'Upload images' button would be left-aligned and below the tabs
Mid-fidelity designs:
Vertical tabs are left-aligned with the images on the right
Search, sort, and filter options appear above the tabs & images
Users can directly upload images into the image section of the modal

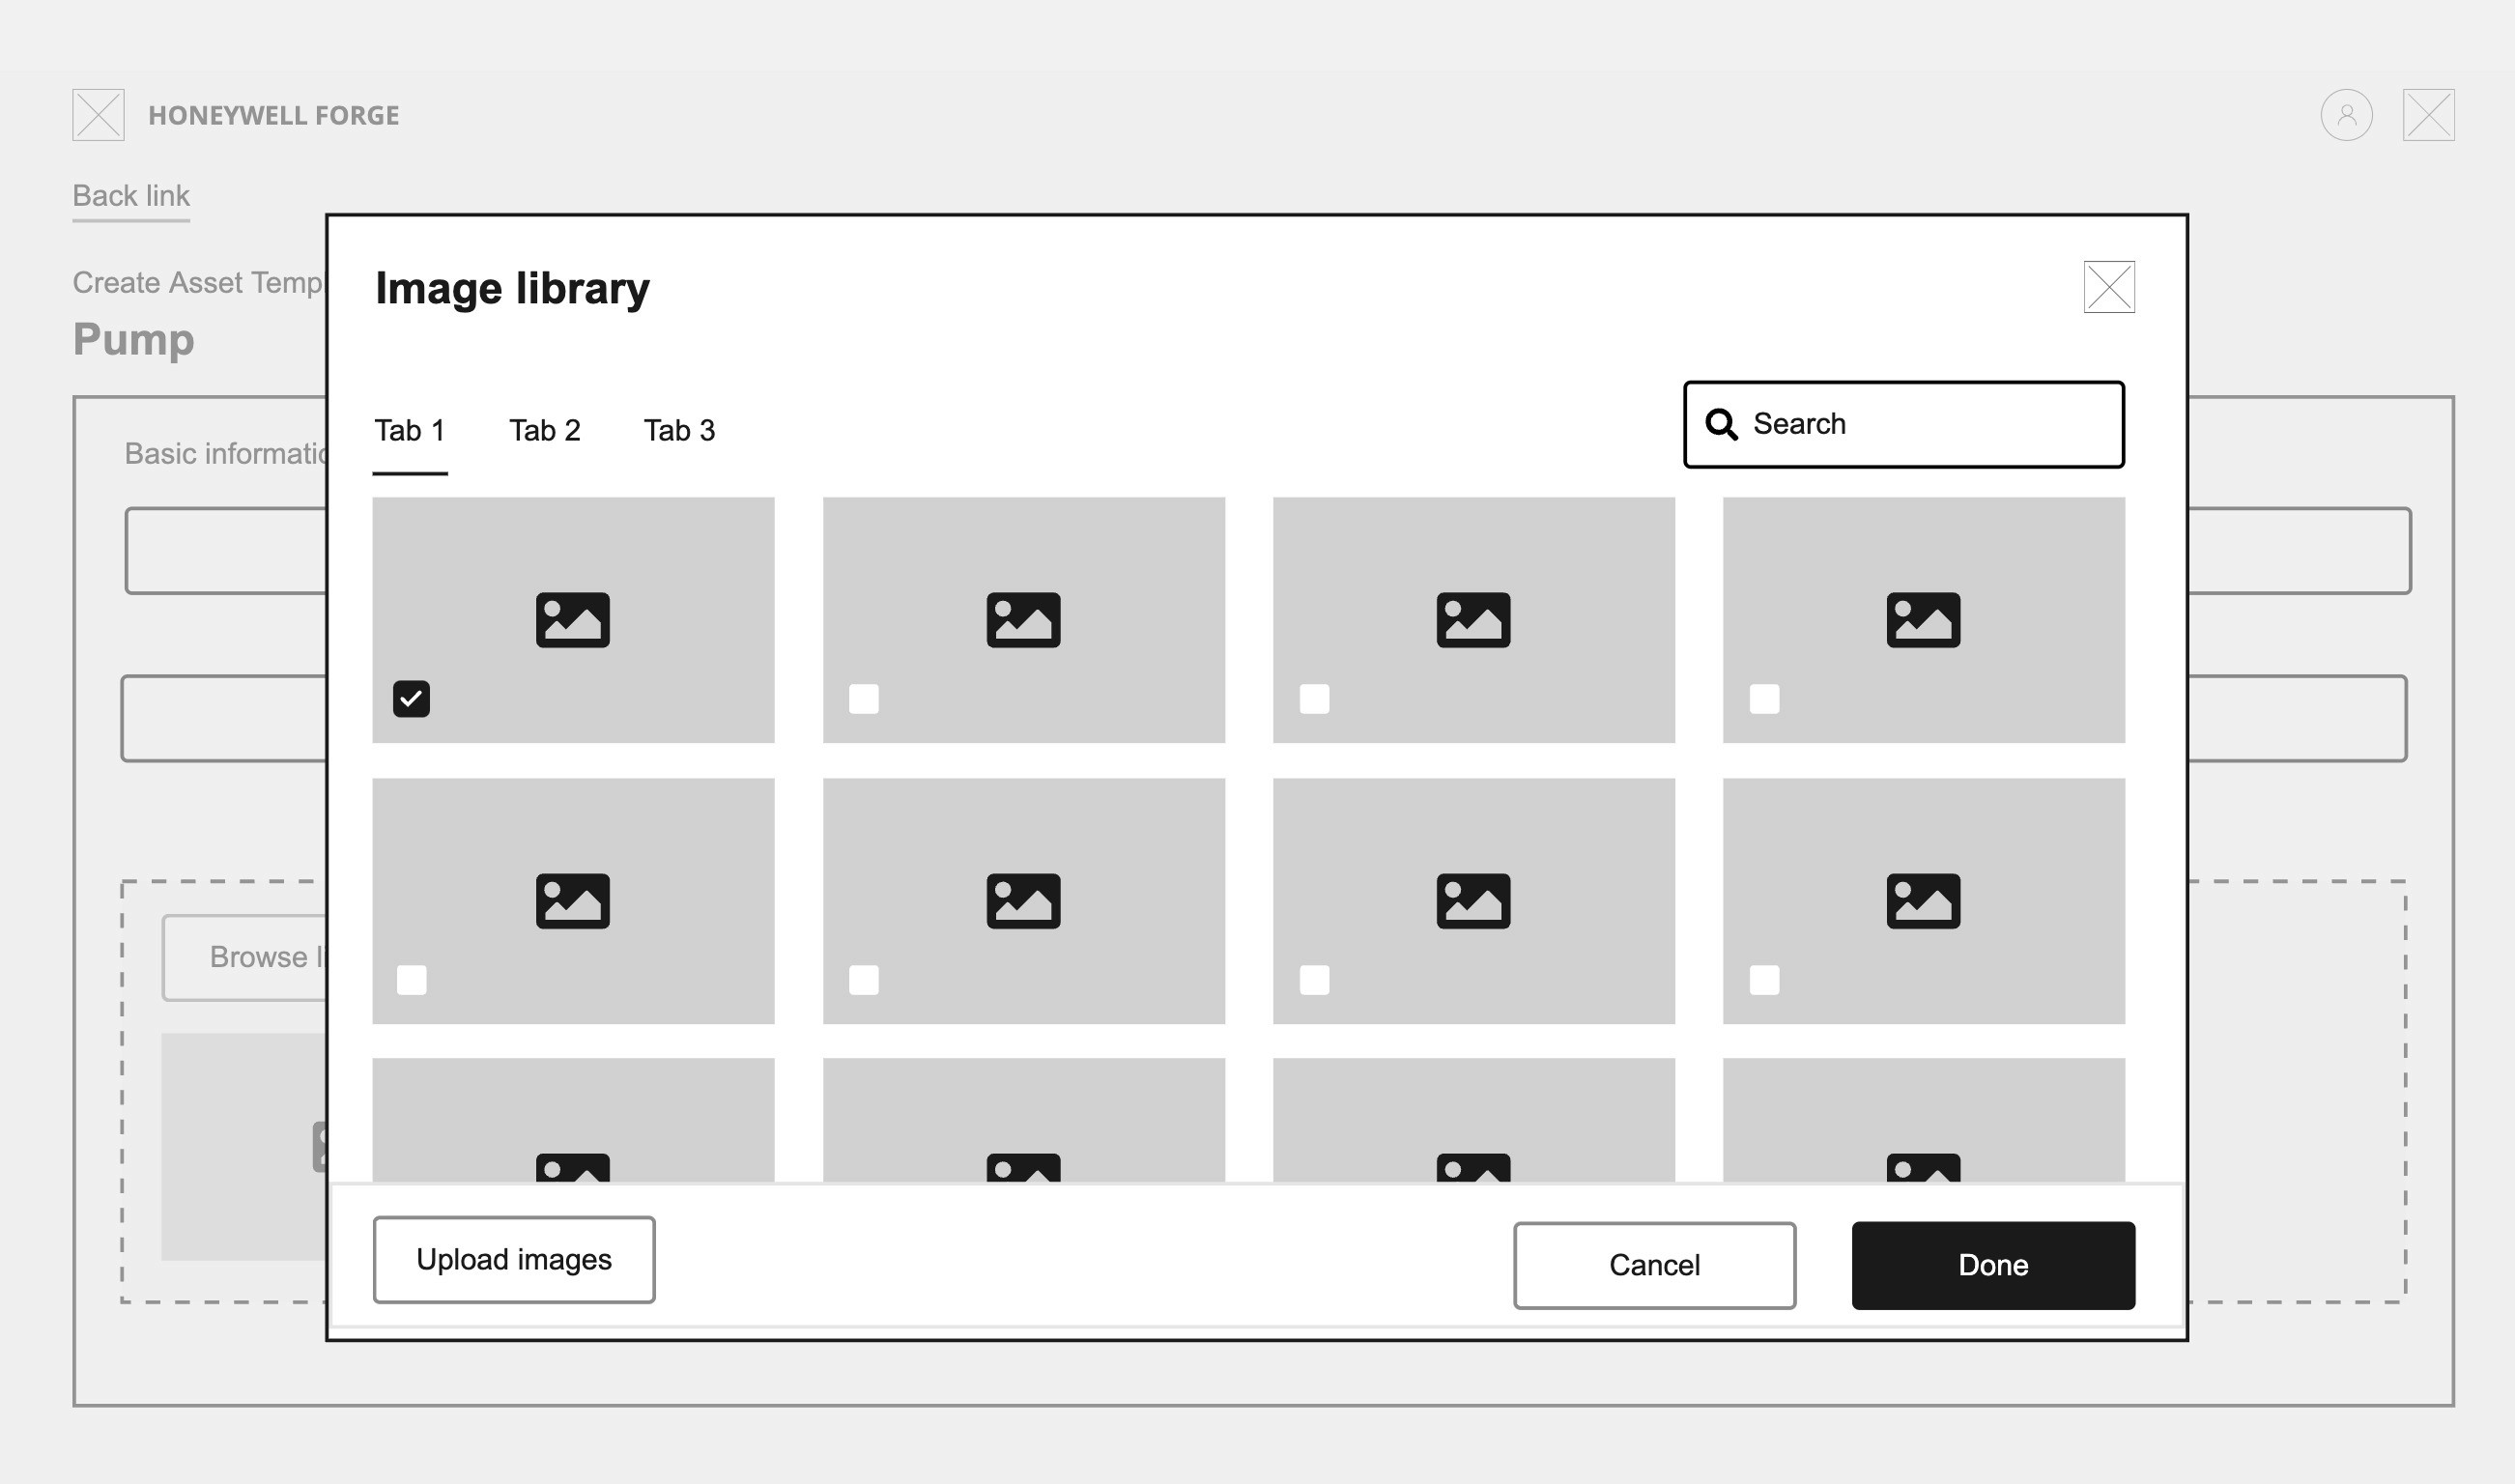
Wireframe v2 - Horizontal tabs
Horizontal tabs would act the same as the vertical tabs, but changes the layout of the modal's content.
The user would select 'Browse library' from the template page
Image library modal would appear in center with horizontal tabs across the top, below the header
'Upload images' button would be placed in the footer as a secondary action
Mid-fidelity designs:
Horizontal tabs appear below the header & above the images
'Images shown' indication + 'Upload images' button
Each image contains a checkbox & file name with the image container

Decision
Horizontal tabs was chosen to continue iterating on due to its consistency with other modal designs in Honeywell Forge, and the ability to add more images in view at a time.


Other tech constraints made known to consider in final designs:
'Filter by' was out of scope and removed for MVO of this feature
The entire modal cannot be a 'drag and drop'; must have explicit 'Upload' tab
Pagination will improve load-performance of images compared to lazy load
Search functionality can only be localized to the tab the user in on in the library
FINAL DESIGNS
Task flow: Upload images to the library
Select 'Browse library' button from the Template image input
On 'Upload' tab, select or drag and drop images into the library
Wait until all images have been scanned for malware and uploaded
Go to 'All images' tab to view newly uploaded images


Task flow: Add images to a template
Select 'Browse library' button from the Template image input
Navigate to the 'All images' tab from the 'Upload' tab
Select images with their corresponding checkboxes to add to the template
Select 'Add' to populate the images to the template


Task flow: Manage images in a template
Select 'Browse library' button from the Template image input (5 images already selected)
Navigate to the 'All images' tab (Banner indicating the max limit of images is reached)
Unselect images to be able to select new images
Select 'Add' to update the template
Note: Users can also remove attached images in the template using the trash icon button.


Task flow: Select 'default' image for template
On the template, view which image is labelled as 'Default'
If incorrect, select the radio button of the correct default image
Note: By default, the default image is the first image added to the template.


Task flow: View images in the lightbox
On the template, select one of the images attached
The image lightbox appears in the center of the screen
Select the arrows or images at the bottom to navigate between images
Select the background or close icon button to close the lightbox


Task flow: Delete image from the library
Select the trash icon button for the image that needs to be deleted
Select 'Delete' to confirm the image deletion
Wait for the image deletion to process
The image is deleted from the image library
Note: Users can only delete their uploaded images; not Honeywell out-of-the-box images.


Demo
Upload images to the image library in the template.
Manage images attached to the template.
CONCLUSION
Outcome
After finalizing the designs and received stakeholder-approval, I walked the engineers through the task flows and interactions, then handed off the designs.
This feature allows customers to further customize their digital twins in the configuration portal to automatically run in their front-end applications. This supports a better experience to understand what assets have issues and why.
Lessons learned
This was the first feature I designed for the Honeywell Forge Onboarding Portal, so I had to ensure the patterns and interactions were consistent with what already existed in the product. I was able to collaborate and get feedback from product management and tech architecture quickly to help me iterate on the best UX for users and engineering feasibility.
Additionally, there was no image handling pattern I could use from the internal design system, so I was given the ability to iterate and present a UI pattern for images for the design system team to align with. This was a fun exercise to do to match UI components with an equivalent to imagery.